
The fungi kingdom is a fantastically weird and wonderful family of diverse organisms, that includes over 144,000 species of mushrooms, moulds yeasts, rusts, smuts, ergots and mildews. Fungi play a vital role in the environment by breaking down organic matter, recycling nutrients back into the soil and providing food, water and shelter for animals, plants and other organisms, as well as food and medicine for humans. These amazing organisms can also store carbon, filter water, prevent soil erosion and break down harmful environmental pollutants like toxic heavy metals, chemicals, plastics and oil.
From microscopic spores in the air to vast underground networks of mycelium, fungi exist in and have adapted to almost every environment on earth, from damp woodland floors and the dry sandy soil of desserts to under water coral reefs, freezing arctic rocks and even human skin.
The fungi we are all most familiar with and aware of are mushrooms. There are over 20,000 known species of mushroom producing fungi and although they are the most visible and well known of the fungi family they are actually one of the smallest groups of fungi in the kingdom.

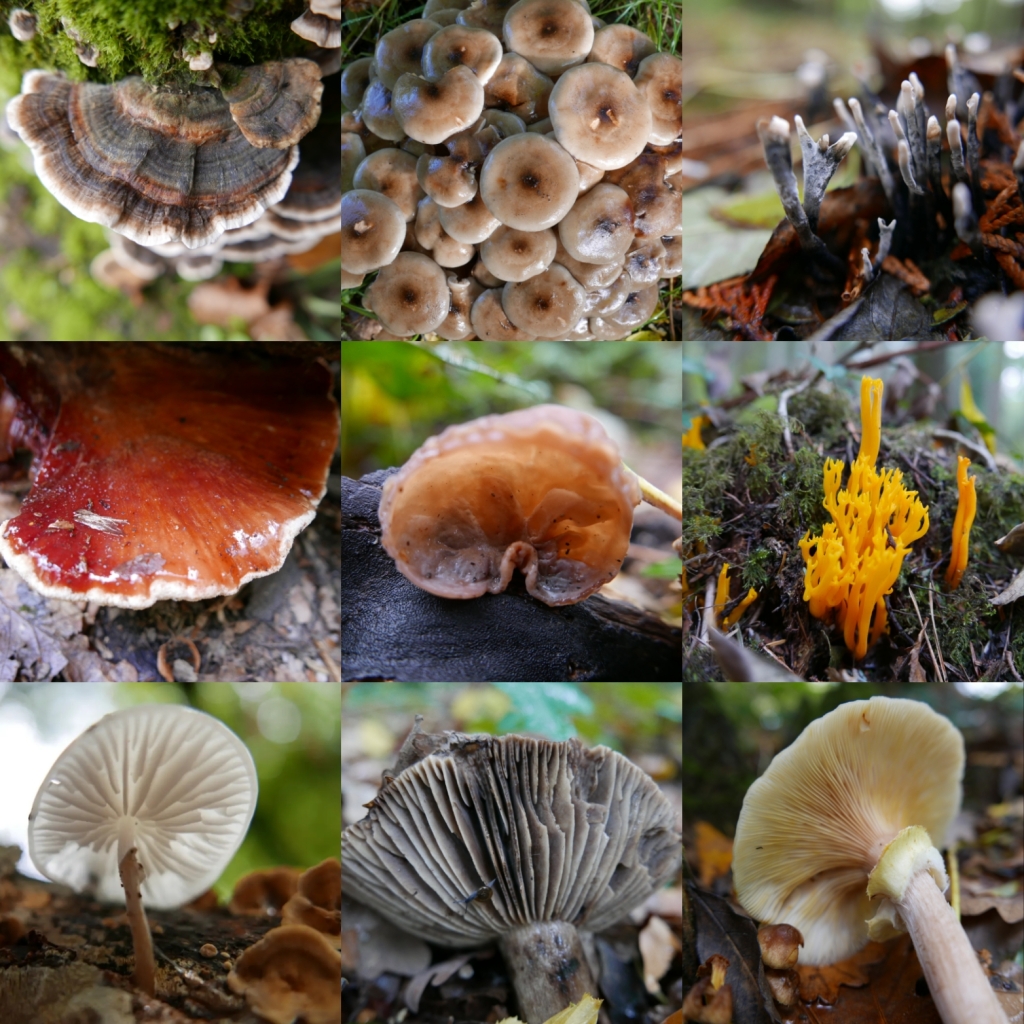
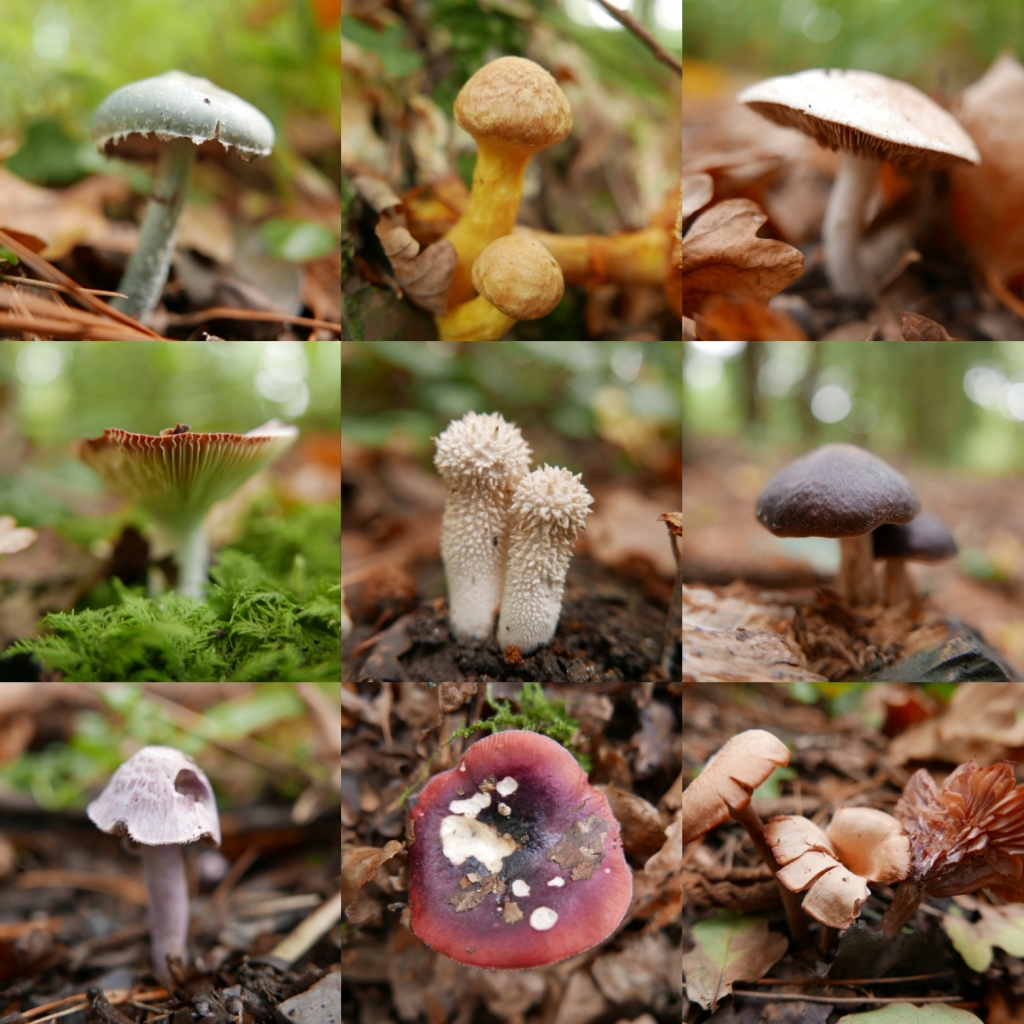
Mushrooms can come in a variety of different shapes, sizes and colours, from the familiar white and brown mushrooms we buy to eat from shops and the red and white spotted fairy toadstools of the highly toxic fly agaric (above), to the more weird and wonderful fungi, like the tiny green elf caps (below), gelatinous Jelly ears, fan like turkey tail and the thin spindly fingers of stags horn, candle snuff and dead mans fingers.

Mushrooms are the fruiting body of fungi and the fungi use them as a mechanism to release spores. Spores are the tiny reproductive cells that carry the genetic building blocks of life in the same way seeds do, spores however (unlike seeds which can remain dormant for years) need the right environmental conditions to germinate and develop straight away. Therefore the spores need to be released at perfect time of year when there is enough, moisture, light and food for optimal germination and growth.

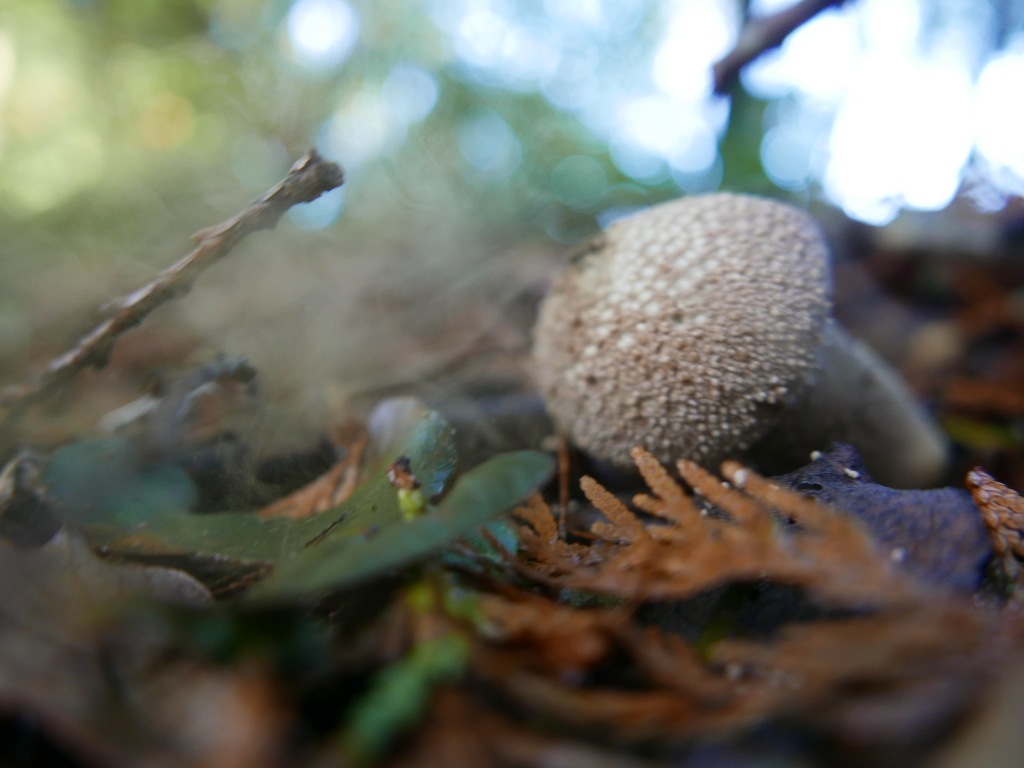
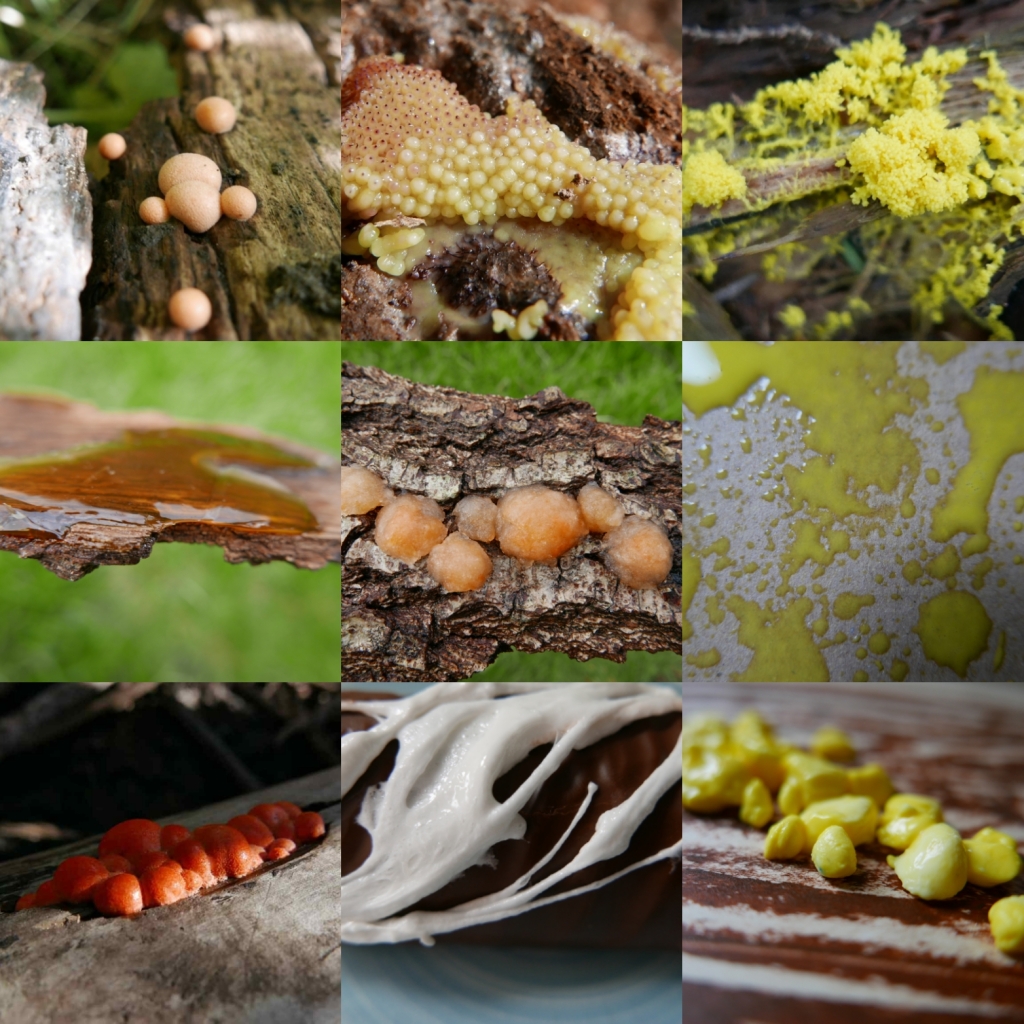
Different species of fungi have developed different methods for releasing and distributing their spores using wind, water, animals and a variety of different mechanisms and clever structures. From popping, puffing and exploding to luring animals using enticing scents, colours or tastes, For example puff ball mushrooms use a bellow like structures to propel their spores outwards (below) where as stink horns use a scent like rotten meat to lure flies to spread their spores for them.
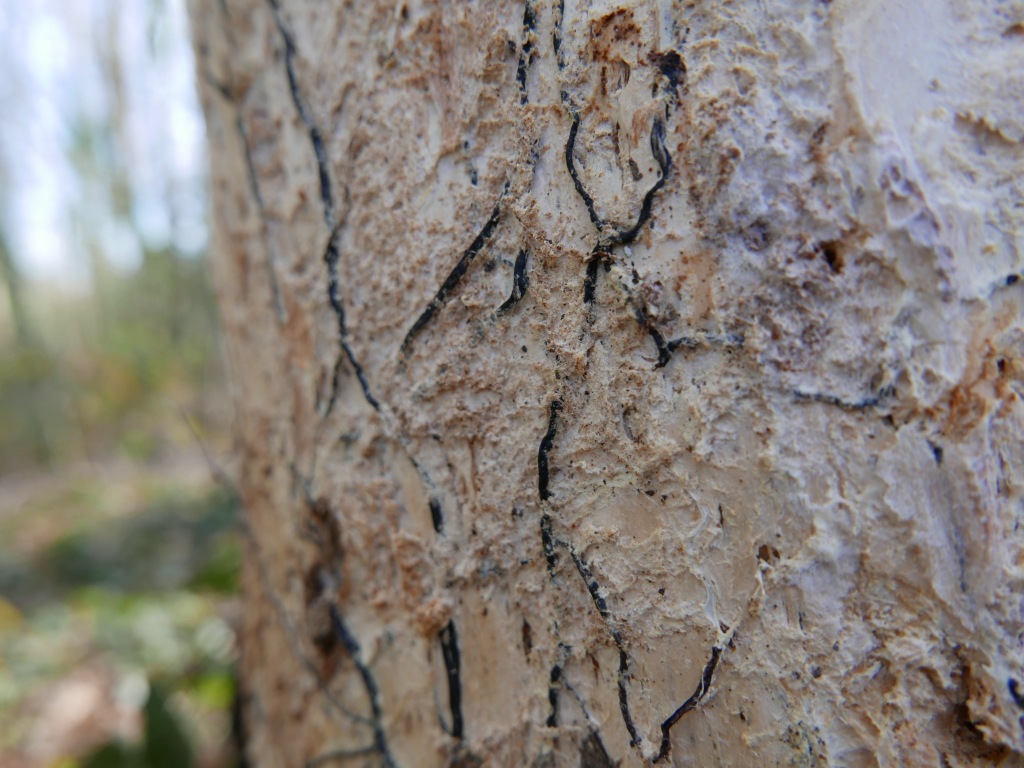
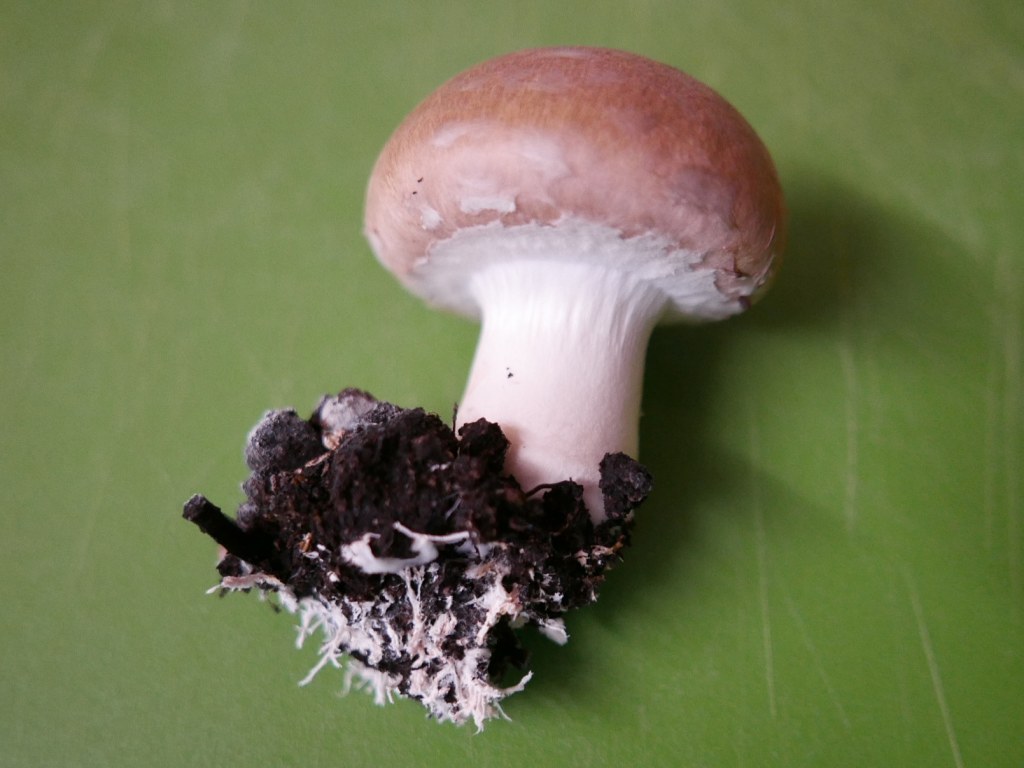
When the conditions are right for the spores to germinate they can then start to grow and develop into mycelium. Mycelium forms the main body of the fungi and is made up of interwoven, thread like networks of tiny branched tubular filaments called hyphae. We very rarely see mycelium as the miniscule thread like strands mainly form under the surfaces of soil, wood and other organic materials.
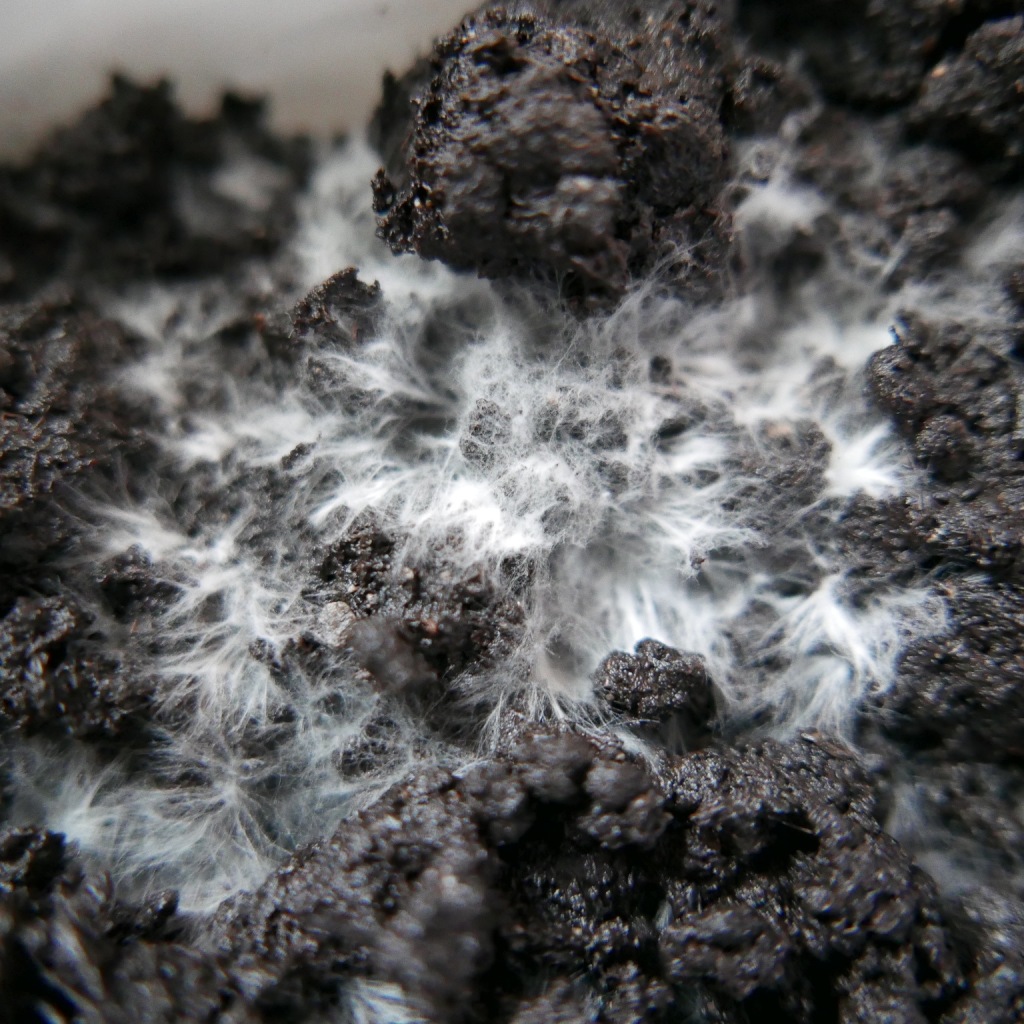
They can grow and spread out over vast distances in search of water and food, absorbing nutrients directly from the environment around them by breaking down any surrounding organic materials. The filaments of hyphae that make up the mycelium secrete special acids and enzymes that have the ability to break down complex carbon chain molecules into much simpler smaller molecules that they can then absorb directly through their cell walls. Breaking down organic materials like dead wood and leaf litter into basic nutrients.
Scientists are currently studying the fungi’s unique ability to break down the complex carbon chain molecules in relation to harmful environmental pollutants like plastic, oil, chemicals and toxic heavy metals. Building companies like Cleveland substrate have also been using fungi to break down and absorb toxic waste from abandoned buildings, they then compact the fungi and substrate leftovers and fire them to create new bricks, recycling them into environmentally friendly building materials.

Fungi are classed as separate organisms to plants and animals as they do not produce food via photosynthesis and they don’t ingest food (eating and digesting/breaking it down internally) like animals, fungi instead breakdown food externally before absorbing it directly. The cell walls that make up the structure of the fungi are made from chitin, a hard wearing material that makes up the exoskeletons and body parts of many animals including, crabs, beetles and butterflies. Whereas plants have cell walls made up of cellulose and they produce chlorophyll, a green pigment which helps convert sunlight into food via photosynthesis.
Fungi play an important role in the environment as decomposers helping to break down organic material as well as recycling nutrients and fixing nitrogen into the soil. Without fungi many plants would not be able absorb the nutrients or nutrition they need from the soil. Several species of plants (like Orchids) actually rely entirely on fungi for their survival, forming symbiotic or mutualistic relationships where the fungi provides the plant with food and water. Using the mycelium threads that travel further and deeper than the plants roots to reach nutrients and moisture.

The vast underground networks of mycelium can also help trees and plants to communicate, by intertwining and interconnecting with their roots to form an interlinking ‘woodwide web’ conveying nutrients, water and chemical signals, like the ones plants emit when they are under stress or attack due to drought, disease or animals and humans.
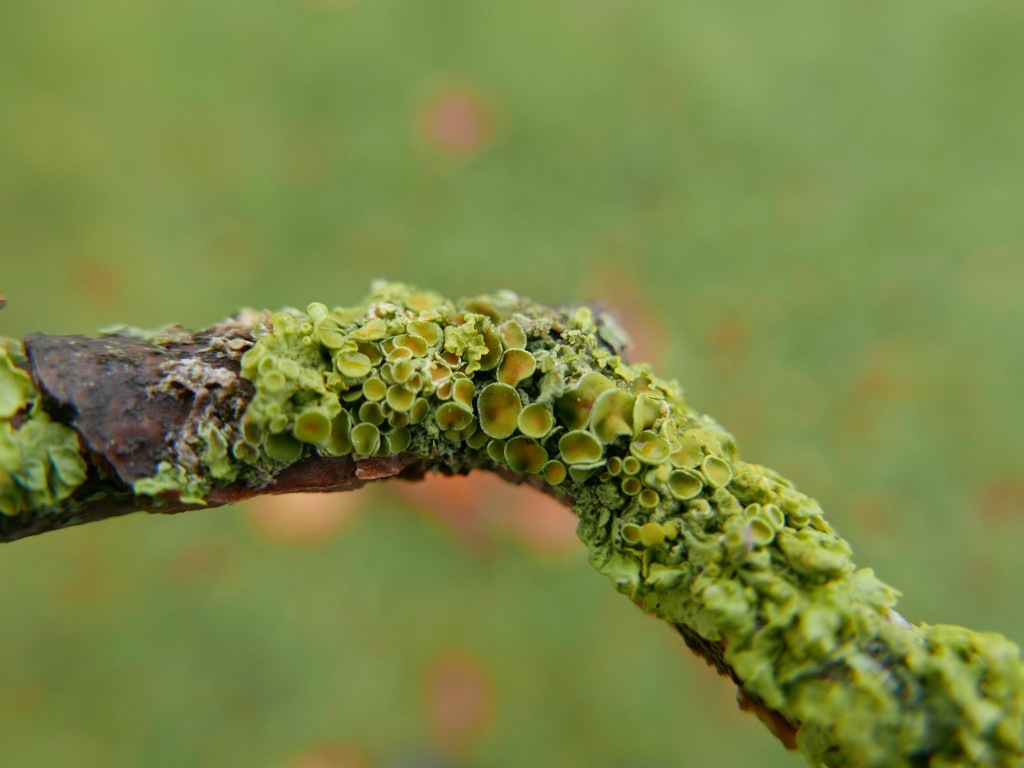
Lichen is another example of how fungi works in partnership with other organisms. Lichen is made up of two different organisms, with fungi and algae coming together to form a composite organism. The outer surface and internal structure of lichen is formed by strands of fungal hyphae inside of which are individual cells of algae. The fungi provides protection and shelter for the algae absorbing water to prevent it from drying out and deterring herbivores and microbes from eating or attacking it. The algae in return creates food for the fungi (and itself) using photosynthesis to convert sunlight into carbohydrates.
Many species of wildlife also rely on fungi as a source of food, from mammals, birds and invertebrates (like beetles, slugs, snails and ants) to microscopic creatures like nematodes and mites. Some species of ant actually actively farm fungi, for example leaf cutter ants carry fungi with them when they start new colonies, keeping it under ground chambers where they tend to it like a farmer tends to its crop, feeding the fungi plant matter and cultivating it as a source of food.
Humans also have a beneficial relationship with fungi, using it throughout history to produce food like bread and cheese as well drinks like beer and wine. When we think of fungi we don’t often think of yeast, but yeasts are actually a part of the fungi family. These microscopic single celled organisms reproduce quickly by budding (growing duplicate copies of themselves) so they have no need to form spores or mycelium. They feed directly on naturally occurring sugars and starches and can often be found on the surfaces of fruits.
Humans have been using yeast to ferment their food and drink since the ancient Egyptian times. Fermentation is the process that happens when yeasts feed on sugars or starches under certain conditions. For example when yeast feeds on the sugars and starches in warm bread dough they create carbon dioxide as a waste product, the carbon dioxide forms tiny bubbles and pockets in the dough which makes the dough rise and gives bread its spongy, soft texture.
However when yeasts are forced to feed on sugar in an oxygen deprived (anaerobic) environment they also create ethanol as a by product, Humans have been using yeast to turn fruits and grains into alcoholic drinks long before they even knew yeast existed or understood the role it played. It took until the 1860’s for a scientist called Louis Pasteur to document and demonstrate the role that yeast plays in fermentation.
Moulds are also part of the fungi family and although some moulds like black mould can be hazardous to our health others like penicillium have been used to develop life changing antibiotics to fight infections, in turn greatly improving survival rates from anything from minor injuries (a paper cut could kill you back in the day) to major surgeries. We have also been able to derive and develop a wide variety of other vital medicines thanks to the wonderful kingdom of fungi, from anticoagulants to stop blood clots and medicines that induces labour in pregnancy to immunosuppressant drugs to stop the rejection of newly transplanted organs.
You can find lots of fun and easy activity ideas below to help you learn more about these amazing organisms.
1. Go on a fungi foray
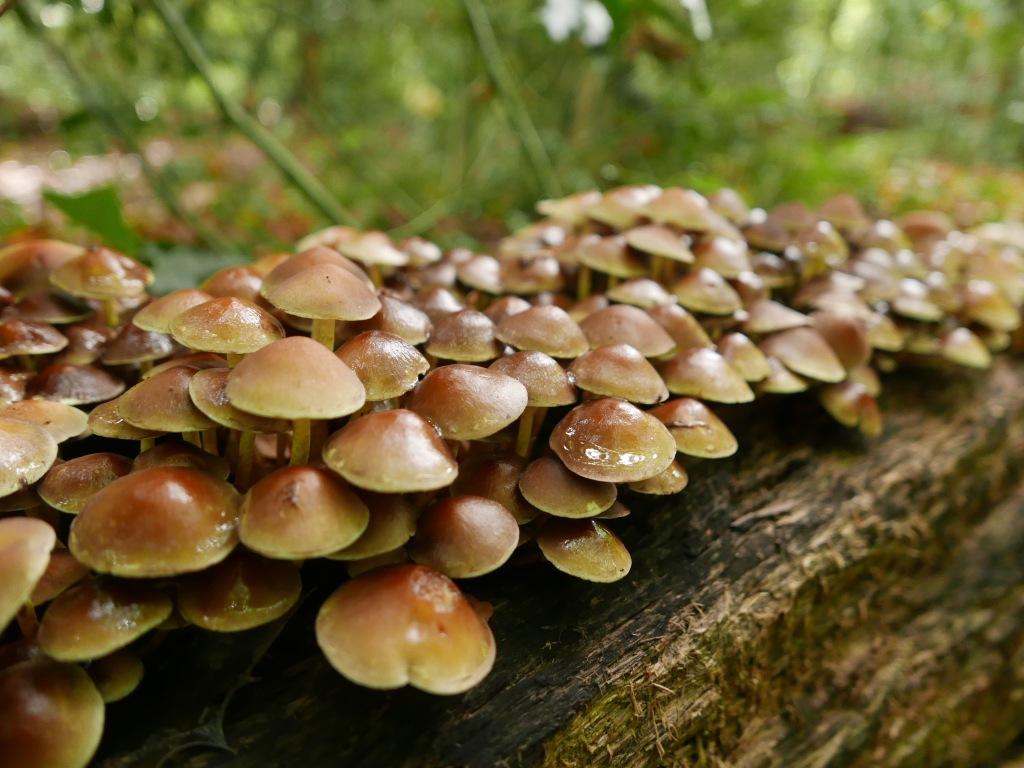
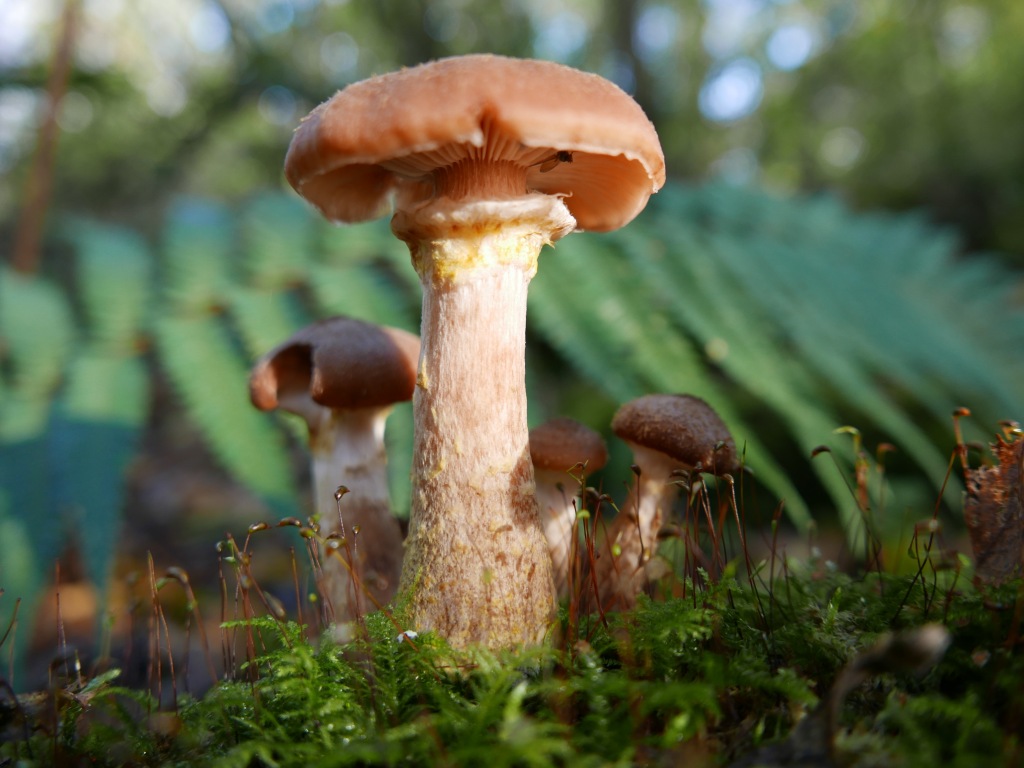
You can often find a fascinating array of fungi and mushrooms on nature walks if you take the time to look closely at woodland floors, tree trunks, rotting logs, leaf litter or amongst long grass. The mushrooms you may find can come in a vast variety of shapes, colours and forms. There are over 15,000 species of fungi in the UK alone. Wild Food UK have a great photo guide to help you identify any mushrooms you find here. Just remember that mushrooms and fungi can be highly toxic (or deadly poisonous) so please remind children not to touch, pick or try to eat any. Please also do not forage for wild mushrooms unless you are with a trained expert as many edible and toxic species look identical to one another.

2. Look for lichens
There are over 20,000 species of Lichen in the world and they are some of the slowest growing and longest living organisms on the planet. Lichens can come in a fascinating array of colours, shapes and textures. You can find lichen growing in almost every outdoor environment from stones, rocks and trees to walls, fences, buildings, paths and benches. NatureSpot have a great photo guide to help you identify any lichens you might find here. You can also find out more about lichens here or take part in citizen science by recording any of your findings on national databases like Nature’s Calendar and iRecord.

3. Grow or look for orchids
Orchids can’t exist without fungi, as every single species of orchid relies on the fungi in its roots to provide it with essential nutrients from the soil. Some species of orchid have actually stopped producing leaves entirely, foregoing photosynthesis as the fungi in the roots provides all the food the plant needs. So where ever there are orchids there are also fungi, You can easily look for orchids on nature walks in the spring or summer or buy or grow your own orchid plants to observe at home.

4. Dig into cow pats
As gross as it sounds cow pats* are the perfect place to find a whole host of macro and micro fungi as well as some interesting insects like dung beetles and larvae. The warm, wet environment of the cow pat creates the perfect growing space for the fungi with an abundance of food available in the form of the dung itself. You just need to find a cow pat and then using gloves and a digging implement like a spoon, dig and sift carefully through the contents. On warm days you can also turn over or remove the tops entirely from semi dried cow pats. Afterwards don’t forget to put every living thing back as you found it.

*Please don’t touch or handle cow pats directly with your hands as they can harbour pathogens like bacteria and viruses. It’s best to observe them safely, using gloves and digging implements and disinfecting and washing everything (including your hands) thoroughly afterwards.
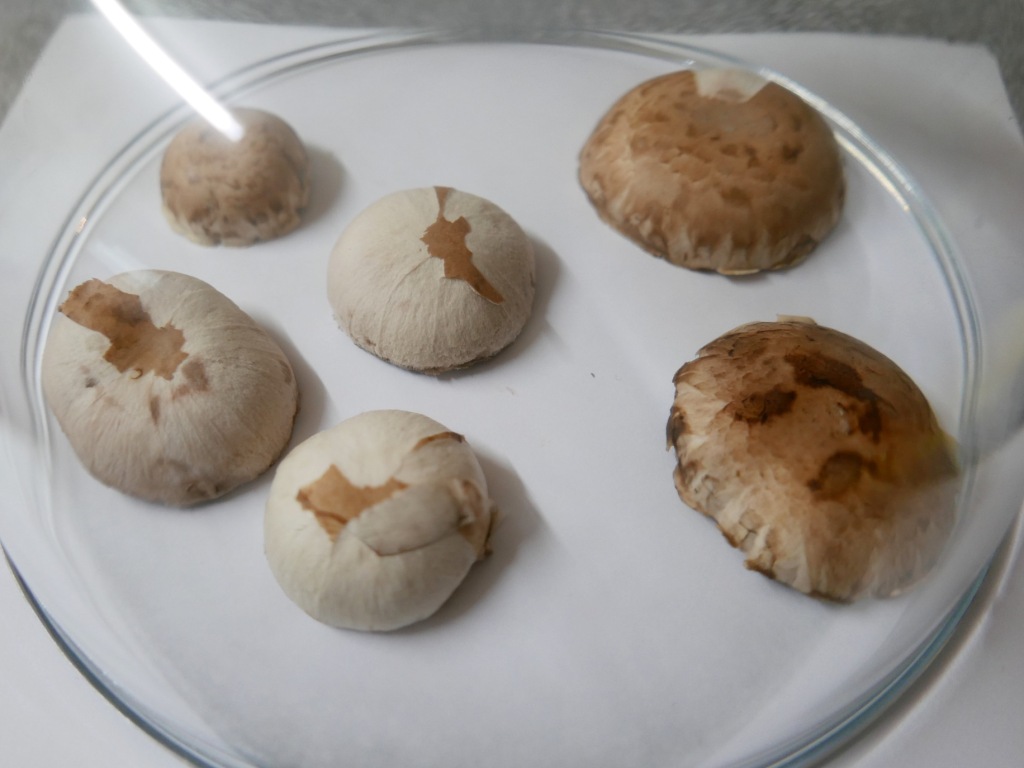
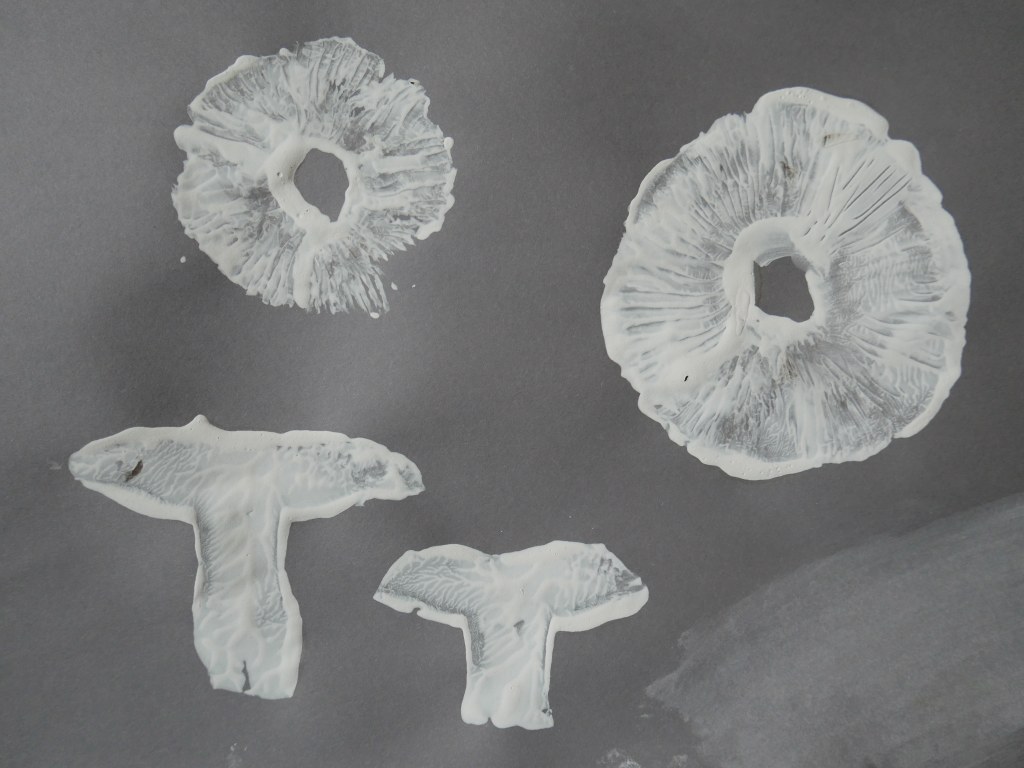
5. Make a mushroom spore print
Mushroom spore prints are so easy to make. All you need is a piece of paper and an open capped store bought mushroom. Firstly carefully peel off any overhanging skin round the edge of the mushroom. Then remove or cut down the stalk of the mushroom so the mushroom cap can lie flat against the paper. Next sprinkle some drops of water on top of the mushroom cap and cover it with a glass bowl. This creates a nice moist environment which will encourage the mushroom to spore. Leave it for a couple of hours (or overnight) before removing the bowl and turning the mushroom over.
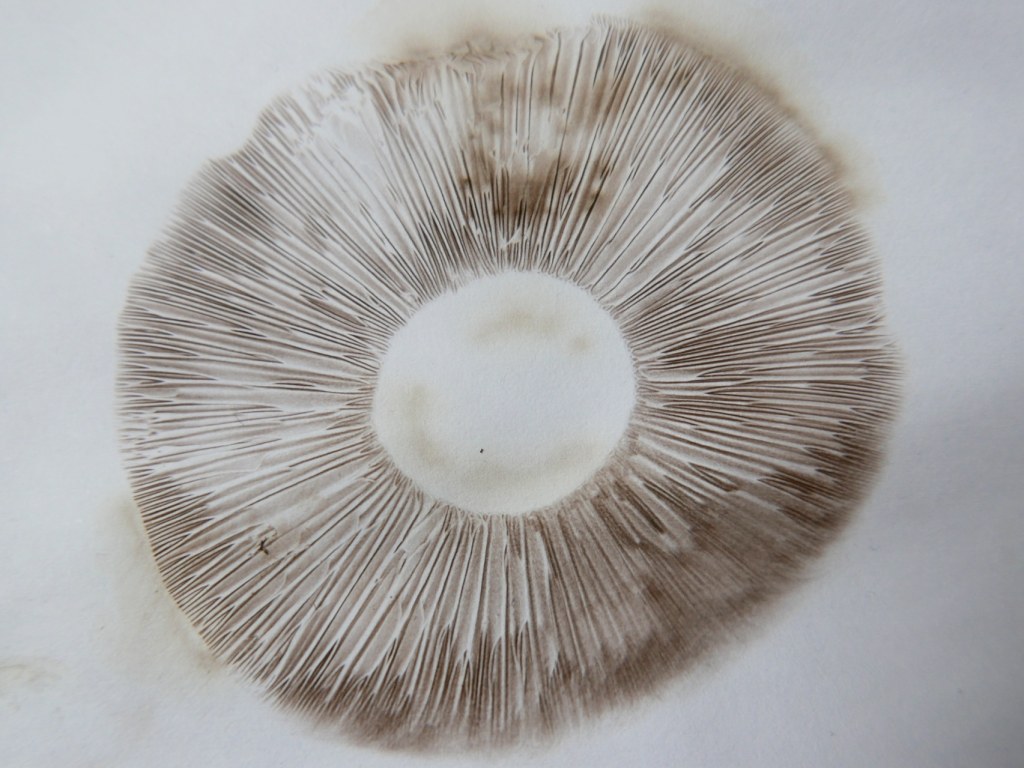
You should find an interesting spore print left in the paper. Look carefully at the surface of your mushroom and compare it to the spore print. Can you see all the individual frill waves and patterns. Did some parts of the cap produce more spores than others? The teeny tiny spores that are on the paper are actually little reproductive cells, each one is capable of growing into another mushroom if given the right conditions.
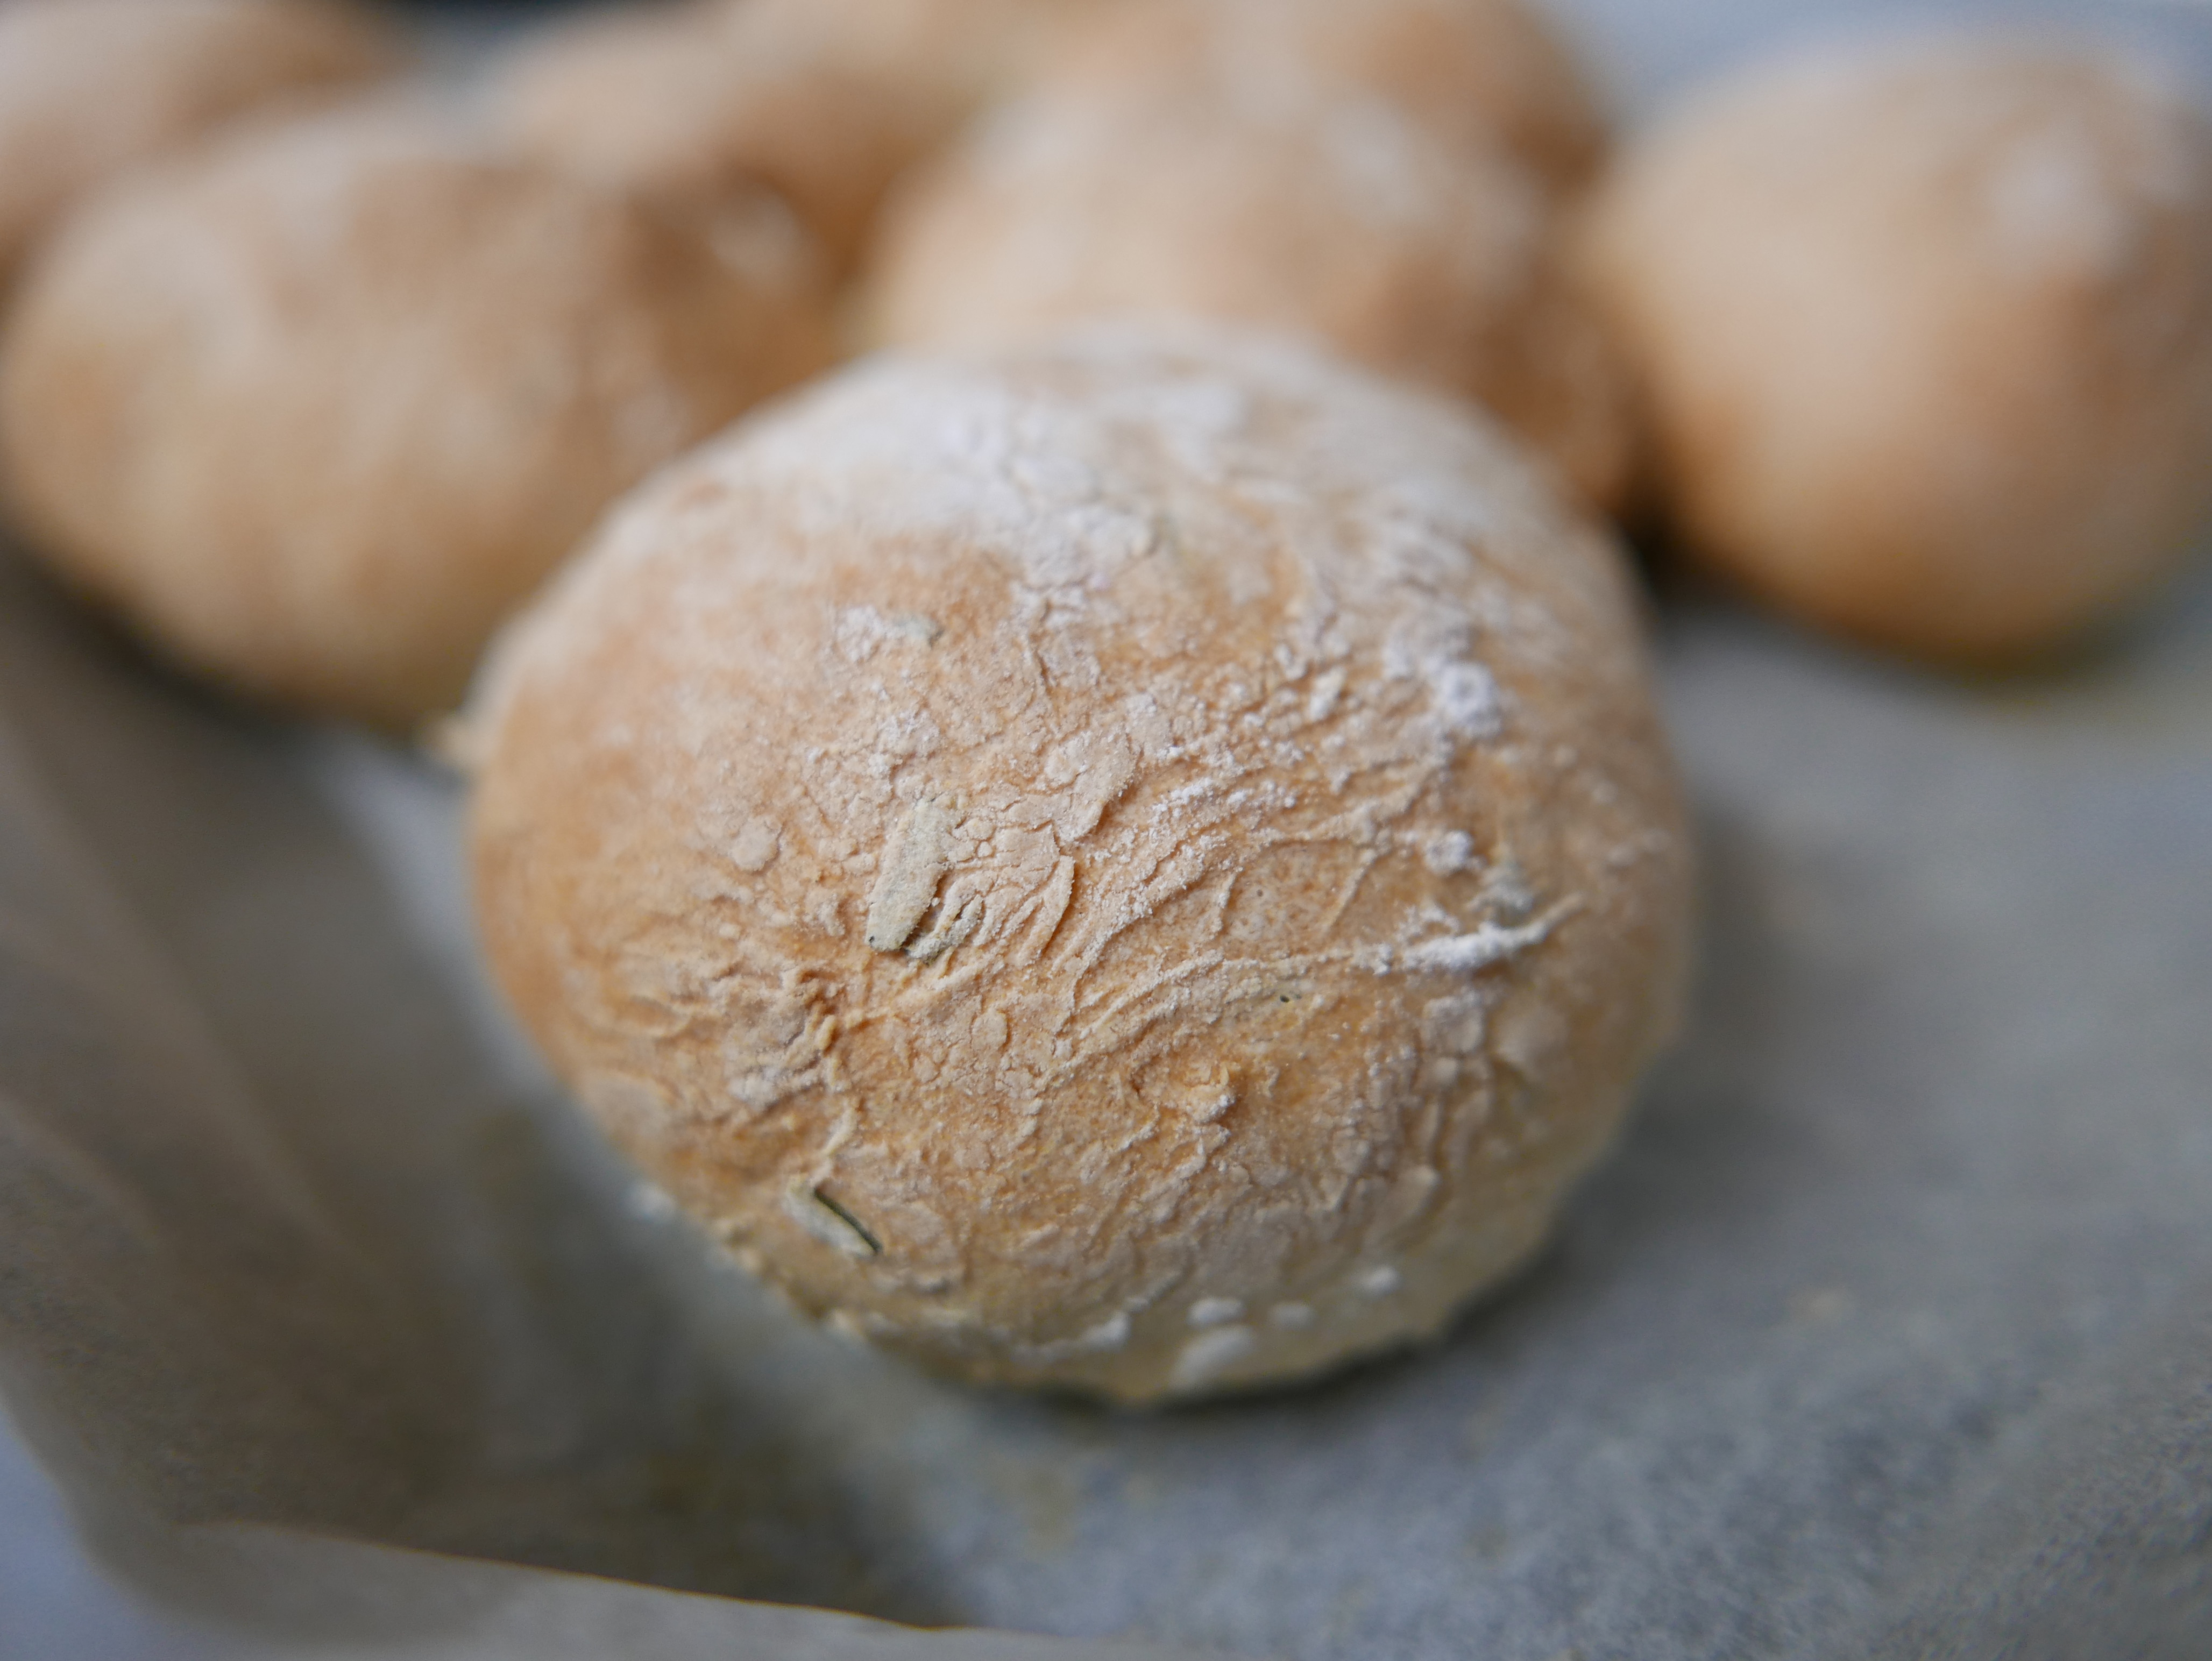
6. Grow your own mushrooms
You can easily grow your own mushrooms using shop bought growing kits or you can also grow your own using the following method. To start you will need mushroom spores (from an edible store bought mushroom) or some ready grown mycelium which you can buy online. The first thing your spores or mycelium will need to grow is food and shelter. For this you will need straw and a water tight, heat proof bag or container that is small enough to fit in your fridge.
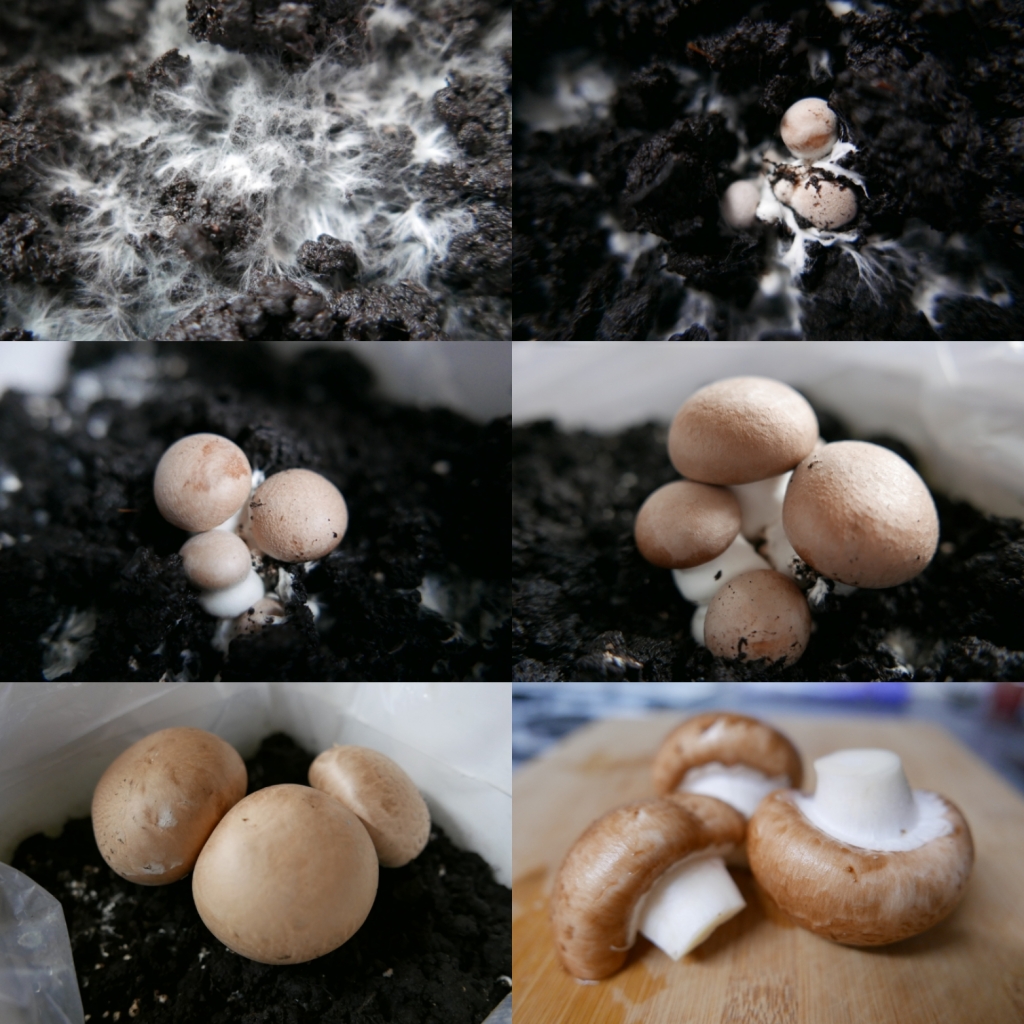
The straw and bag or container will both be of bacteria and other microorganisms, which you need to kill off before you start growing fungi. Otherwise they will compete with our fungi and eat all the nutrients in the straw. So you need to pasteurise the straw and bag or container to get rid of any other microorganisms. Firstly fill the bag or container up to two thirds full with straw. Then carefully pour enough boiling water into the bag or container to cover the straw and then seal the bag or container and then leave it to cool overnight.

Once the straw has finished soaking overnight, carefully drain off the excess water and then add the mycelium or mushroom spores carefully mixing them into the wet straw. Seal the bag or container again but this time make a tiny pin prick in the top so that is keeps the moisture in but there is a tiny amount of air flow. Now the fungi has the right environment to grow in all it needs is time. So leave it for four weeks for mycelium or 8 weeks if you are using spores in a nice warm place (out of direct sunlight) where it won’t be disturbed. After four weeks you need to trick the fungi into thinking it is Autumn to trigger mushroom growth, so place the bag in the fridge for a week to encourage your mycelium to produce mushrooms. Finally remove the bag from the fridge and open it slightly. Spray the bag daily with water to keep the straw moist and then wait and watch to see your mushrooms beginning to grow.
7. Enjoy eating mushrooms*
You can easily buy a variety of edible mushrooms* to explore and enjoy eating raw or cooked. Mushrooms are a rich source of dietary fibre as well as vitamin B, vitamin D, potassium, copper, phosphorus and selenium. The most common varieties of store bought mushrooms you can find are white button, cremini, portobello, shiitake, oyster (pictured below), and enoki. You might be surprised to find that button mushrooms cremini mushrooms and portobello mushrooms are all the same species of mushroom Agricarus bisporus. They have just been picked at three different points of development. Button mushrooms are picked when the mushrooms have first started growing and are small and white with closed caps, Cremini mushrooms are picked when the mushrooms have turned brown and the caps are starting to open and portobello mushrooms are picked when the mushrooms are fully formed and the caps are fully open with visible gills.

*Please also do not forage for wild mushrooms unless you are with a trained expert as many edible and toxic species look identical to one another.
8. Print with mushrooms
You can also use store bought mushrooms to make simple mushroom silhouette, cap and gill prints. Simple cut a stalk off the cap of a mushroom or cut a mushroom in half and then have fun dipping them into paint and printing them onto paper, card or other materials like fabric or wood.
9. Stick mushrooms
It is so simple and easy to make some simple stick mushrooms using any small branches or or sticks you find on nature walks along with some clay, play dough or salt dough. Simply shape the clay or dough into the shape of a mushroom cap and then carefully press it onto the stick. When the clay or dough has dried you could also paint it different colours to match whichever variety of mush room you like. If you are using salt dough or play dough please do not leave your mushrooms outside afterwards as both playdough and salt dough contain high volumes of salt which is toxic to trees, plants and wildlife.

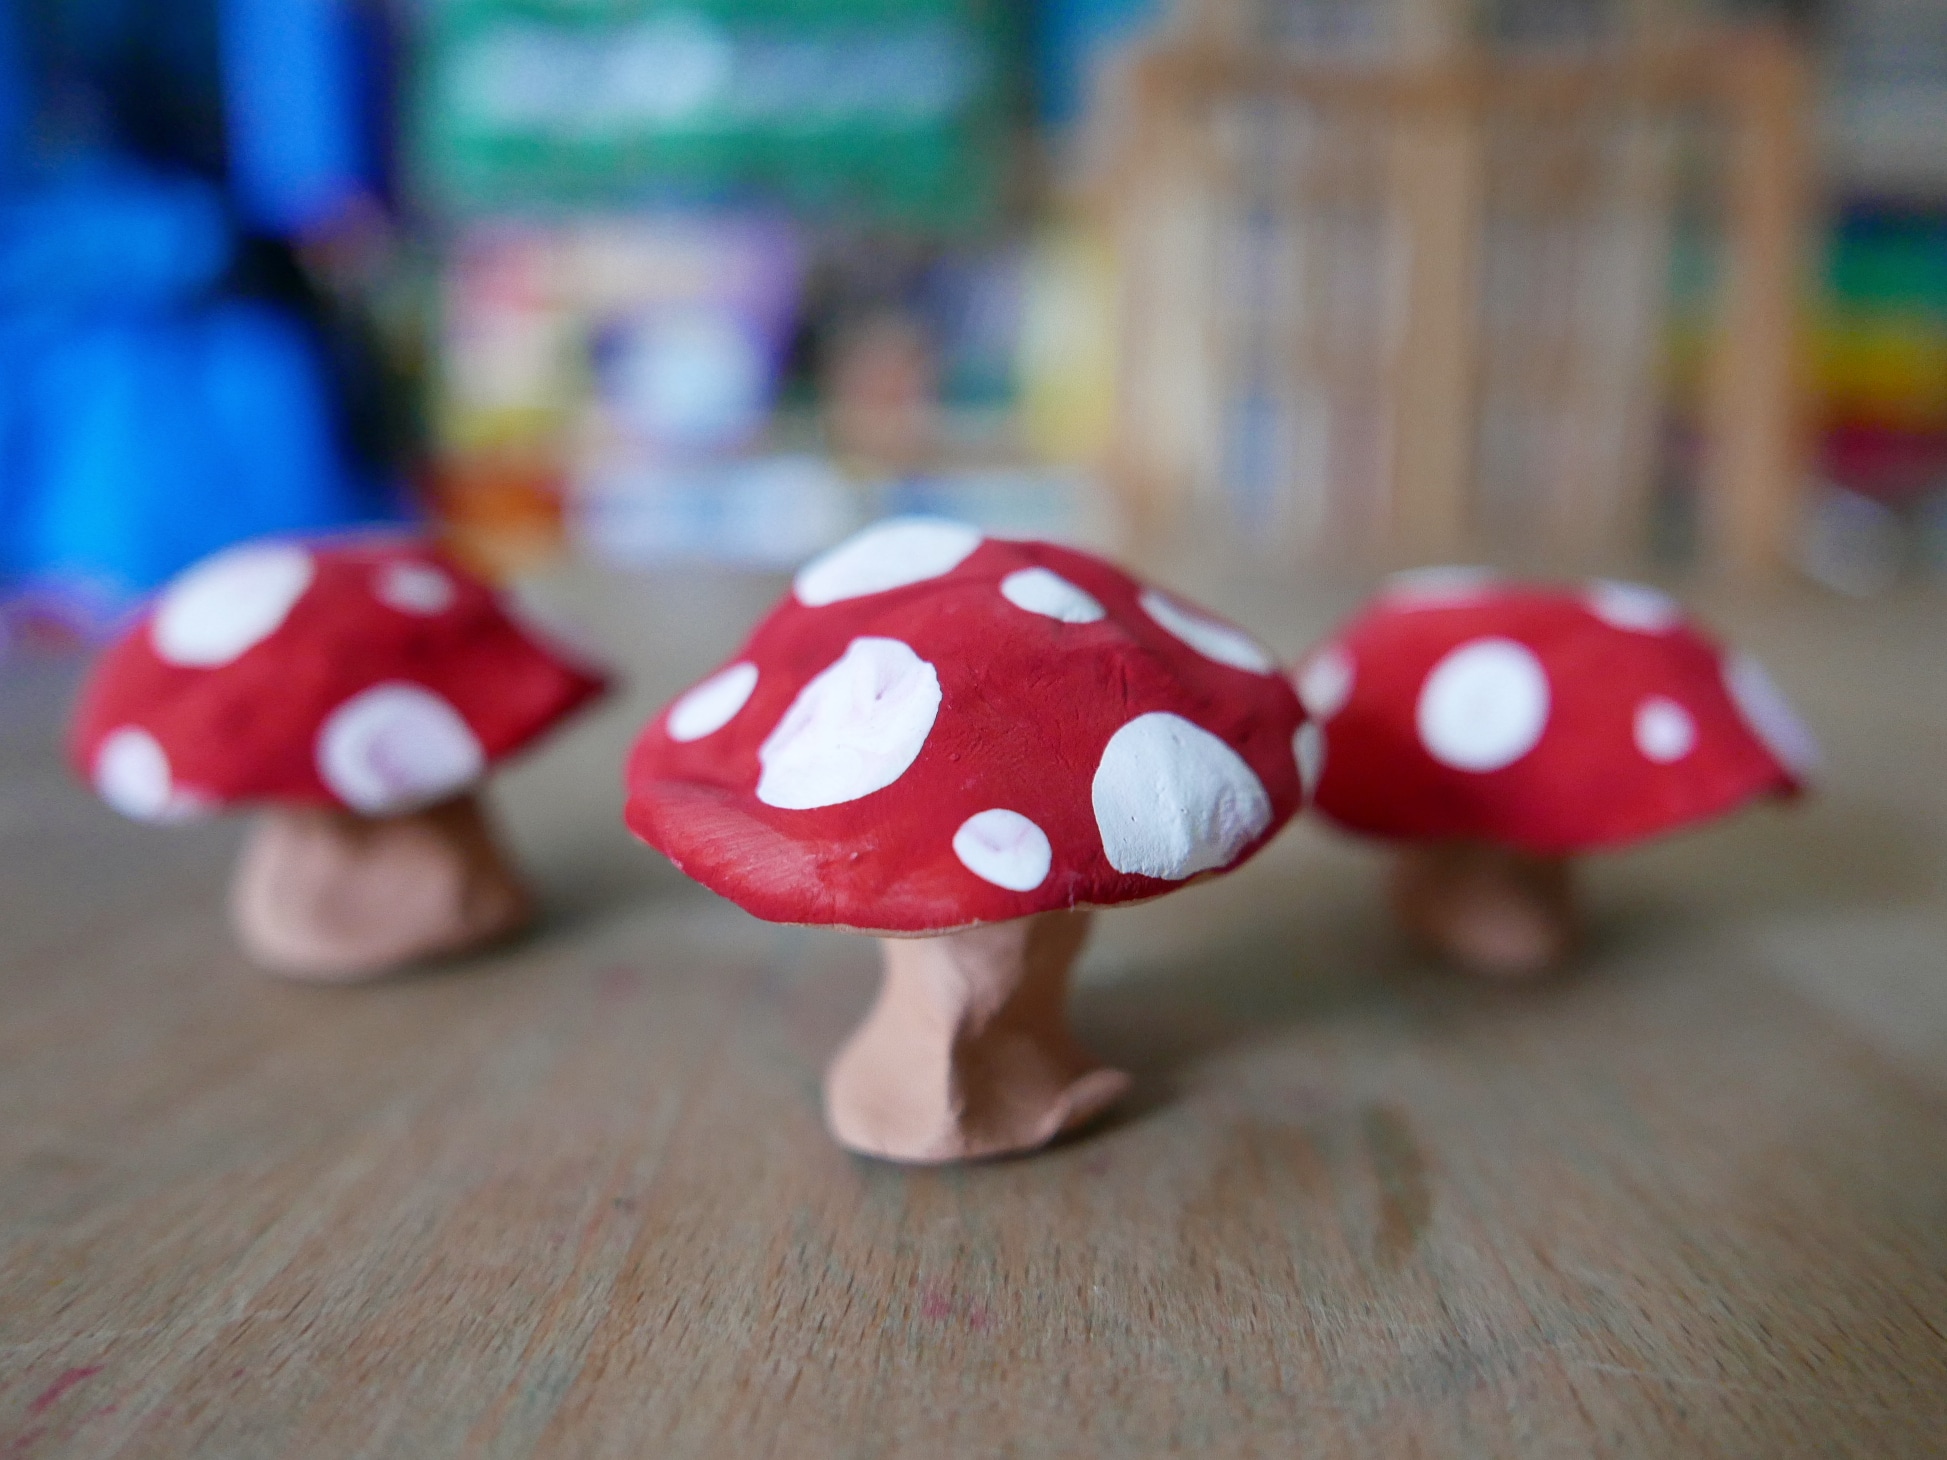
10. Clay mushroom
You can also use clay to make more permanent mushrooms by rolling a fat piece of clay between your hands to form the stalk and then rolling a big ball of clay out flat to form a disc for the cap. Using your fingers you can then carefully shape the cap edges into a saucer shape before attaching it to the stalk.
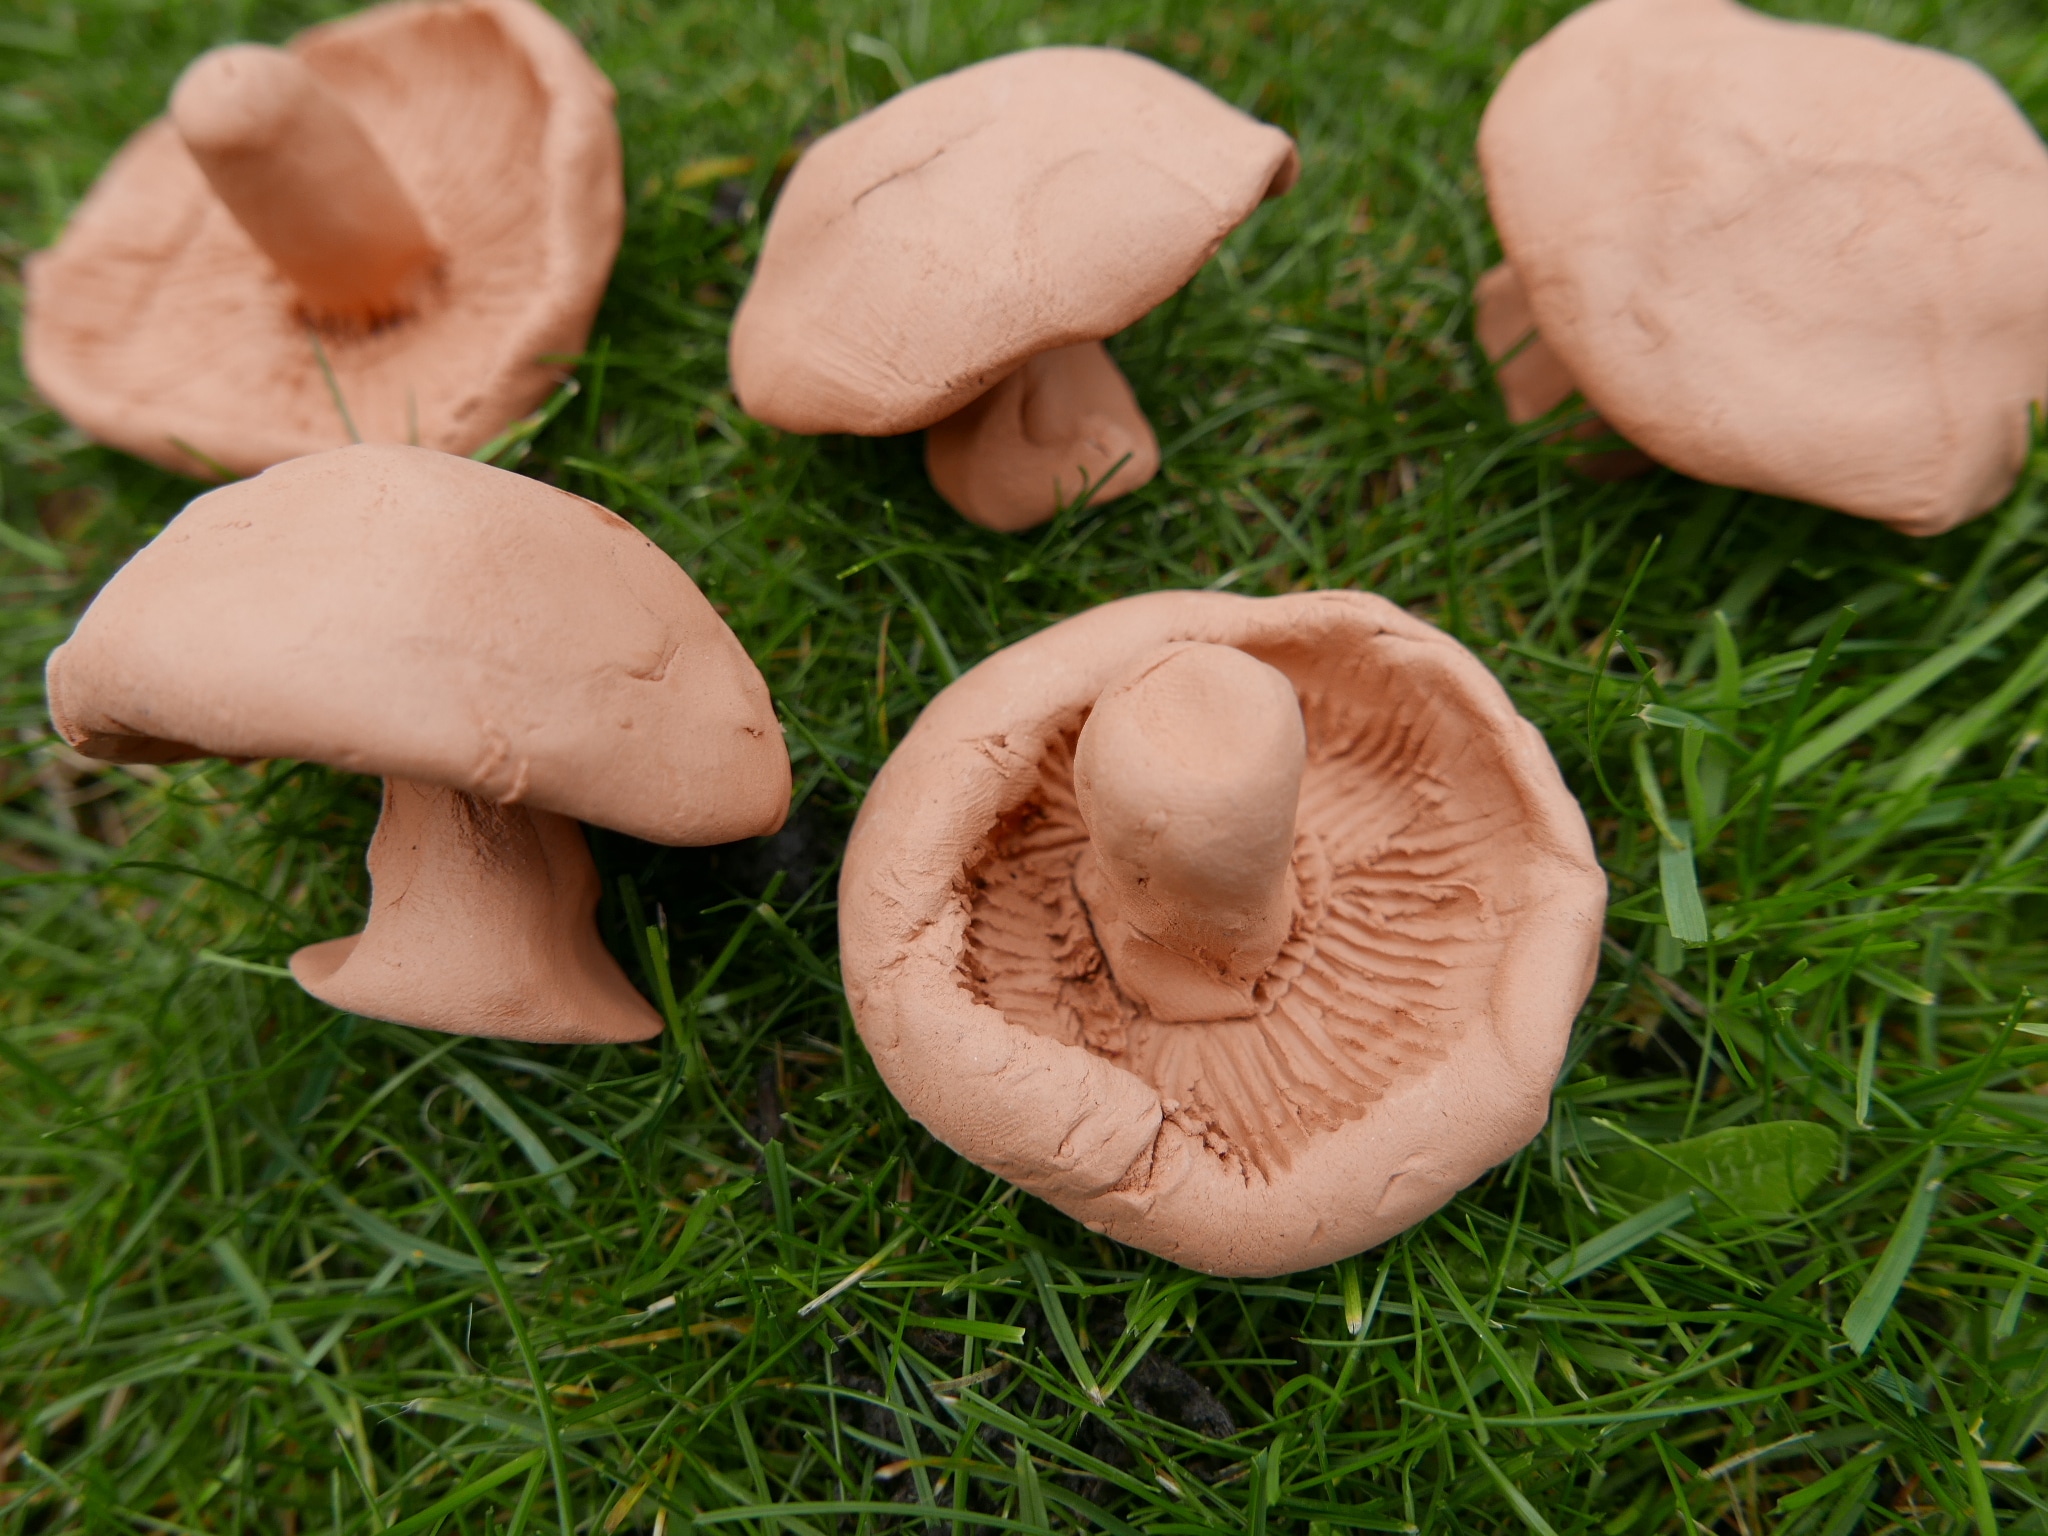
If you are feeling more adventurous you could also use a stick or clay tool to scrape and scratch gill like marks into the underside of the clay mushrooms caps. Once your mushrooms are dry you could also use paints or collage materials to colour, decorate and add additional details to your mushrooms.
11. Mushroom collages
Making nature collages is a fun activity for children of all ages and abilities. It encourages creativity and helps develop fine motor skills. All you need is some paper or recycled cardboard, First draw, paint or print some simple mushroom pictures onto the paper. Next collect as many natural objects as you can find around you to create a nature collage around the mushrooms. You could use leaves, stones, grass, bark, fallen fruit and flowers. *But pretty please don’t pick any wild flowers, only collect ones you have grown yourself or fallen ones you find on the floor.

12. Mushroom potato prints
Mushroom potato prints are easy and fun to make. You just need to cut a potato in half, dip it into some paint and then print it onto a surface like paper or recycled cardboard. The print forms the cap of the mushroom, you then just need to add the stalk which you can do via a finger paint print or by using a paintbrush, pen or even collage materials.

You can even make fairy toadstool prints (fairy toadstools are a beautiful type of fungi called Fly Agaric). Simply dip the potato half in red paint and then print it onto a surface,. When the red cap print has dried you can then use white paint to finger paint or brush on the spots and stalk of the toadstool.

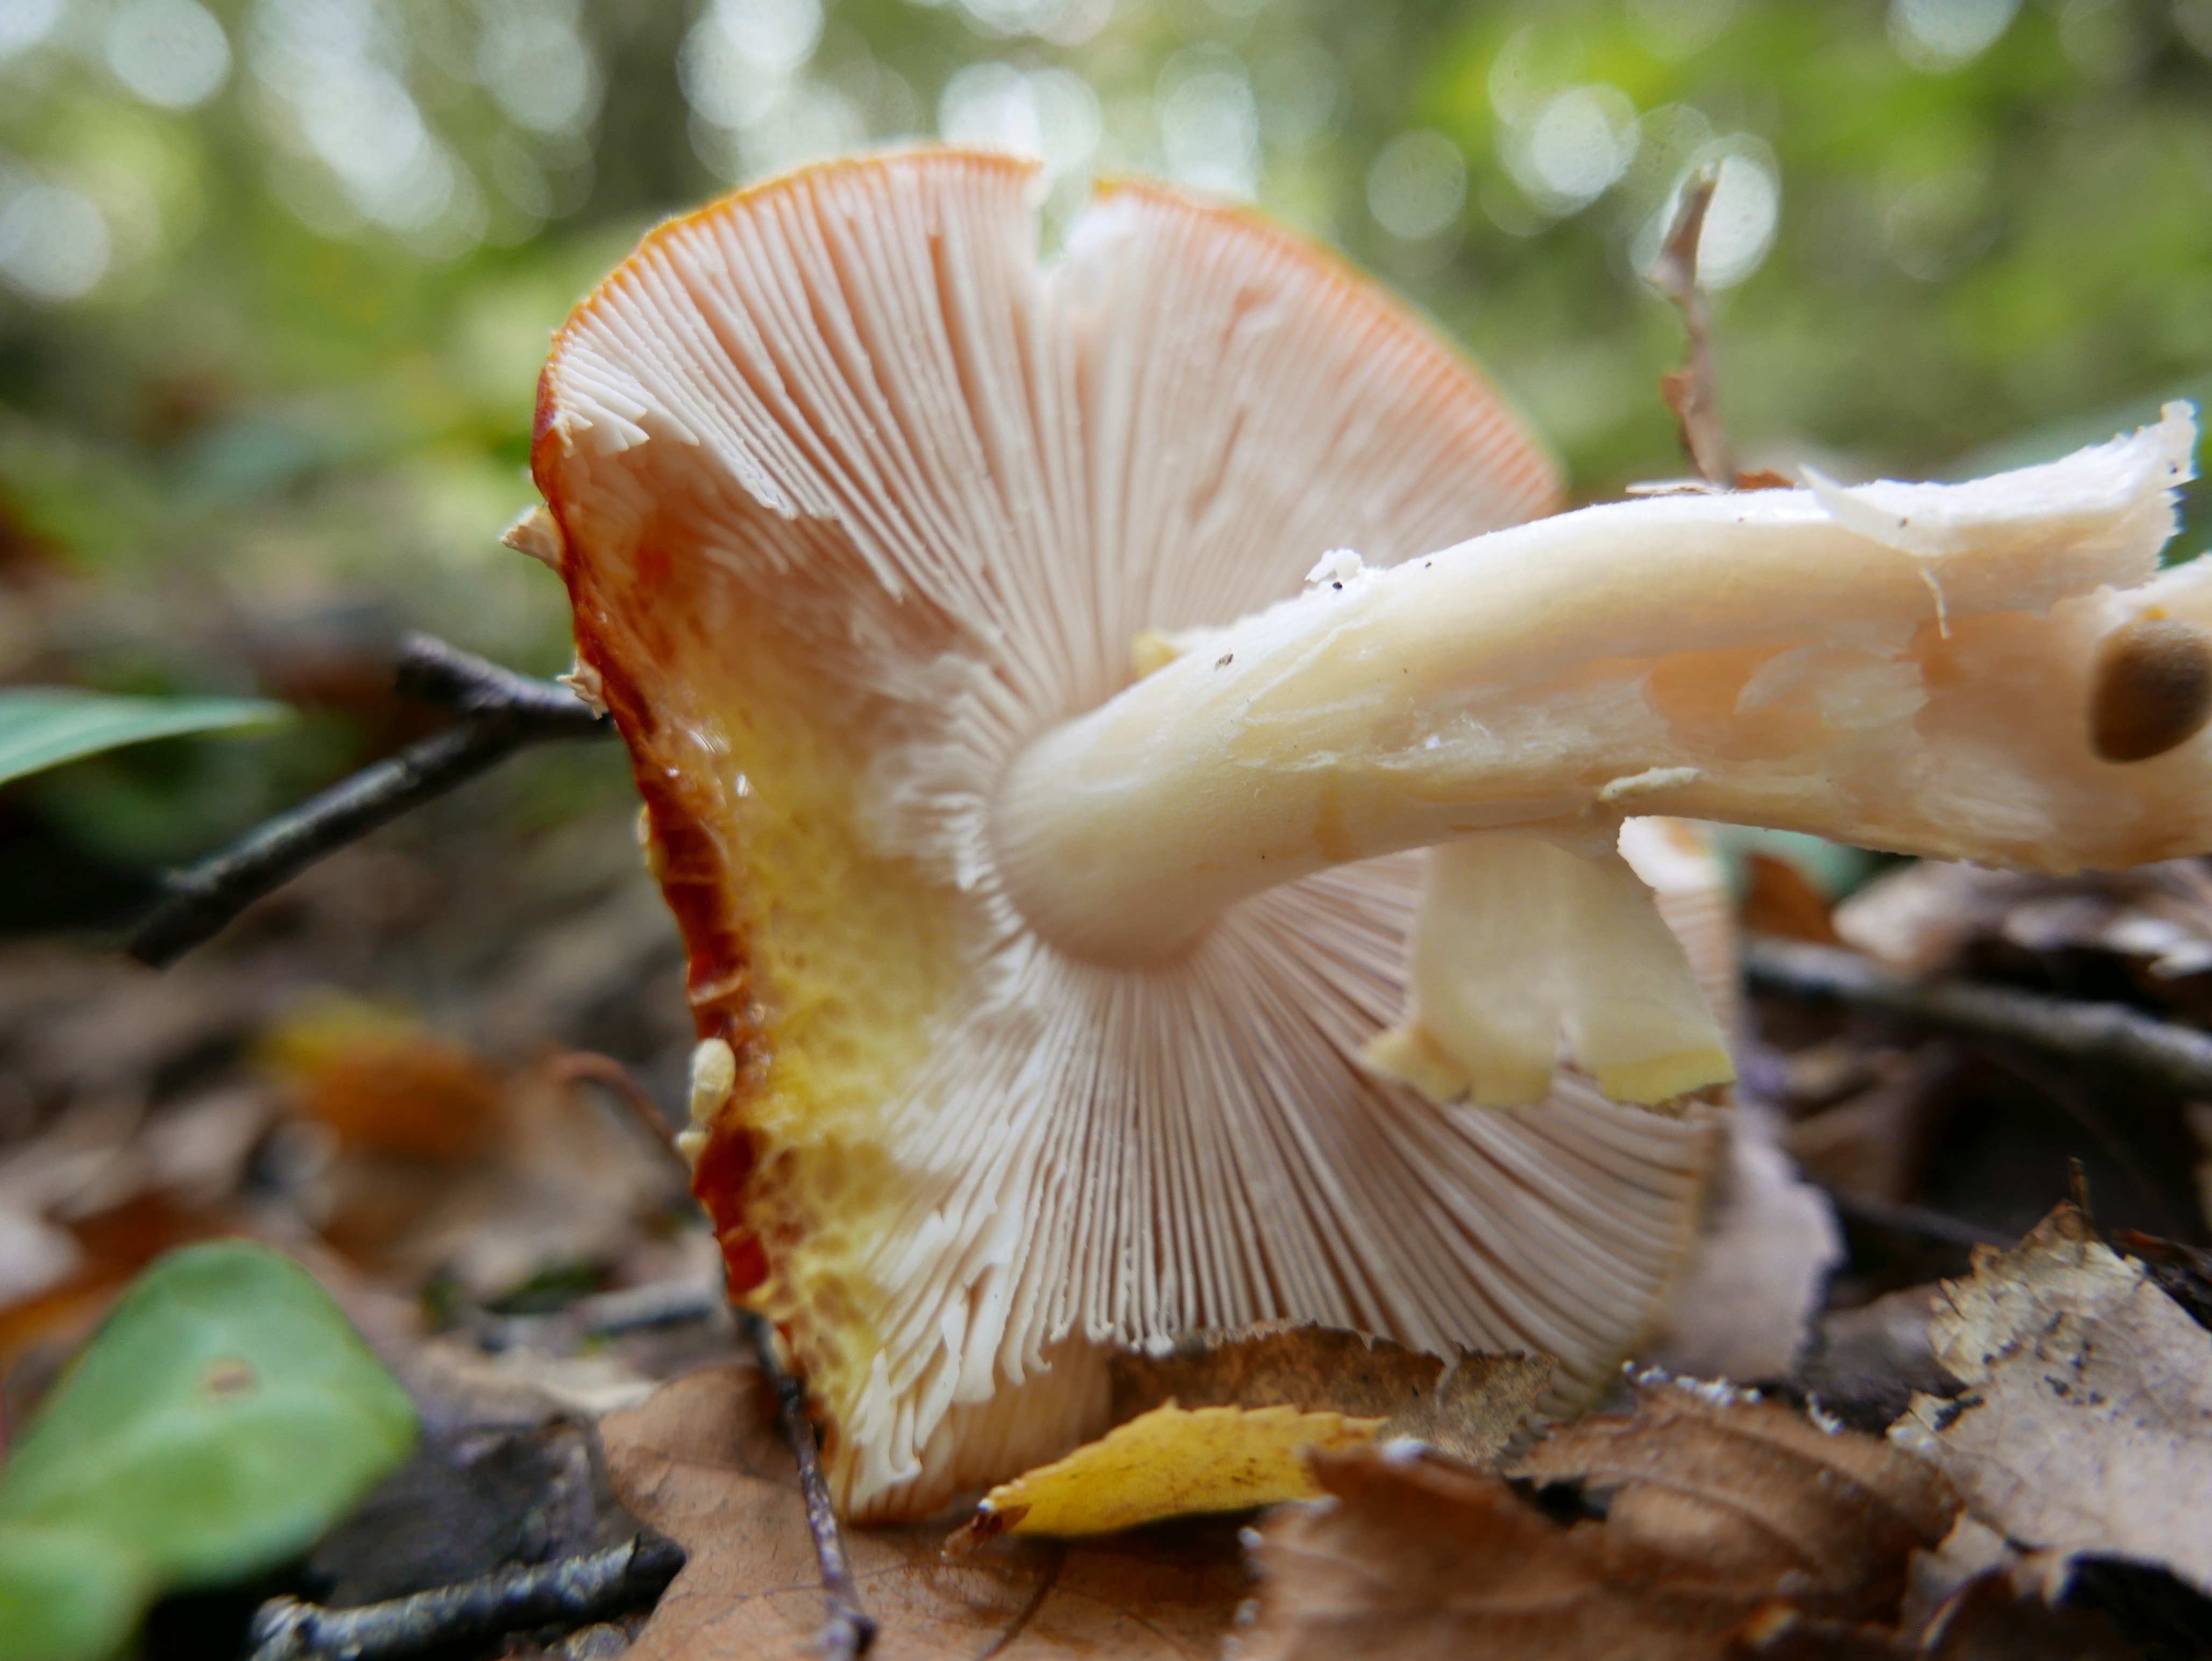
Some mushrooms also have gills on the underside of the cap which you can see when they are upturned. The gills are where the mushroom spores are produced and they create a beautifully frilly pattern. To create a gilled cap mushroom print you will need to carefully cut small triangular slithers all around the edge of a potato half. Then using a spoon carefully scoop a hole in the centre to form the stalk hollow. Then simply dip the potato into paint and print as normal.

You could even go one step further and make more intricate potato prints of different types of fungi like turkey tail. Carefully carve ring shapes, frills or wave like patterns into the surface of a potato print before dipping in paint and printing it on to a surface.
How about using your fungi potato prints to make patterns, pictures, cards and even recyclable wrapping paper. It is also fun to experiment printing on different types of surfaces and textures from paper to fabric, foil and wood. And as long as you use non toxic paint you can even print on outdoor surfaces like paths, trees and leaves.

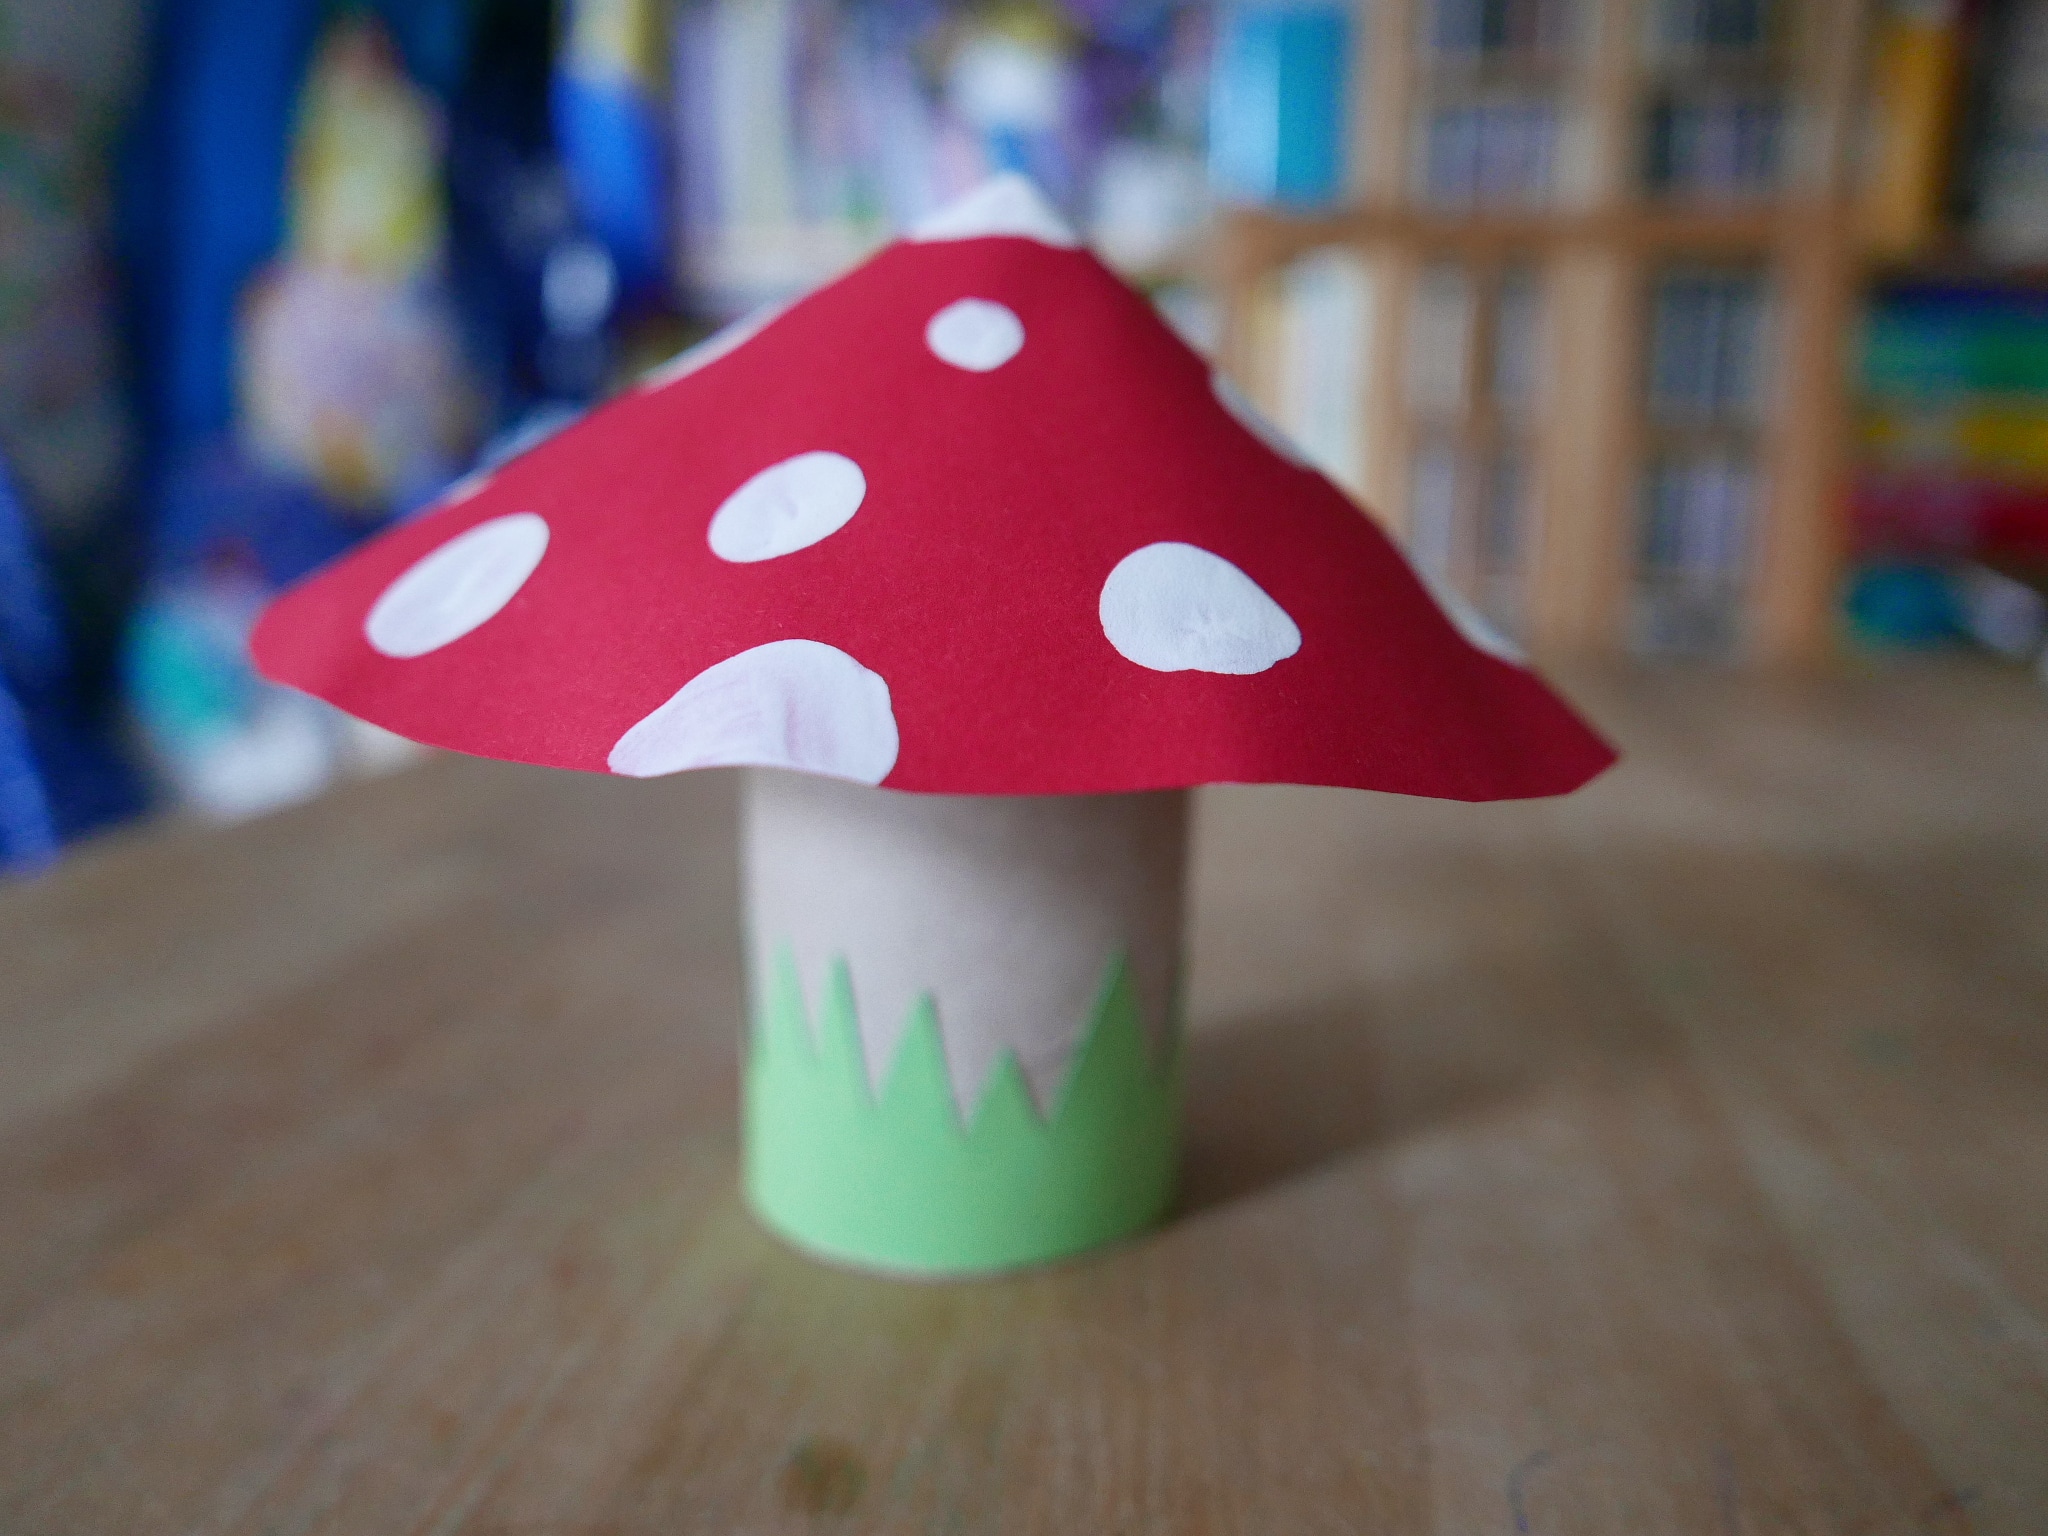
13. Cardboard tube mushrooms
We hate to waste anything and recycling and reusing materials is one of many small things we can all do to help the environment. So instead of chucking used cardboard tubes we like to find ways to use them in crafts and activities. To make cardboard tube typical mushroom you just need an old cardboard tube, paper and paint or pens paint. First fold and cut the sheet of paper into a circular cone shape to make the mushrooms cap. Then glue it to the cardboard tube and then decorate both with pens. paint of collage to finish your mushroom.
You can also use your cardboard tube to make a variety of other types of mushrooms like the fan like waves of turkey tail or shelf like bracket fungi. This time the cardboard tube will form the tree trunk, dead wood or log that the fungi is growing on. So first paint, colour or collage your tube to look like wood. Then cut a sheet of paper or card to form the wave or curved shelf like shapes of turkey tail or bracket fungi. Paint or decorate it to resemble the colour or pattern of the fungi and stick it onto your cardboard tube wood. You could also make a few more layers of fungi to stick on to give it more depth.

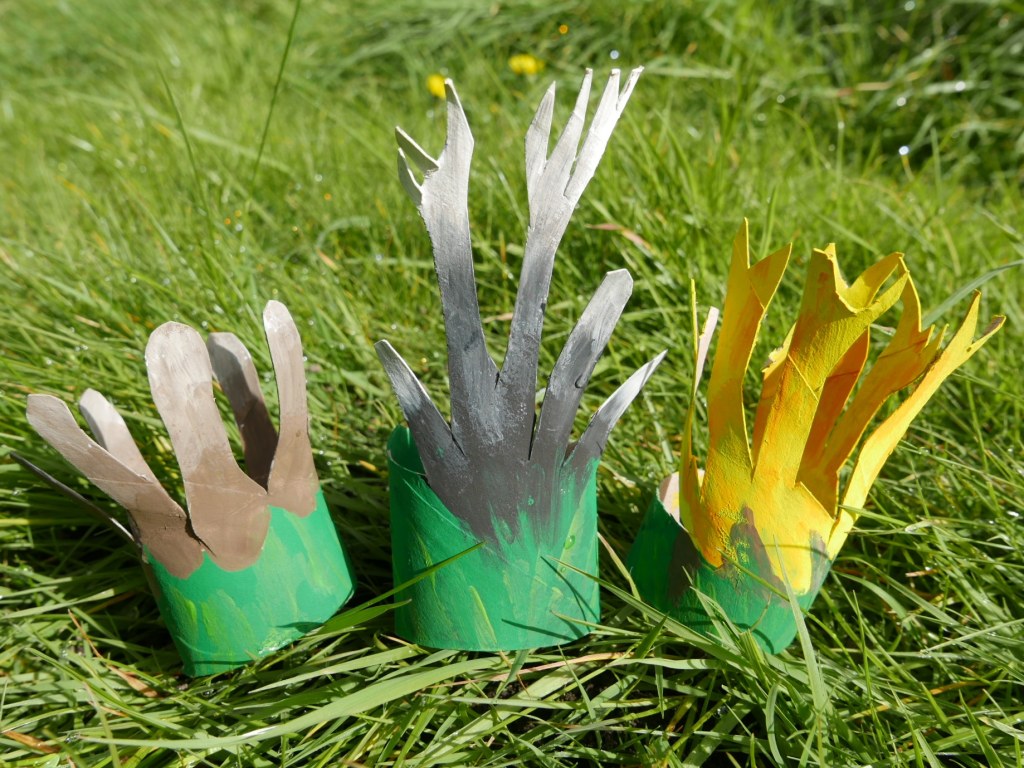
You could also make more fantastic, weird and wonderful fungi using cardboard tubes with or without extra paper or materials. For example we simply cut the ends of the cardboard tubes below to resemble the different finger like, hornlike or spindly shapes of dead mans fingers, candle snuff and stag horn fungi. We then used paint to add extra details and make them the same colours as each individual fungi.
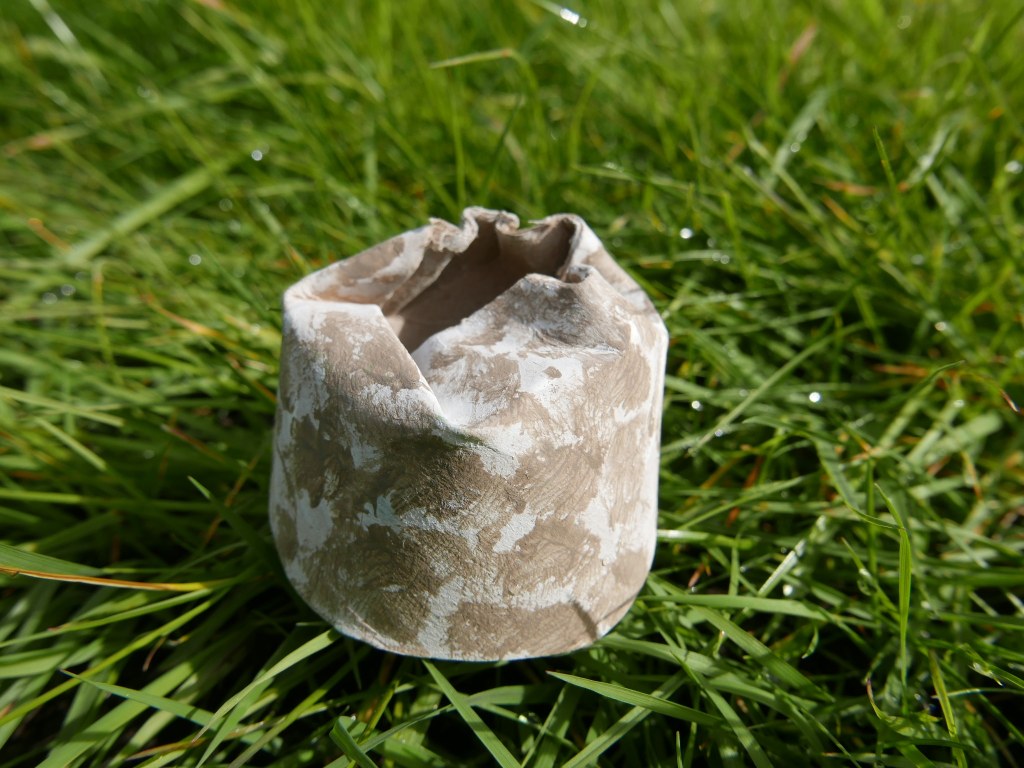
To make puff ball fungi we just painted the cardboard tube a speckled white and brown and then crumpled and folded the top and bottom down to give it the crumpled spherical shape of a puffball mushroom. When you have finished you can use your cardboard tube mushrooms as a decorations, story props, napkin rings or even fill them with sweets or presents to give as gifts.
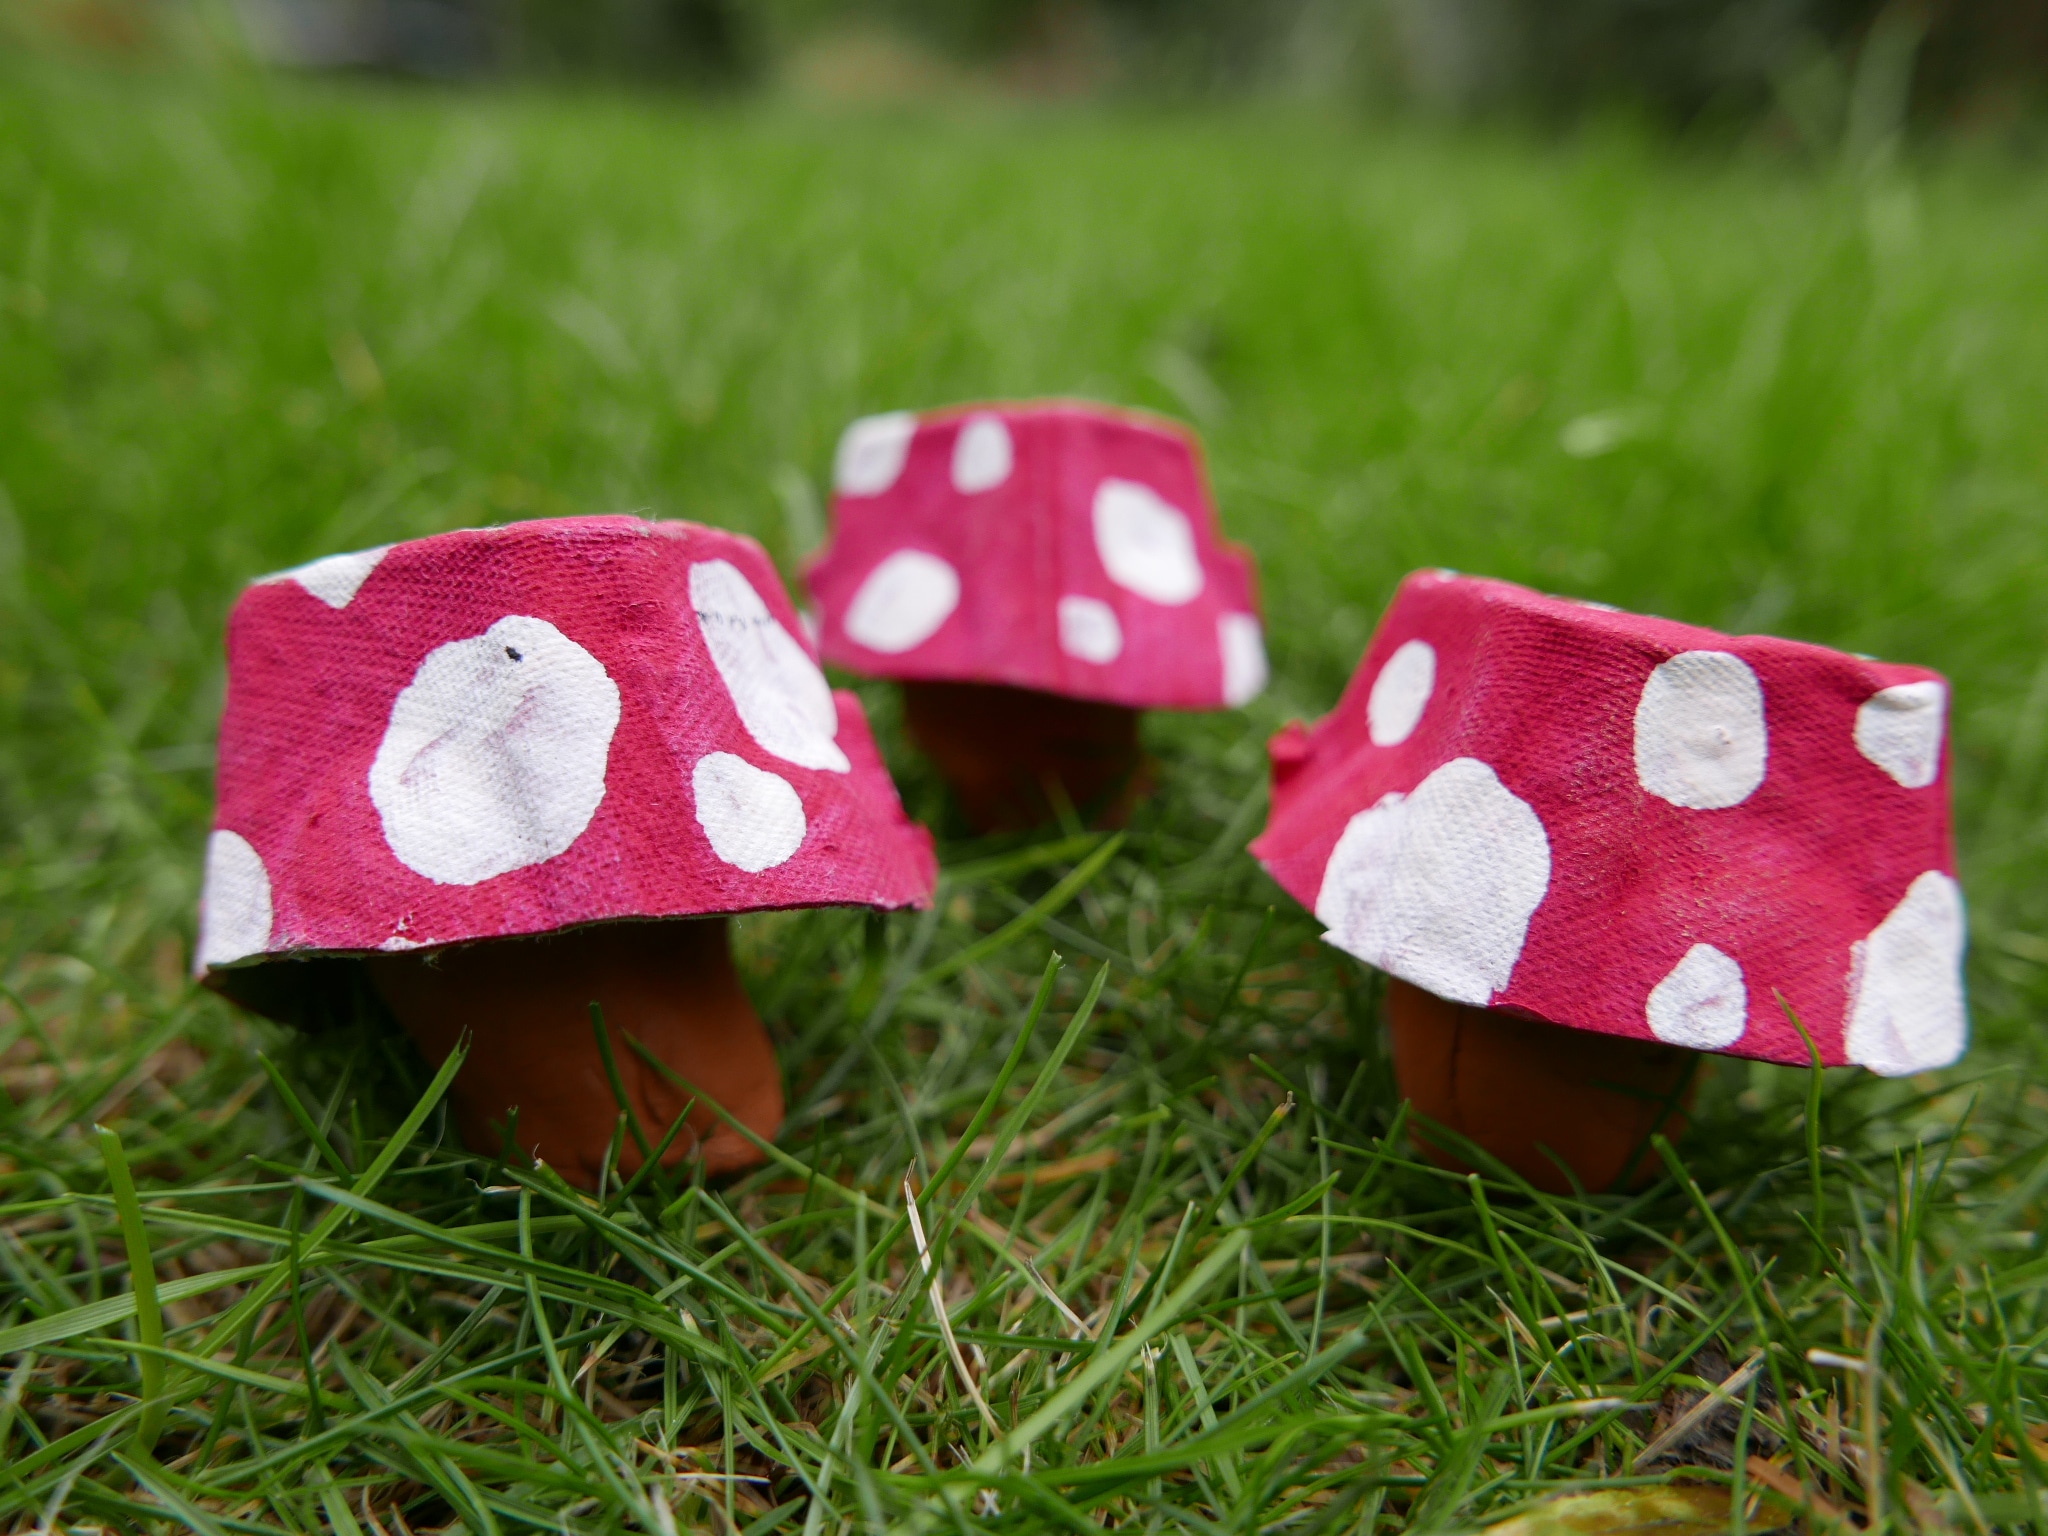
14. Egg carton fungi
You can also make egg carton mushrooms using an old egg carton and paint, collage or pens. Simply cut all the bottom cups out from the egg carton to form the mushrooms or caps. You can then add colour and details to your egg carton mushrooms using paint, pens or collaged materials.

You can also add stalks to your egg carton mushrooms using folded pieces of egg carton, card or paper. Or by moulding them out of clay, playdough or salt dough. Again you could also experiment and try making more fantastic, weird and wonderful fungi using any other materials you can think of. The possibilities are as endless as your imagination.
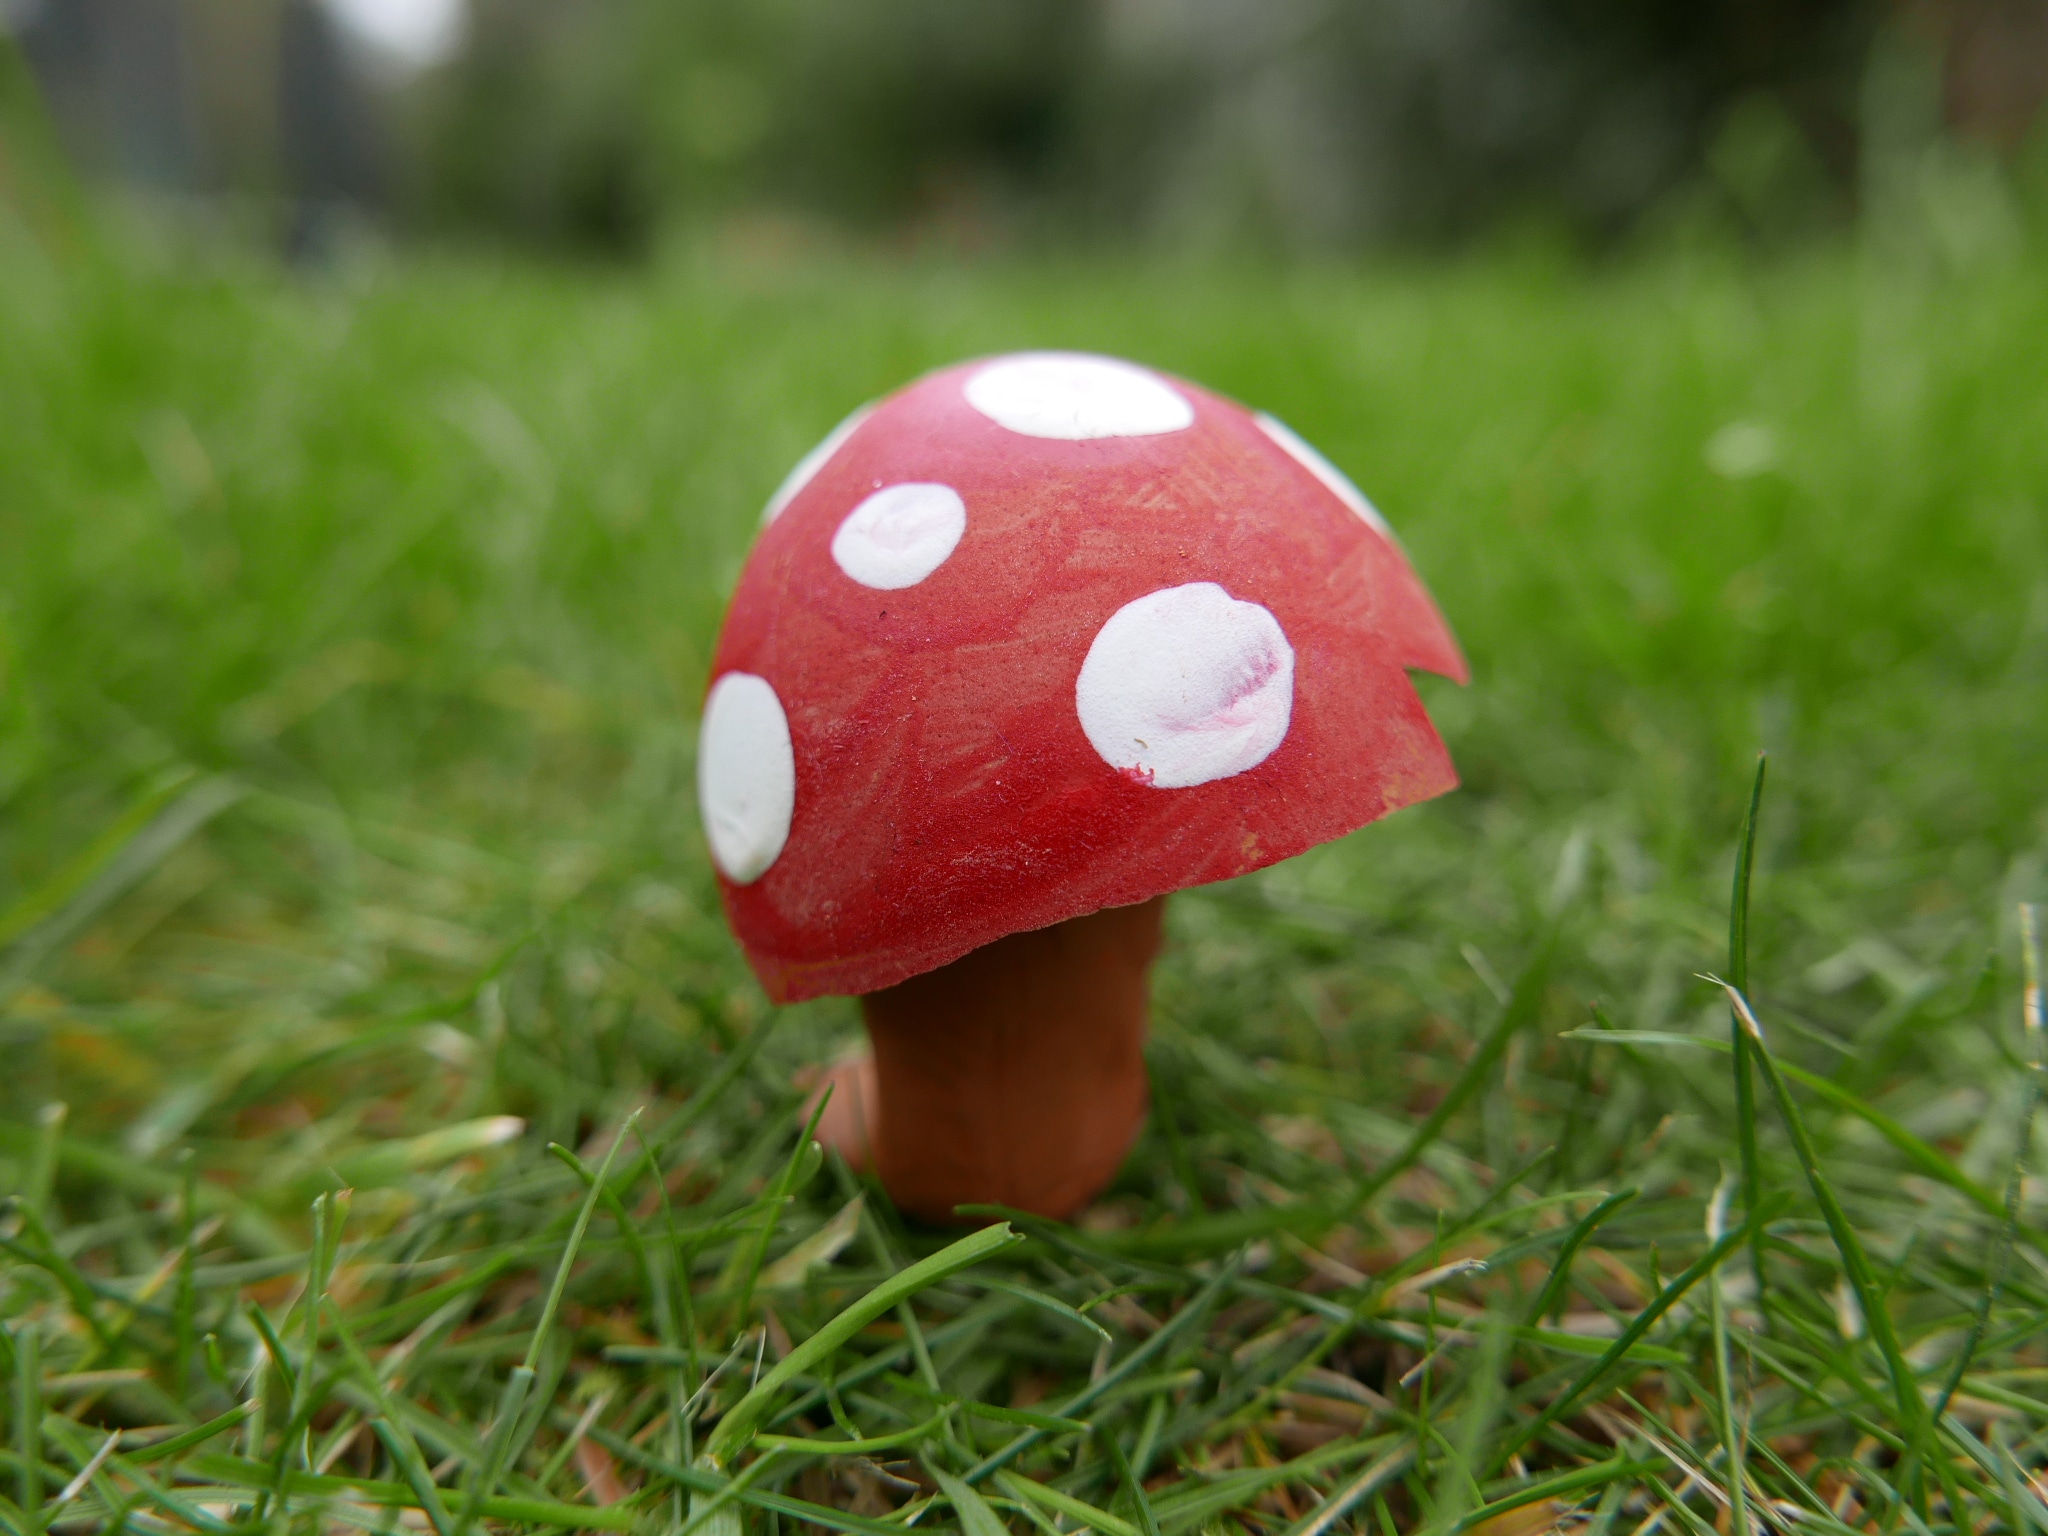
15. Egg shell mushrooms
You can also use eggshells halves left over from cooking and baking to make some cute little mushrooms. Make sure you wash the egg shells thoroughly first with hot water. You can then add colour and details to your egg shell mushrooms using paint, pens or collaged materials. Finally add stalks to your egg carton mushrooms using folded pieces of egg carton, card or paper. Or by moulding them out of clay, playdough or salt dough.
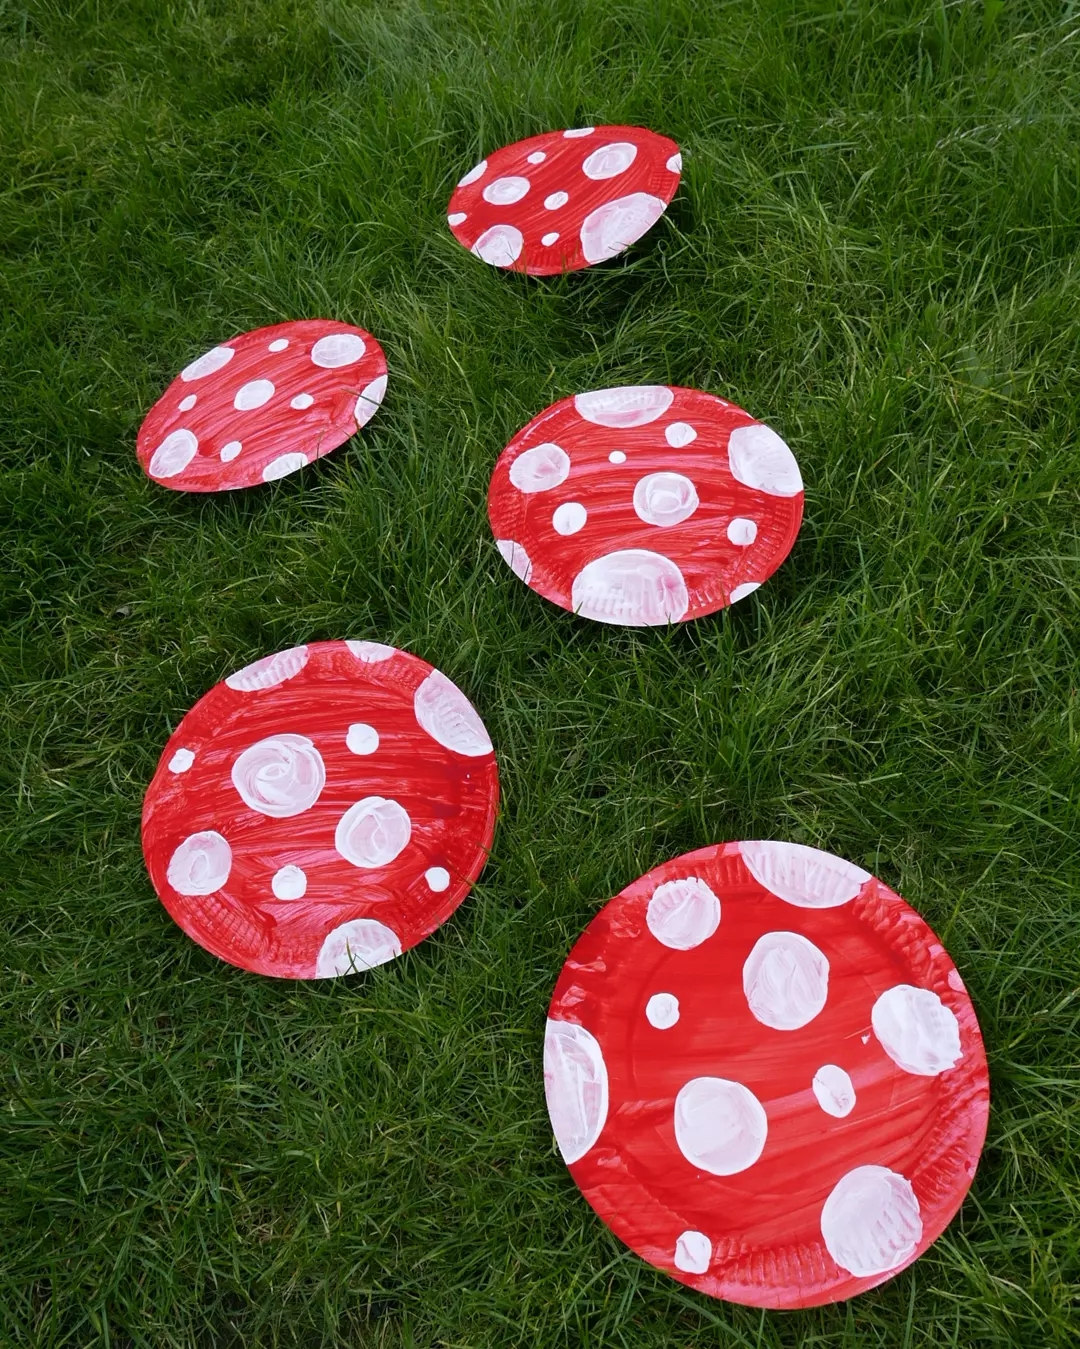
16. Paper plates mushroom stepping stones
You can also paint, decorate or collage onto paper plates (or circles out of paper) to turn them into fun mushroom caps. Once you have finished decorating your mushrooms you can then use them as decorations or lay them out as stepping stones for balance and obstacle course type games. Just make sure you are placing the plates on non slip or soft surfaces to avoid trips, slips and falls.
17. Paper fan mushrooms
All you need to make paper fan mushrooms is some A4 or A3 paper and a bit of tape or glue. You could use plain paper, coloured paper or painted paper for this Or you could even try recycling old wrapping paper, thin card or fabric. You just need the material you are using to be foldable enough that it holds and retains the shape of each fold.

Lay you paper vertically so the shortest edges of the paper are at the top and bottom and the longest are at the sides. Then fold the top edge of the paper over (by about a finger to a thumbs width) press the fold down to crease it and then flip the whole thing over so the folded edge is at the bottom, fold the folded bottom edge upwards to form another crease and press it down firmly, flip the paper again and keep repeating until the whole sheet is folded into a thin strip. Fold the long strip in half so the long ends meet and then glue or tape the two ends together to form a concertina fan shape. Turn the fan over and bring the bottom two ends together, then glue or tape the two ends together to create a full circle. You can then add a stalk to your fan mushroom cap using folded paper or a cardboard tube.

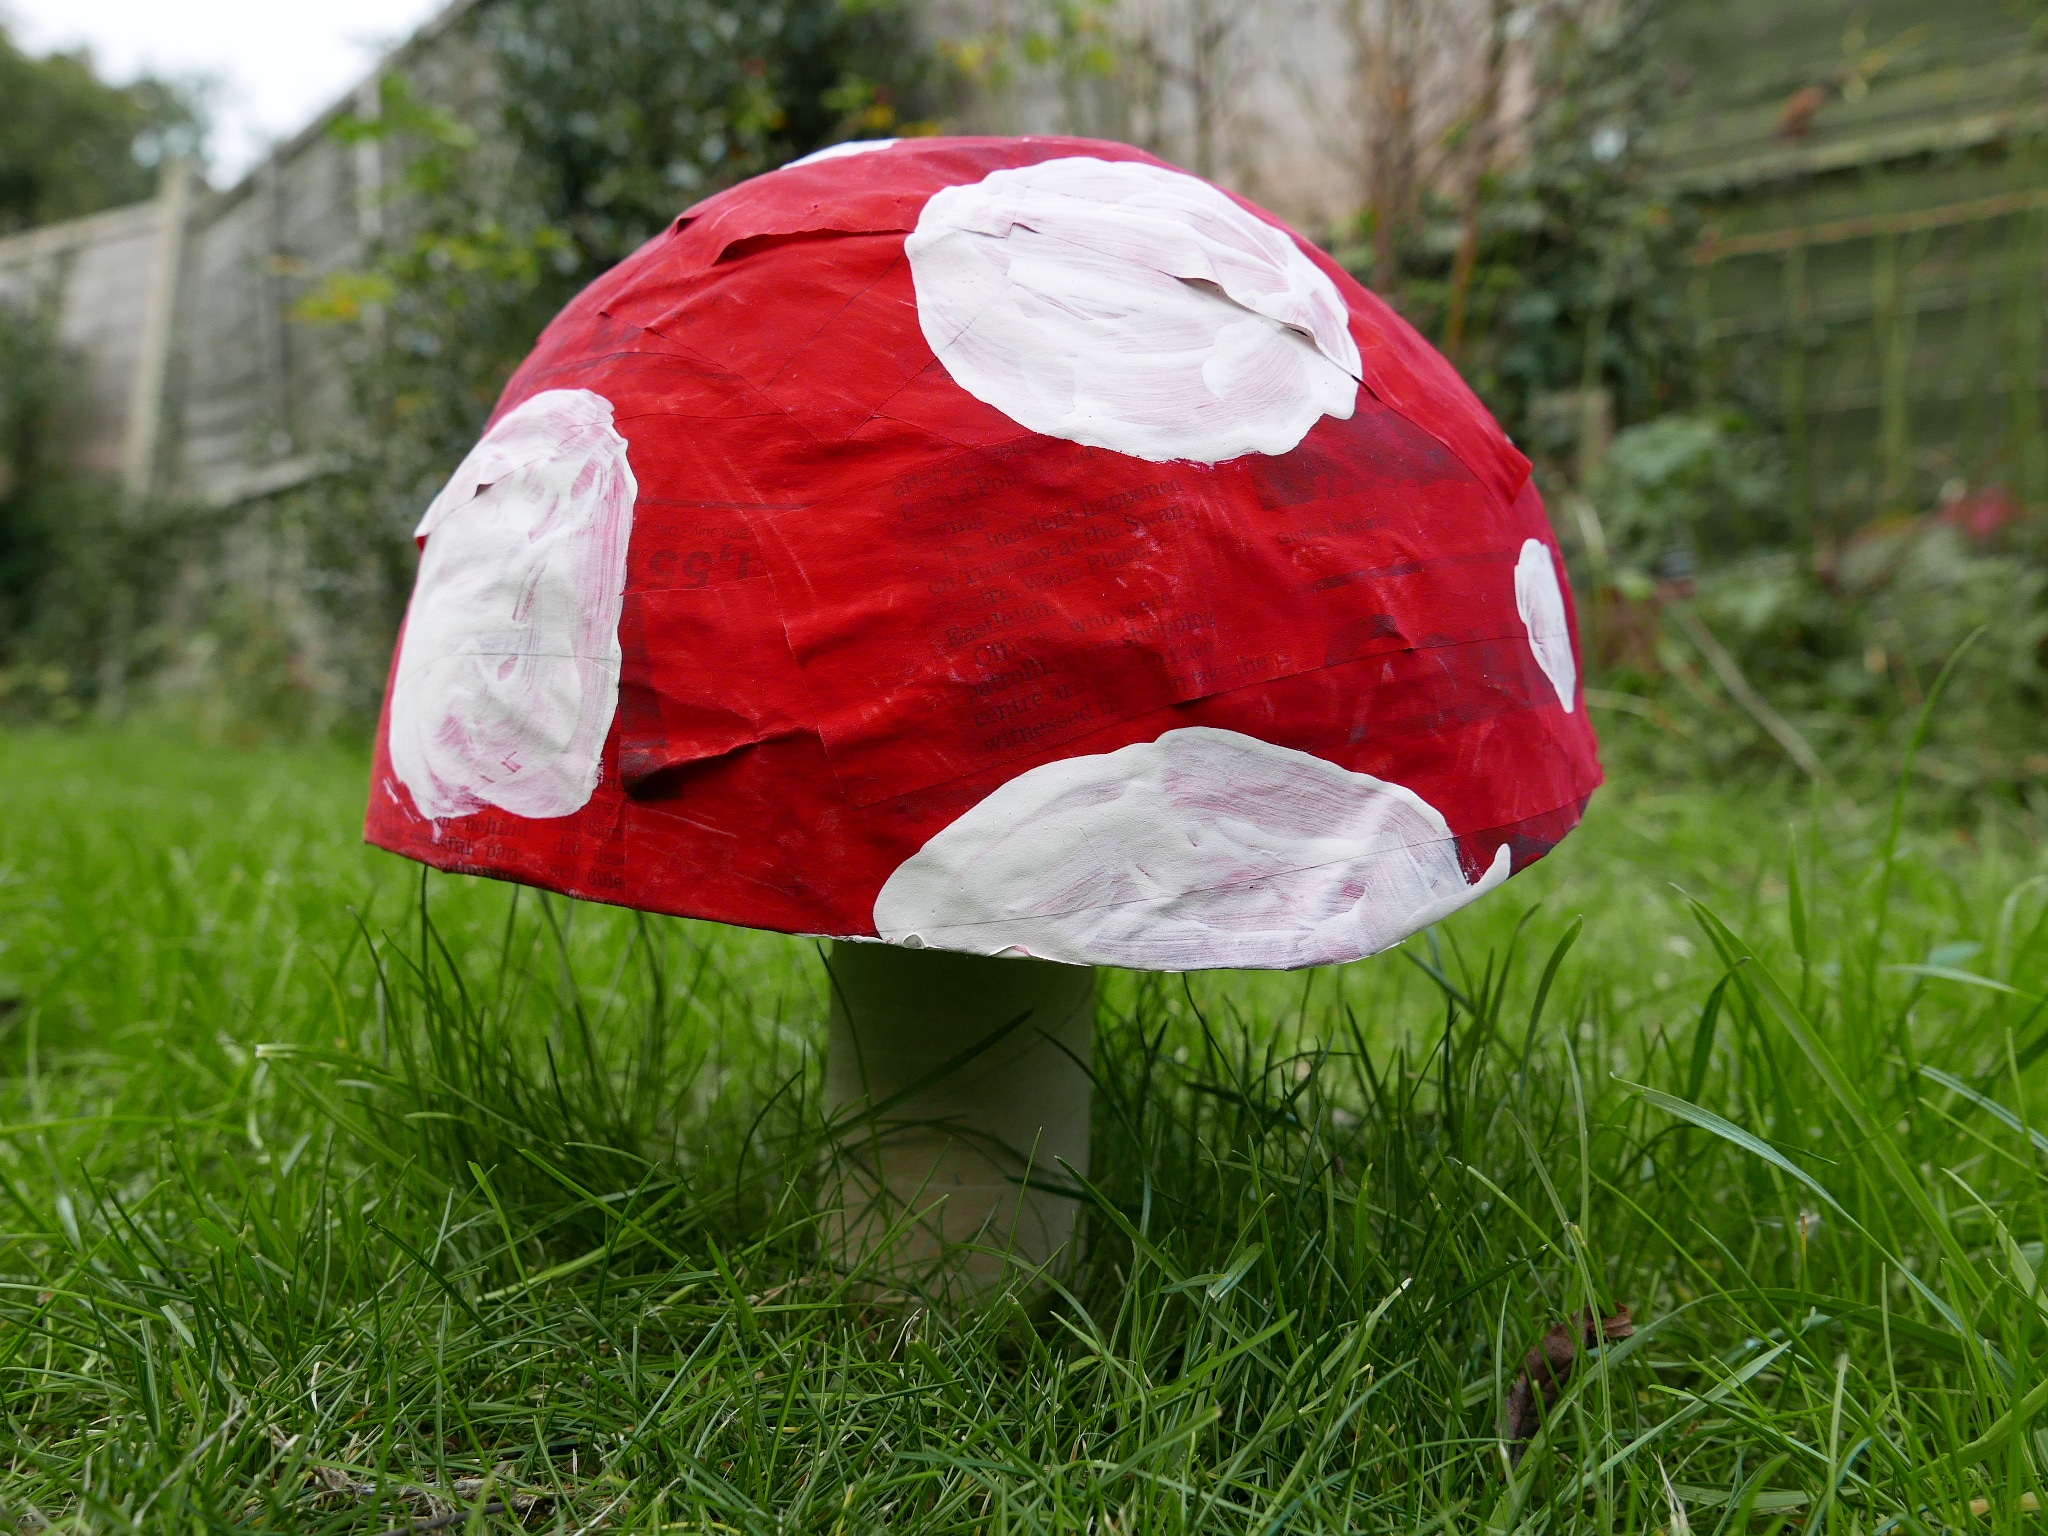
18. Paper mache mushrooms
All you need to make a paper mache mushroom is some old newspaper (or non glossy magazines, catalogues or old telephone directories will also work.), PVA glue, a balloon or old bowl and some paint. To make the paper mache you will need to mix PVA glue and water together in a tray or bowl to make a thick paste. Then cut the newspaper or magazines, catalogues and telephone directories into strips and then dip the strips into the paste.

Drape the strips of paper over half of a balloon or the bottom of an old bowl, slowly covering and layering the strips over the surface until everything is covered. You can cover it in as many layers as you like, the more layers you use the sturdier the final decorations will be. But bear in mind it will also take longer to dry. Now you need to leave your paper mache mushroom to dry completely for a day or two. When everything is dry carefully remove the balloon or bowl from the paper mache shell. Or leave them in to keep the shape whilst you paint and add details to your mushroom.
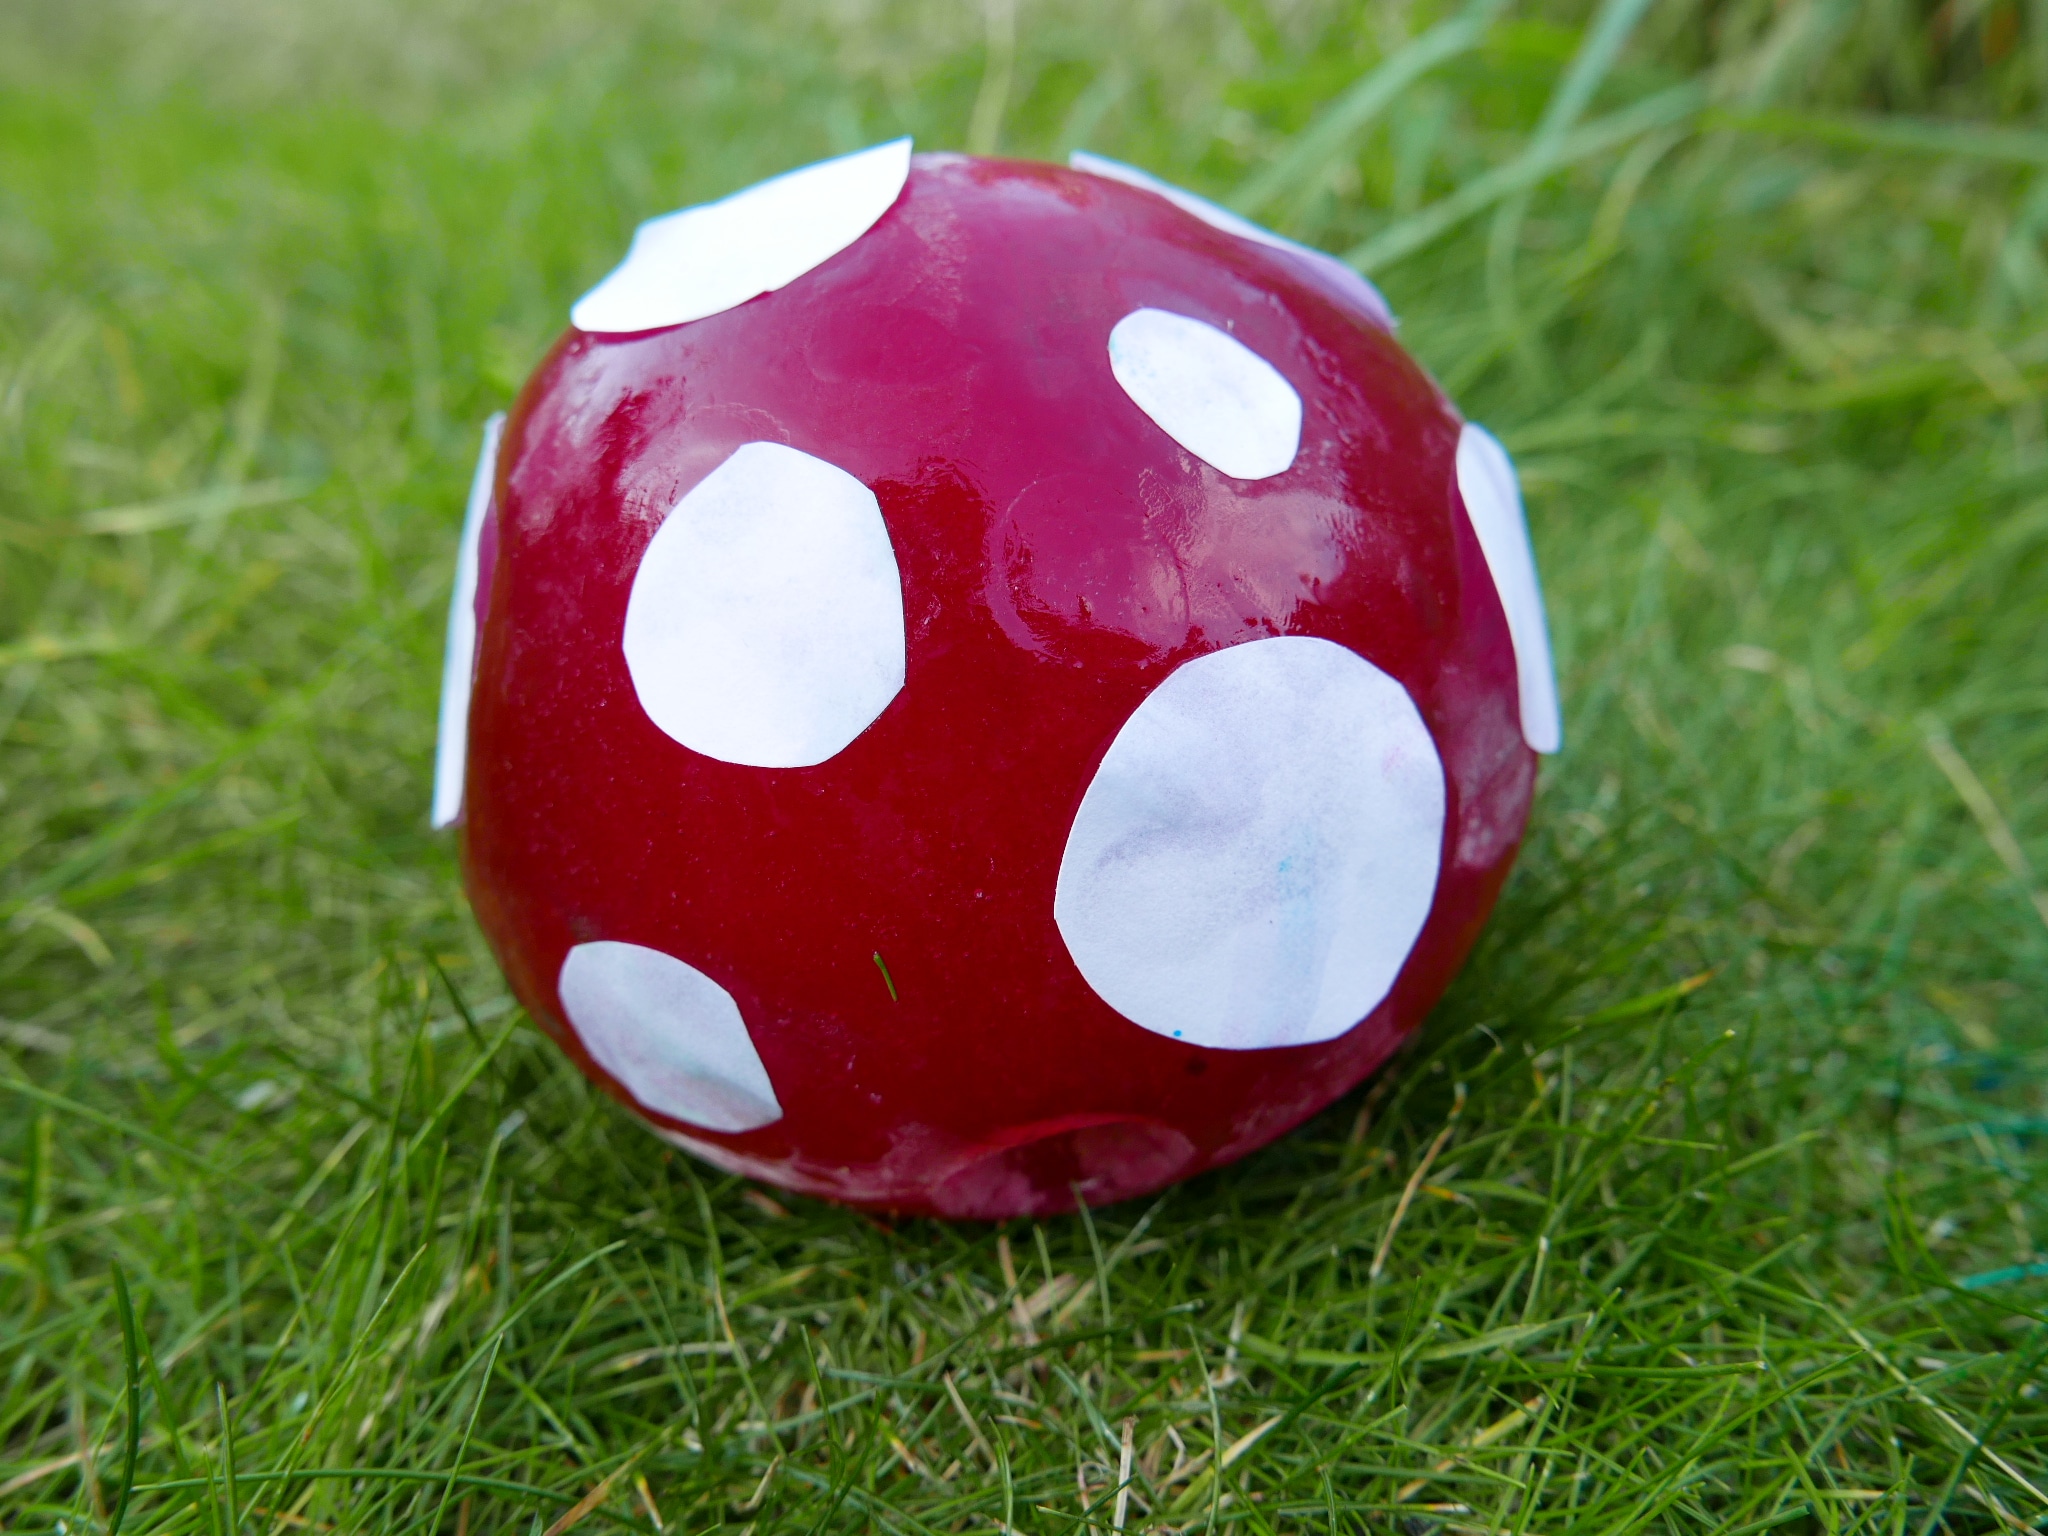
19. Mushroom ice globes
Mushroom ice globes look great and are fun to play with. They are also so easy to make you just need to add some food dye or paint into a balloon, then stretch the neck of a balloon over a tap (hold it firmly in place) and semi fill the balloon with water. Tie the end up securely, give it a shake to mix the colouring in and freeze the water filled balloon overnight. When your water is fully froze you can cut and peel the balloon off to reveal a perfect round ice globe. You can then also cut out simple paper shapes or dots to decorate your ice globes with to turn them into mushrooms like fly algaric of puffballs.
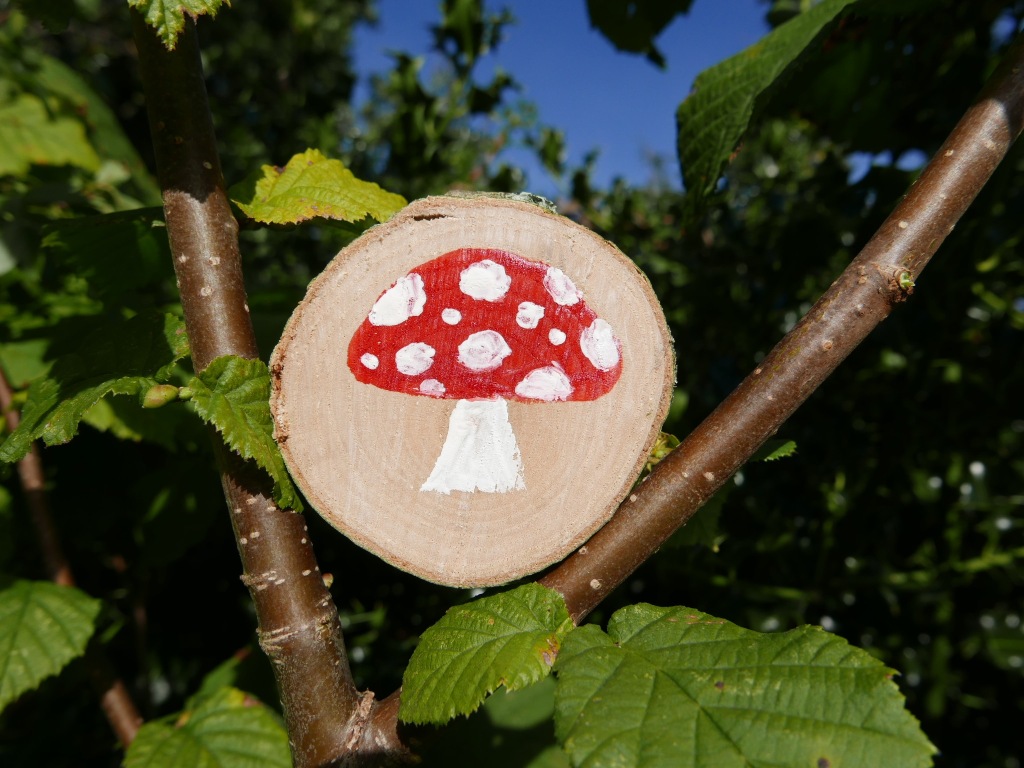
20. log slice mushrooms
Log slices are simply slices of tree logs or branches. They can be any shape or size and they are a brilliant, tactile and fun resource to use in play. You can easily decorate your log slices with mushroom pictures and then turn the log slices into pendants or decorations. You just need to carefully drill a single hole through the slice so the children can thread some string, ribbon or wool through.
21. Carved and whittled mushrooms
If you have more time, patience and experience you could also have a go at carefully whittling or carving a branch or stick into a simple mushroom shape. You could also then paint, colour in or collage onto your finished mushroom to give it colour and further details.

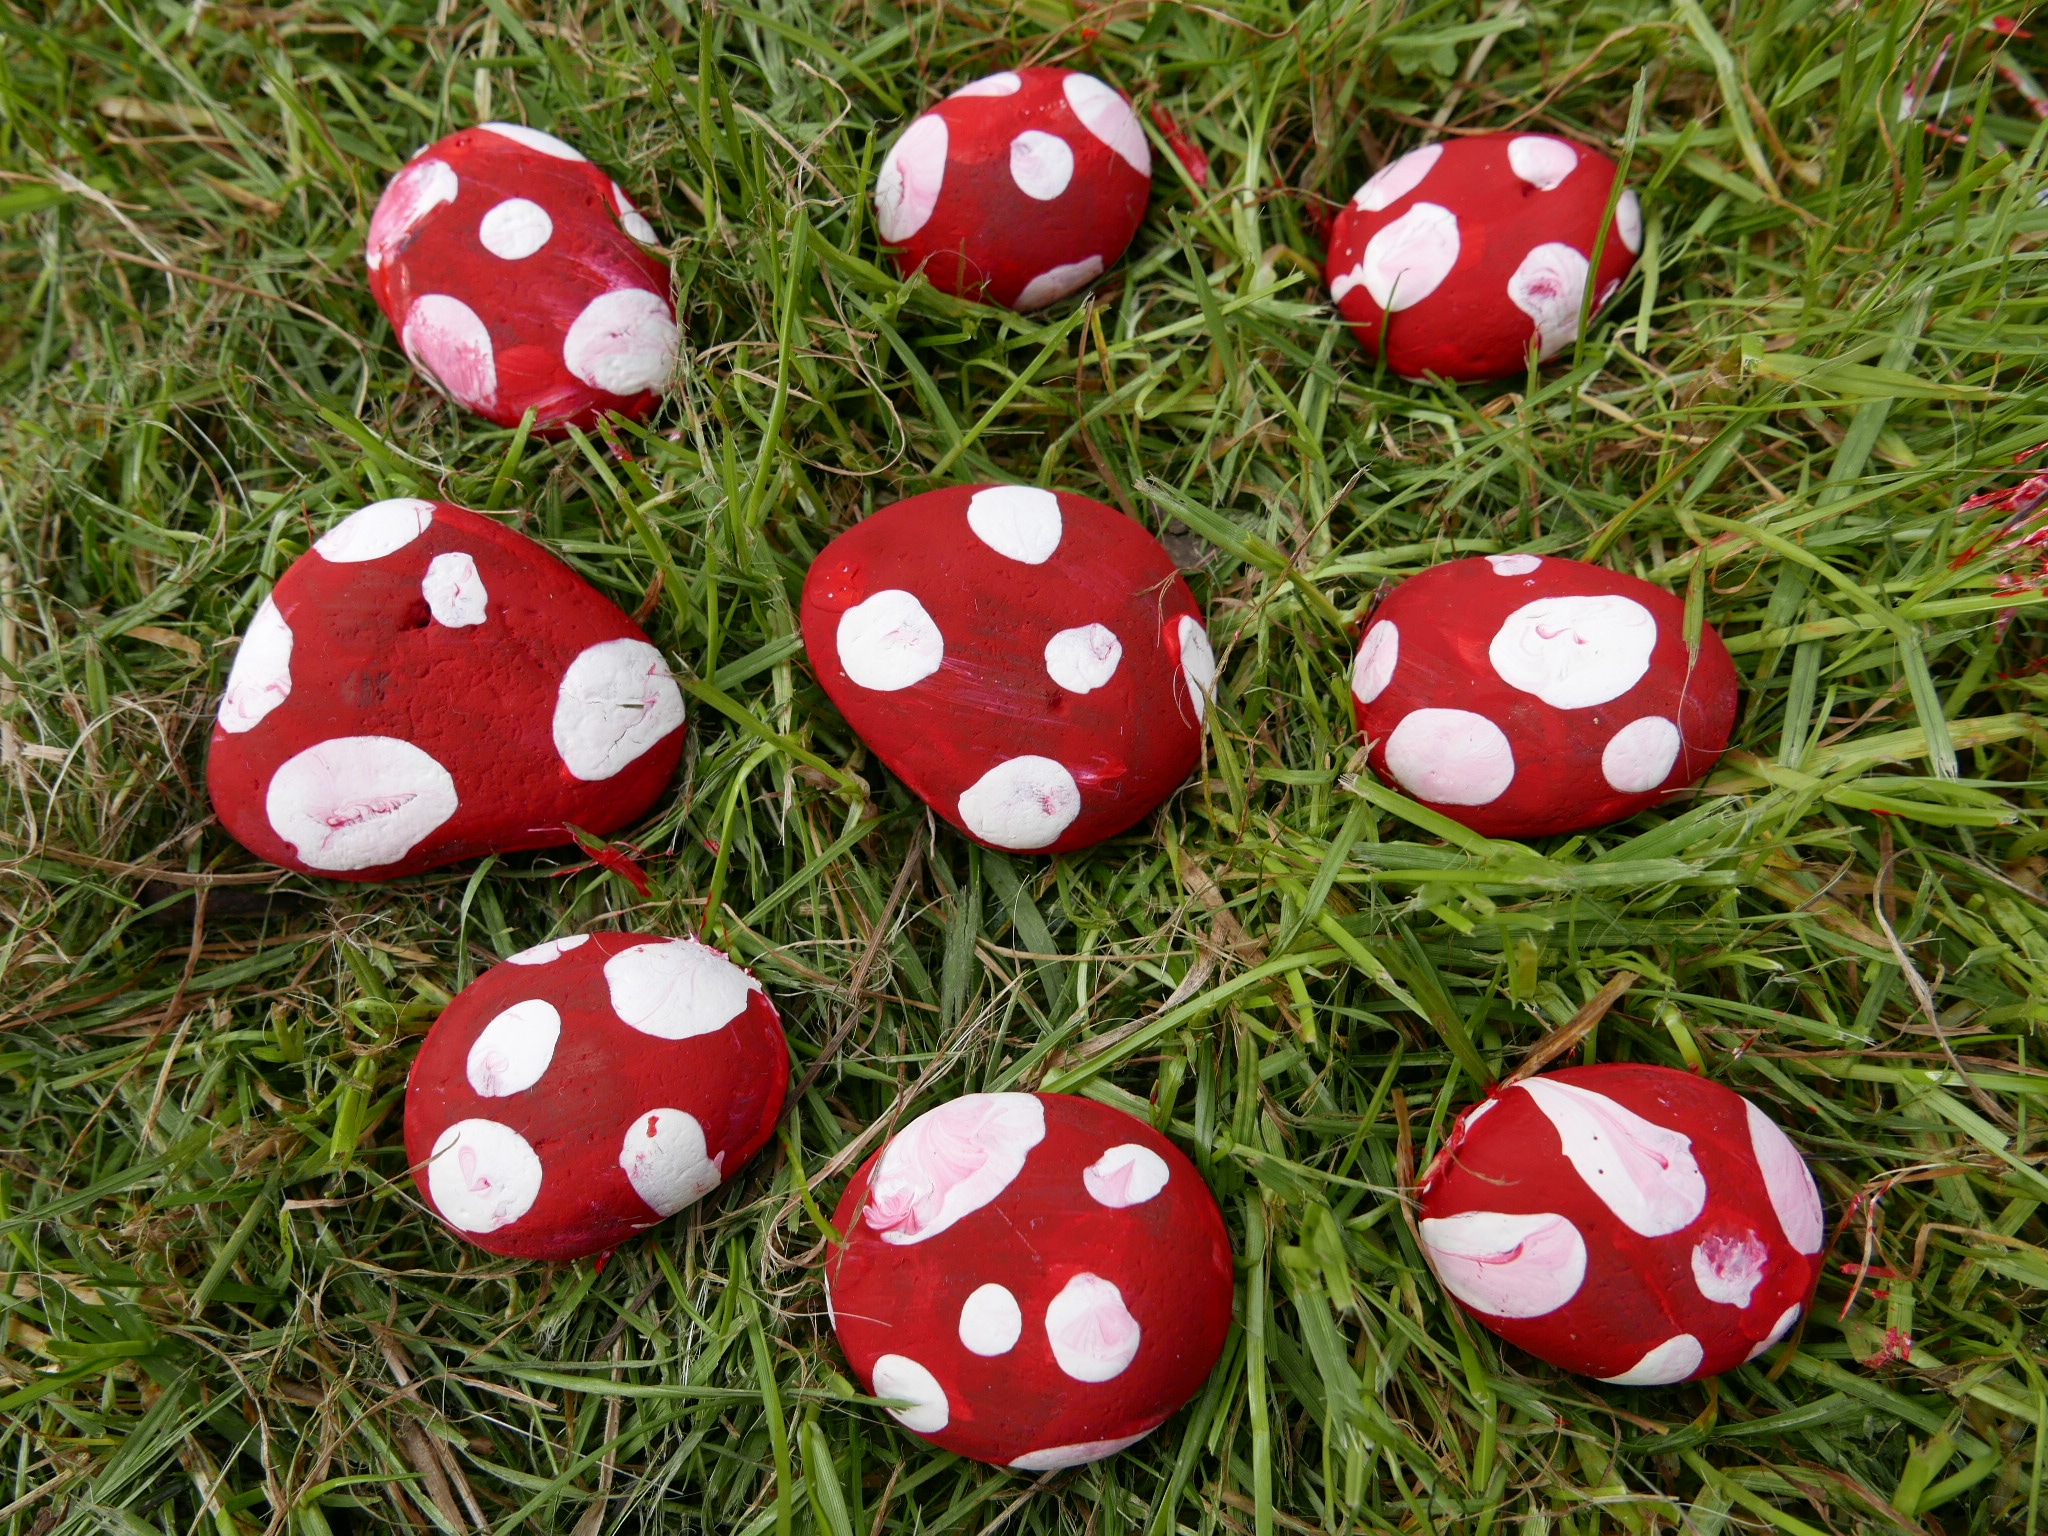
21. Painted pebble
We love finding painted pebbles when we are out and about, it’s wonderful to see the creativity and love that people put into them. You can easily find pebbles to decorate yourself by looking in your garden, on a nature walk or along the shore. All you need then is some paint or permanent markers to paint or draw mushroom themed pictures, patterns or designs onto the pebbles. *Safety note please be aware of the choking hazard of pebbles with smaller children.
22. Mushroom decorated vegetables
You can also use pumpkins, squash’s and other round vegetables to make fun pumpkin decorations, especially in autumn or for Halloween. Again all you need is some paint or permanent markers to paint, print or draw mushroom themed pictures, patterns or designs onto the vegetables.

23. Mirror print mushrooms
And finally mirror image painting is a quick activity that also looks really effective. Simply fold a piece of paper or recycled cardboard in half. Unfold the paper or card and then paint half of a mushroom shape onto one half of the paper. Then fold the paper or card back up again and press down firmly across the whole of the surface. When you open the paper or card back up again you should have an interesting mirror image print of your mushroom.

For day 15 of 30 Days Wild 2024 we went on a woodland walk to look for fungi and got completely caught and soaked in the rain. We also made some mini mushroom spore prints to explore.
If you like this you might like to try:

Soil science and sensory activities


One thought on “23 Mushroom and fungi activity ideas”