
Mint is a wonderfully fragrant and versatile edible herb that you can easily grow in your garden, in pots or on a window sill. Not only does it taste and smell great it’s also a fantastic plant to grow for wildlife, many species of birds, beetle, moth, slugs, snails and spider rely on mint as a source of food and shelter as well as a place to lay eggs and larvae. The flowering varieties (like water mint and mountain mint) also produce abundant nectar rich flowers that provide a vital source of food for pollinators like bees, butterflies and hoverflies. There are over 7000 species of plant in the mint family which includes includes lavender, rosemary. oregano, marjoram, basil, thyme, sage and lemon balm.

Mint leaves and flowers are also both edible for humans and can be used in both sweet and savory dishes. Mint is a good source of protein, thiamin, niacin, vitamin B6, phosphorus and zinc as well as smaller amounts of dietary fiber, vitamin A, vitamin C, riboflavin, folate, calcium, iron, magnesium, potassium, copper and manganese. They can be eaten fresh* or dried and the leaves are often used as a wonderfully aromatic herb to flavor both savory and sweet dishes. *Please make sure any herbs or flowers you pick from a garden are edible, pesticide free and have been thoroughly washed before using them.

Mint also contains a fragrant essential oil and menthol both of which are used as flavorings in many processed drinks and food as well as being used to make perfumes, toiletries, toothpaste, aromatherapy oils, cleaning products and cosmetics. The Egyptians used to use mint in funeral rights and as part of the mummification process and it was used in food and medicine by the Greeks and Romans. They also spread fresh sprigs mint across the floor so when the leaves were crushed under foot they would release a fresh minty scent like a natural air freshener.

Mint also acts as an environmentally friendly form of pest control for gardeners and farmers as it can be used both as a ‘companion plant’ and a ‘trap crop’ The strong aroma of mint plants masks the scent of other plants and deters pests like mosquitos, houseflies, cabbage moths and ants. It also acts as a decoy plant attracting some insects like aphids and flea beetles and root flies away from vegetables like cabbages and carrots and flowers like roses. Mint also attracts beneficial predator insects like wasps and hoverfly larvae that eat aphids and other crop pest insects.
You can find lots of fun and simple mint activity ideas and recipes below to enjoy.

1. Brew fresh mint tea
Fresh mint tea smells and tastes amazing. It is also caffeine free and good for your digestion so children can enjoy trying it too. All you need to make fresh mint tea is some freshly picked mint leaves, hot water* and a teapot. Carefully wash and inspect the leaves making sure to remove any damaged ones then place them in the teapot, cover the leaves with boiling water and leave it to infuse. Don’t forget to add a little cold water to take the temperature down before you drink it. (always check the temperature is safe before serving to children.) You can enjoy your mint tea warm or turn it into ice tea by adding more cold water and ice cubes. You could even add a bit of sugar or honey for sweetness.

*Please make sure any herbs or flowers you pick from a garden are edible, pesticide free and have been thoroughly washed before using them and don’t let children near boiling water.
2. Make edible mint ice cubes
You can easily make decorative edible ice cubes for drinks using fresh mint leaves. Simply freeze washed mint leaves and drinking water together in ice cube trays. You can then pop them into your drinks as pretty decorations. *Please just be aware of the choking hazard of the ice cubes with small children.

3. Fresh mint syrup
Mint syrup is so beautifully fragrant, fresh and simple to make, all you is:
- Two handfuls of fresh mint leaves (or roughly100G)
- 250ml water
- 100g sugar
Mix the water and sugar together in a saucepan and then bring it to the boil, add the mint leaves and then reduce the temperature down to a simmer for 10 minutes (you do not need to stir it). Take the saucepan off the heat and leave the mixture to cool for 10 minutes. Sieve out the mint leaves and place you finished syrup in a sterilized jar or bottle. The syrup will keep in the fridge for a week or too. Or you can freeze into small portions in an ice cube tray. Enjoy using the syrup to flavor different foods and drinks like cordials, cakes, cocktails, lemonade, chocolate, yogurt, puddings and ice cream.

*You can sterilize old jam jars by rinsing them out well with soapy water then filling them with boiling water for 5 minutes or by placing them in a warm oven for a few minutes (caution this will make the glass really hot, so handle with care and oven gloves.)
4. Mint cupcakes
To make mint cupcakes you will need you will need
- 100g softened butter or an alternative butter spread
- 100g caster sugar
- 1 egg (lightly beaten)
- 100g self raising flour (or alternatively 100g of plain flour with 2 teaspoons of baking powder added)
- 1 teaspoon of baking powder
- 1 tablespoon of finely chopped fresh mint leaves
- Optional – add in some milk or dark chocolate drops

Before you start it helps to preheat the oven to 180 oC/340oF.0
First put the butter and sugar together in a mixing bowl and beat it together until it’s light and fluffy. Next gradually add in the beaten egg whilst continuing to stir the mix. Add in the flour, baking powder, mint leaves and chocolate drops if you are using them. Then whip everything with a spoon or mix with an electric mixer for for a few minutes until the mix is light and fluffy.

Pour the mix into cupcake cases (don’t fill to the top as the mixture rises quite a lot) and place in the oven for 15 minutes or until the cakes are golden brown. Leave to cool and then enjoy as they are or decorate. You can also make mint flavored icing by boiling mint leaves in water for 5 minutes. sieve out the leaves and then use the mint infused water to make up your icing as normal.
5. Mint shortbread biscuits
Ingredients.
- 120 g of Butter
- 60g of caster sugar
- 180g of plain Flour
- A tablespoon of fresh mint leaves
- Optional – add in some milk or dark chocolate drops
Firstly heat the oven to 180c
Cream the butter and sugar together before carefully add in the flour, leaves and chocolate drops then mix until you have a smooth mix you can roll into a ball. Chill the dough in the fridge for 30 minutes. Roll the dough out to biscuit thickness and then use cookie cutters to cut out the biscuits. Place the biscuits on a tray covered in greaseproof paper, then pop them into the oven for 15 minutes (or until golden brown). The biscuits should keep an air tight container for 5 days or you can freeze them and save them to enjoy at a later date.

6. Fresh mint tooth paste
Fresh mint toothpaste is so quick and cheap to make. Please note homemade toothpaste aren’t as effective at cleaning teeth as toothpastes that contain fluoride but the process of making them can be fun and educational for little learners. You just need to collect some fresh mint leave and grind or crush them into a fine paste using a pestle and mortar or a blender. Next mix the mint leave paste in with 2 tbsp of baking soda and 4 tablespoons of coconut oil. Now you can put your ready made toothpaste in small sterilized jar and keep it in the fridge for upto a week.

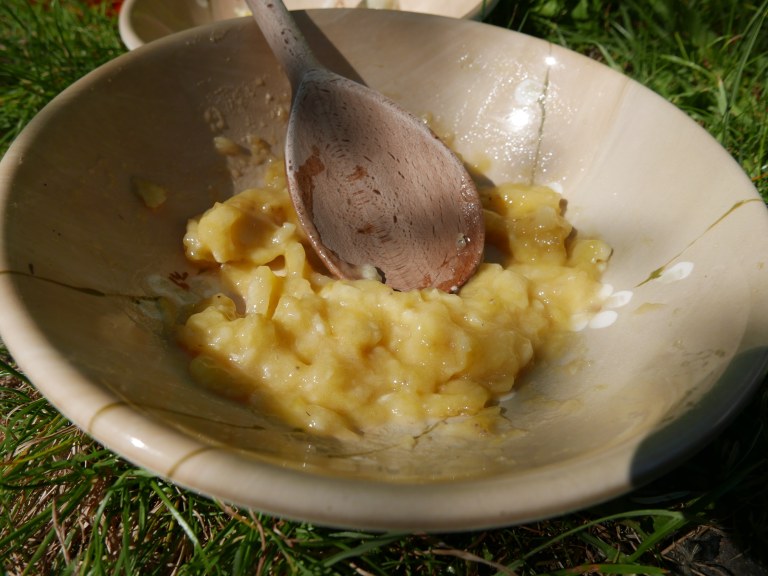
7. Fresh mint face masks
Mint is a source of menthol which can create a cooling and refreshing feeling on your skin This makes it a fantastic ingredient to put in fresh facemasks. To make a fresh face mask simply crush and mix any combination and amount of the ingredients listed below together. It does help to have a liquid base like banana, yogurt or honey to make it easier to spread your face mask on but its not essential. It’s great fun experimenting with different ingredients. When you are finished you can chill your face mask for a few hours or use it immediately, they don’t keep long so use them up quickly! Just remember to do a small skin sample test on your arm for a few minutes first to make sure you don’t have a reaction to any of the ingredients.

- Bananas makes a great starter base for a face mask as its naturally moisturising and makes your skin feel refreshed. Its also a great way to use up overripe bananas.
- Natural yogurt is also a good starter base as it contains lactic acid which helps cleanse your skin.
- Honey has natural antibacterial properties and also moisturises and helps soothe irritated skin.
- Lemon juice, orange juice, lime juice and grapefruit juices are all great cleansers and helps brighten tired skin.
- Oats contain compounds that soothe itchy, dry and irritated skin.
- Edible and skin safe flowers and herbs like nasturtium, lavender, rose, mint and rosemary all contain rich and calming essential oils that are good for your skin and also smell fantastic.
- Cocoa powder (unsweetened) smalls delicious and mentally boosts and uplifts your mood… it also might make you want to eat chocolate.
- A drop or two of skin safe essential oils (check to make sure its safe for contact with the skin before use) can all add an extra sensory, uplifting or calming element to your facemask.
- Sugar, desiccated coconut, coffee grounds and baking soda are all great exfoliates you can add to your face mask to carefully rub away dead skins cells with.
8. Mint lip balm
It is surprisingly simple and easy to make your own natural mint lip balm using just 3 ingredients. First you need a handful of mint leaves, Bees wax or the vegan alternative of candelilla wax and a carrier oil like olive oil, sunflower oil, coconut oil sweet almond oil or castor oil. First place the mint leaves in a jam jar and cover them with your choice of carrier oil. Then place the jar on a window sill or warm place to infuse for 2 weeks. Make sure you stir the oil every few days and make sure the flowers are completely covered with oil.

After 2 weeks strain the oil through a muslin a cup or jug and measure the weight. If you are using bees wax you will need 1 part beeswax to 3 parts oil (For example 300g of oil only needs 100g of beeswax), If you are using candellia oil you want to use 1 part to 4 parts oil (for example 200g of oil needs 50g of beeswax). Pour the oil into an old saucepan and gently heat, add in the bees wax of candillia wax and stir until its fully melted and mixed together. Pour it into a sterilised container* or pot like an old mini jam jar and leave to cool and set. If your lip balm turns out too soft or hard you can always re-melt it and add in more oil or wax.
9. Mint leaf potato prints
Potato printing is a simple activity for children of ages, all you need is a potato cut in half, a bit of inspiration and some paint to get started. They make great invitations to play for children of all ages and you can use the potato prints to make patterns, pictures, cards or recyclable wrapping paper.

Mint leaf potato stamps and easy to make. You just need to cut a leaf shape into a potato half. You can do this by cutting one end of the potato half into a triangular point. Then carefully cut a line down the centre of the potato half with two or three lines branching out on either side. Finally dip your potato stamp in green paint and have fun printing lots of mint leaves.
10. Go on a wildlife safari amongst the mint plants
You might be surprised at the amount of wildlife you can find amongst mint plants. If you look along the stems and under leaves you can often find eggs, larvae, caterpillars and other insects and mini beasts such as aphids, snails and slugs. Pollinating insects like bees, beetles, butterflies and moths will also be attracted to flowering mint flowers. You could look amongst mint plants in the garden or go out and find wild mint plants. You could also take a notepad or camera with you to record your finds and help citizen science by recording any insects you spot on the I spot nature site.

11. Make sensory exploration pots
Scented herbs like mints along with edible flowers, spices and fruits are great for sensory exploration and play. You can easily fill some recycled pots or containers with a variety of differently scented materials. Then the children can have fun guessing what is in each pot by smelling and shaking them whilst the lids are on. Or by opening them to touch, taste and explore the what is inside. Here are some ideas of sensory materials you could use:
- Edible flowers: Roses, Dandelions, Elderflower, Marigolds, Nasturtiums, Borage, Pansy’s or Primroses.
- Scented herbs: Lavender, Basil, Rosemary, Marjoram, Sage, Thyme, Oregano, Parsley and Chives.
- Spices: Cumin, Cinnamon, Paprika, Vanilla, Turmeric, Ginger, Cardamom, Anise, Clove and Liquorice.
- Fruits: Orange, lemon, lime, apple, grapefruit, strawberries and banana.

12. Mint nature painting
Nature painting is a simple activity for children of all ages, Just simply dip mint sprigs and leaves into paint and use them as natural paintbrushes or paint, print and mark make with. How about experimenting with other different natural materials to see what variety of marks you can make by using different shapes and textures. Recycled cardboard is a great environmentally material to use instead of paper for your nature painting. Simply cut out panels from old cardboard boxes and packaging.

13. Sensory mint water play
Water play is a great sensory activity for children of all ages. Mint leaves and sprigs scattered in the water help to add extra scent, colour and texture for the children to enjoy and explore. The essential oils and menthol in mint are wonderfully calming, refreshing and uplifting and mint itself is edible so it is taste safe for younger children that like to taste and explore things with their mouths. *Just please be aware of the health and safety and risks with babies and don’t leave children unattended around water.

14. Sensory mint ice play
After you finish you can recycle the water and materials by pouring them into different shaped containers or ice cube trays to freeze and replay with as ice blocks another day. It’s fascinating to see the objects trapped in the ice. You can hold the ice up to the light or experiment melting or breaking the ice in different ways You could also incorporate them into water play or use them in pretend play with mud kitchens. The children will enjoy exploring all the different scents and textures as the ice melts.

15. Mint scented playdough
It is surprisingly quick and simple to make your own homemade playdough using just kitchen cupboard ingredients. You can also easily add extra sensory elements with natural materials like scented herbs like mint and lavender or dried or fresh flower petals. You could also pop in a few drops of food colouring or flavorings to give it a bit more scent or colour.

To make your playdough base you will need the following ingredients.
- 300g of plain flour
- 80g salt
- 2 tablespoons of cream of tartar
- 2 tablespoons of vegetable oil
- 240ml of hot water
First mix the flour, salt and cream of tartar together than add in the oil and any other additional natural materials. Next start to pour the water in slowly (you might not need it all) and if you are using food colouring or flavouring you can add a few drops now.
If the playdough feels to wet then add in more flour it it feels to dry add in a few more drops of water. Finally knead your playdough until its a smooth consistent dough. Once it feels right then it’s ready to use. Children can add additional natural materials to the dough as they play and have fun exploring and experimenting with mark making as well. Just remember that salt is toxic to plants and wildlife so do not leave playdough outside unattended or let it come into contact with grass or plants outdoors. We always play with ours on a tray or board.

Your playdough should keep for awhile in an airtight container in a cool dry place although the length will vary depending on the natural materials you use and if the playdough gets wet or damp during play. Always check it carefully before play and give it a sniff to make sure it doesn’t smell off.
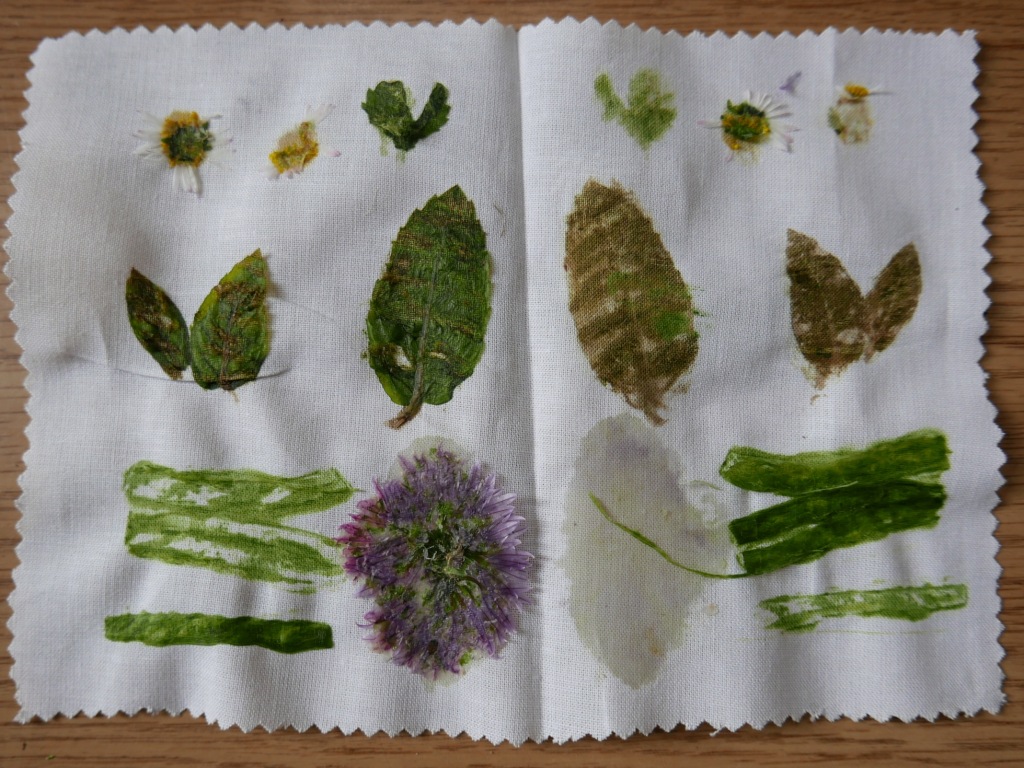
16. Tataki zome
Tataki zome is the Japanese art of transferring botanical dyes from flowers and leaves onto fabric by simply hammering them onto the surface. It’s also know as flower pounding, leaf bashing and sometimes refereed to as Hapa Zome. (Funnily enough Hapa Zome came from an artist getting the name wrong, now its more widely used than Tataki zome which is the correct name for it.)
For this activity you will need scraps of cotton or linen fabric or some old clothing. something to hammer with like a rounded stone, hammer or rolling pin, a safe surface to hammer on and finally natural botanical materials like herbs, flowers, leaves and grass. *Pretty please however don’t pick any wild flowers, only collect flowers you have grown yourself, fallen ones you find on the floor or flowers from shop bought bouquets.
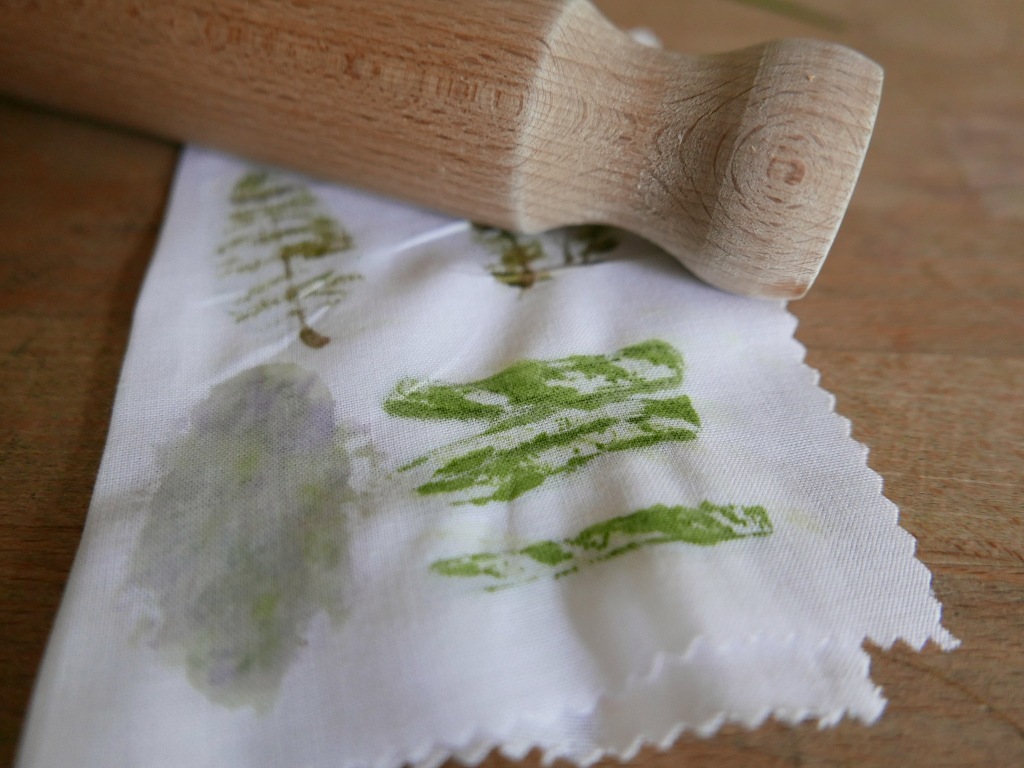
Lay the fabric or clothing flat onto a hammer safe surface and arrange your flowers and leaves on top. Then cover everything with a piece of paper or another piece of fabric. Carefully but firmly (supervision required at all times for this) hammer across the fabric with a stone or hammer. You should be able to see the dye seeping through the fabric so make sure you have hammered evenly across. Peel back the paper to see the images you have made.
For Day 5 of 30 Days Wild 2023 we explored herbs in the garden and looked for wildlife amongst the mint leaves, we also enjoyed making fresh mint tea, biscuits and our own fresh mint toothpaste.
If you like this you might like to try:
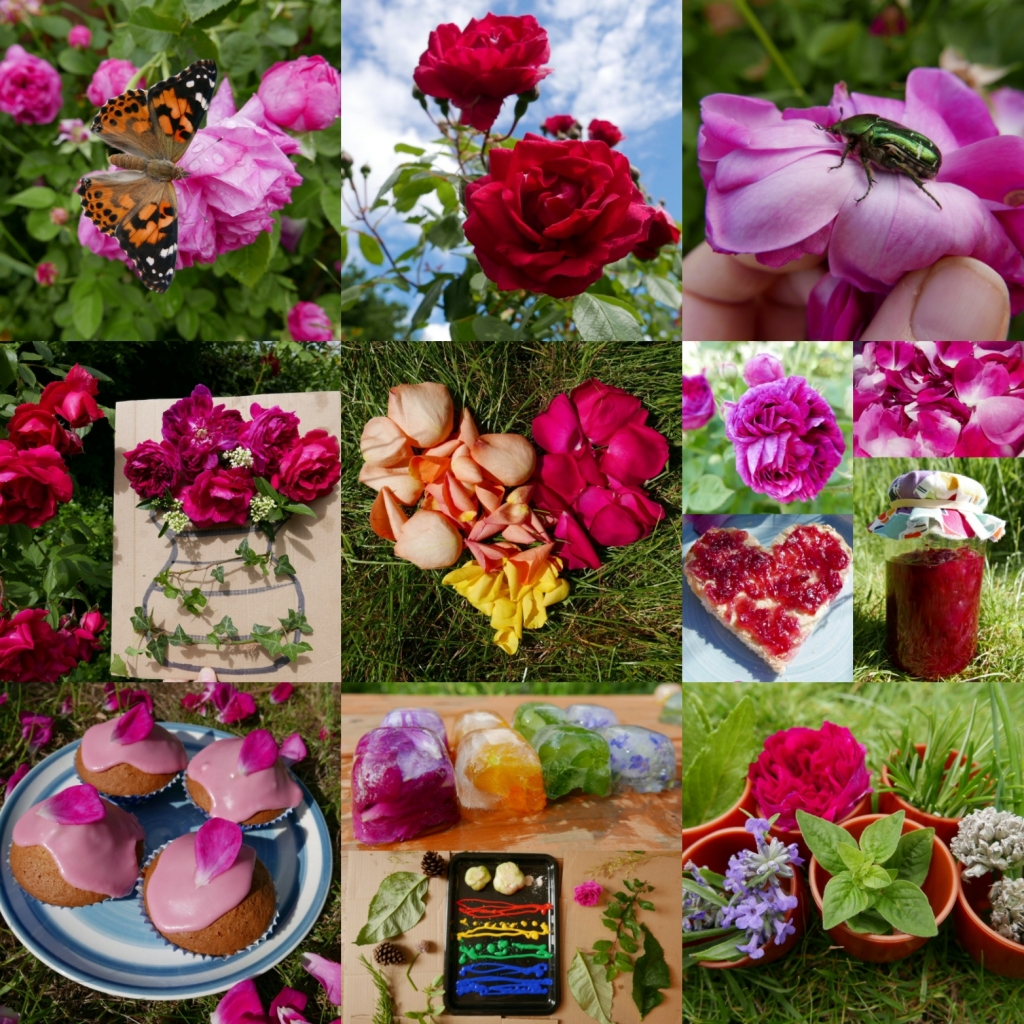
30 Rose activity ideas and recipes
22 Strawberry activities and recipes

Elderflower recipes and Elder tree activity ideas


2 thoughts on “16 Mint activity ideas”