
Ice play is a great activity for children of all ages. It is so quick and simple to make and you can easily add extra sensory elements using scented herbs, flavoured oils, colouring and textured natural materials. You can find 18 fun and easy ice play ideas below, from sensory and crafts to STEM activities and science experiments.
1. Edible sensory ice cubes
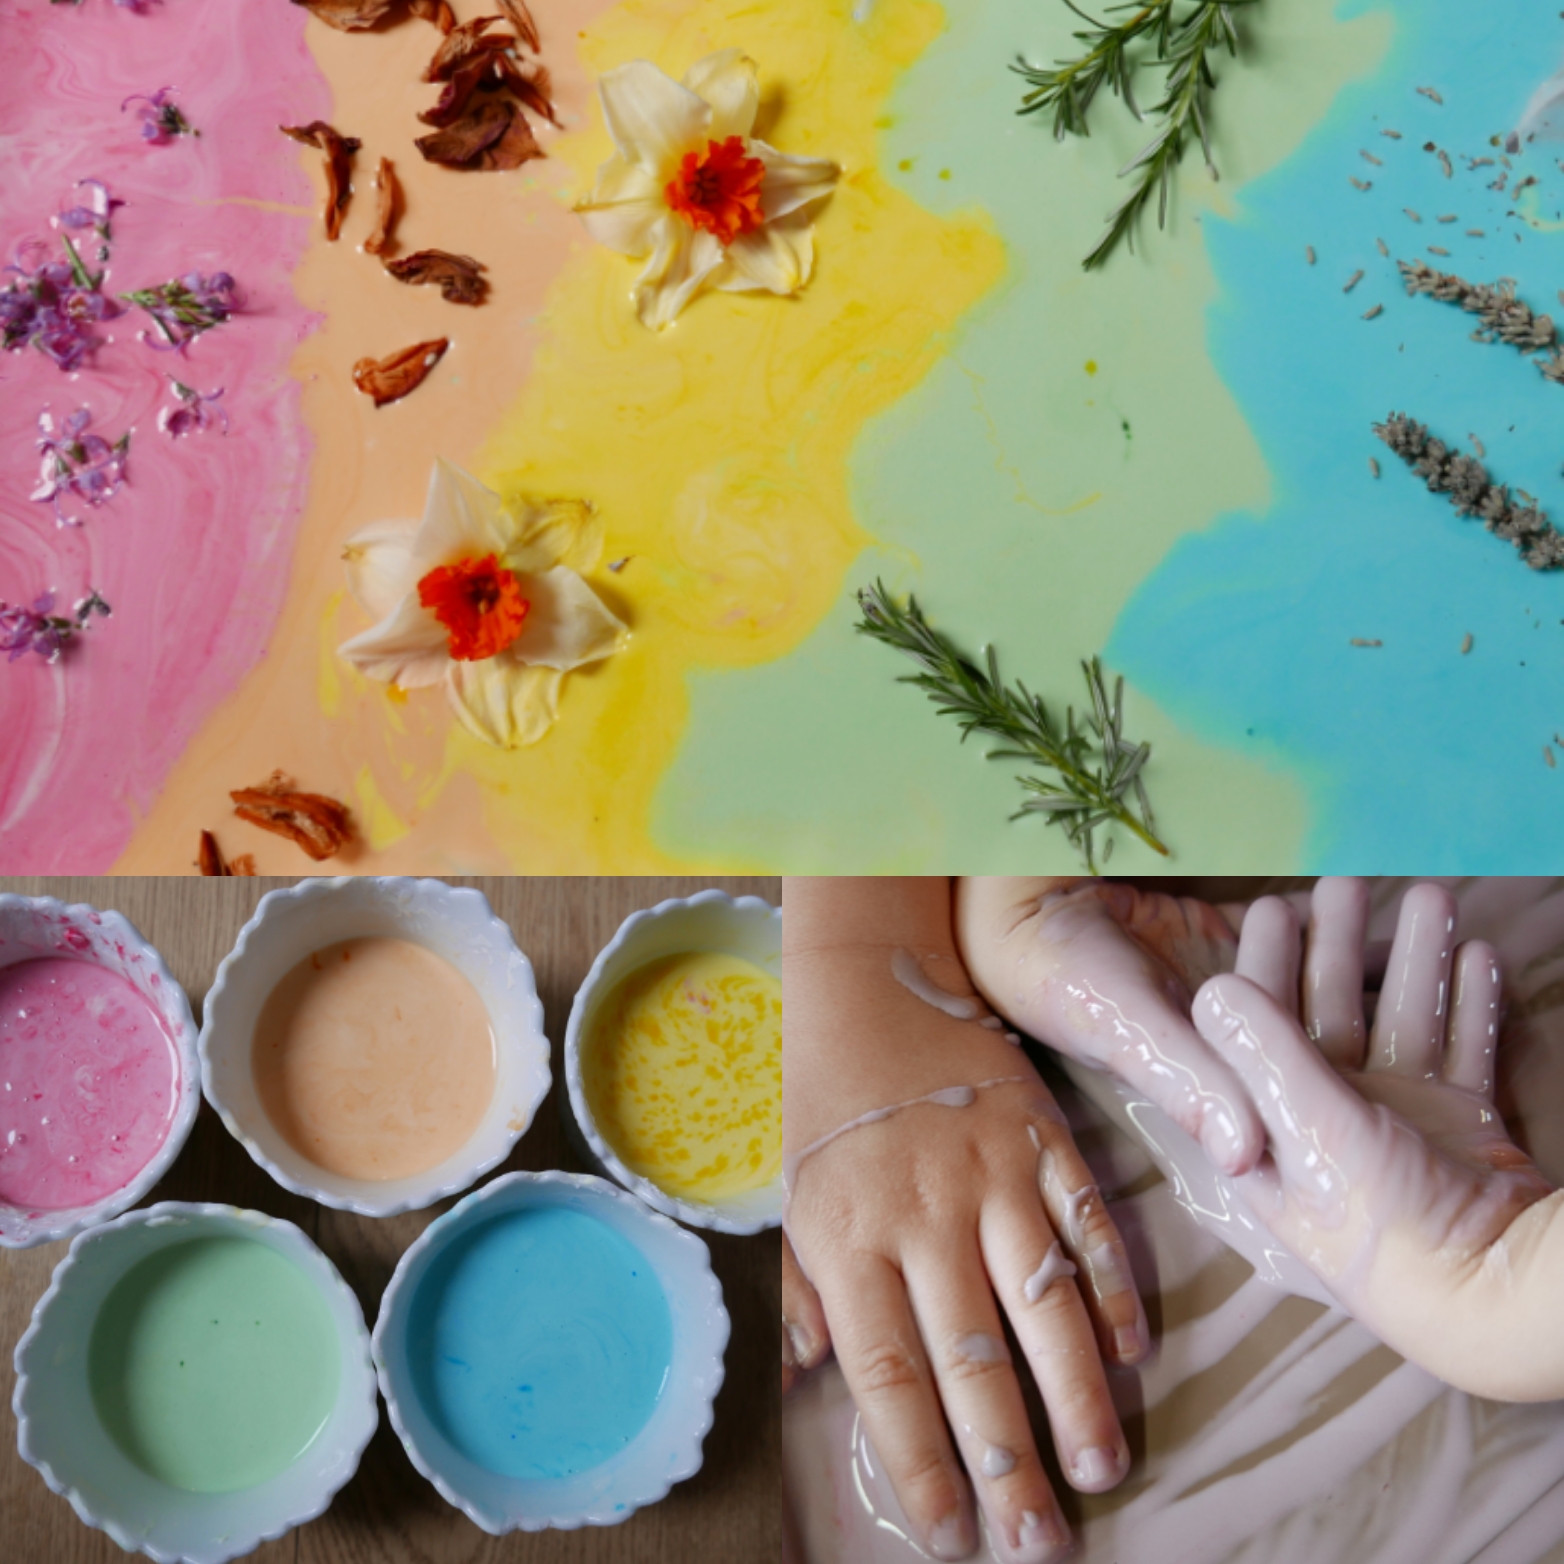
Ice is a wonderful material for sensory play and exploration. All you need for this activity is an ice cube tray, water and some edible sensory materials like scented herbs, edible flowers, fruits or food flavorings. Lavender and mint also wonderfully calming herbs to use, but you could also use uplifting fresh citrus fruit slices. You can find a handy list of edible sensory material ideas below for inspiration.
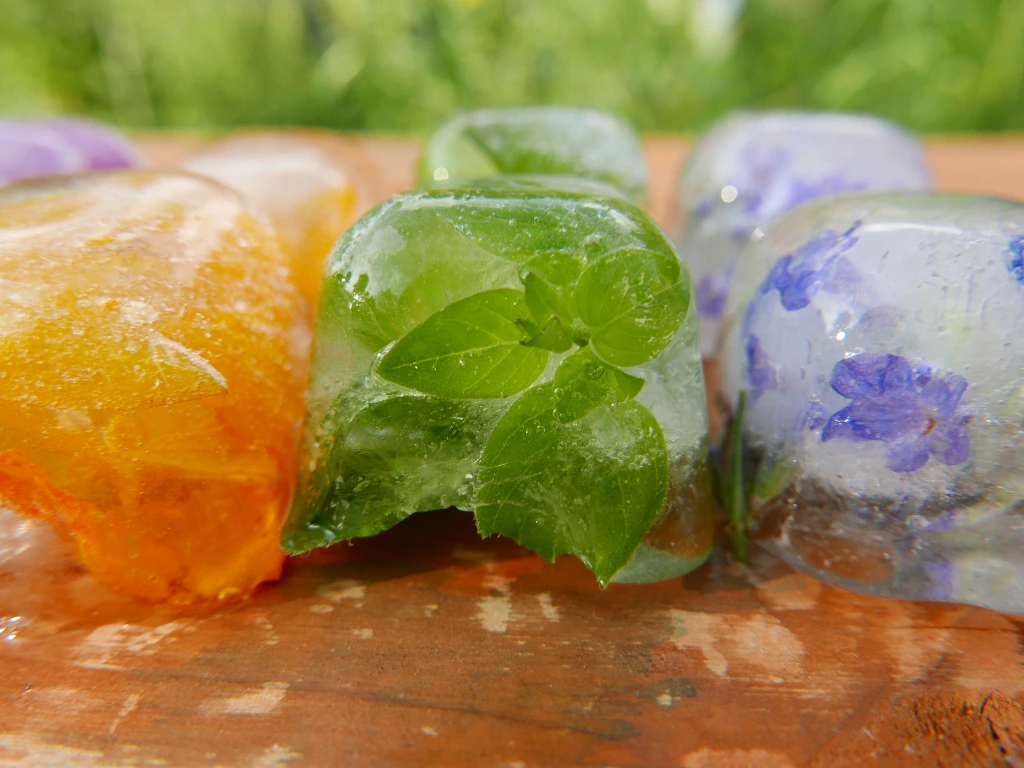
- Scented herbs like Lavender, Basil, Rosemary, Lemon Balm, Marjoram, Sage, Thyme, Oregano, Parsley and Chives.
- Edible flowers like Roses, Dandelions, Elderflower, Marigolds, Nasturtiums, Borage, Pansy’s or Primroses.
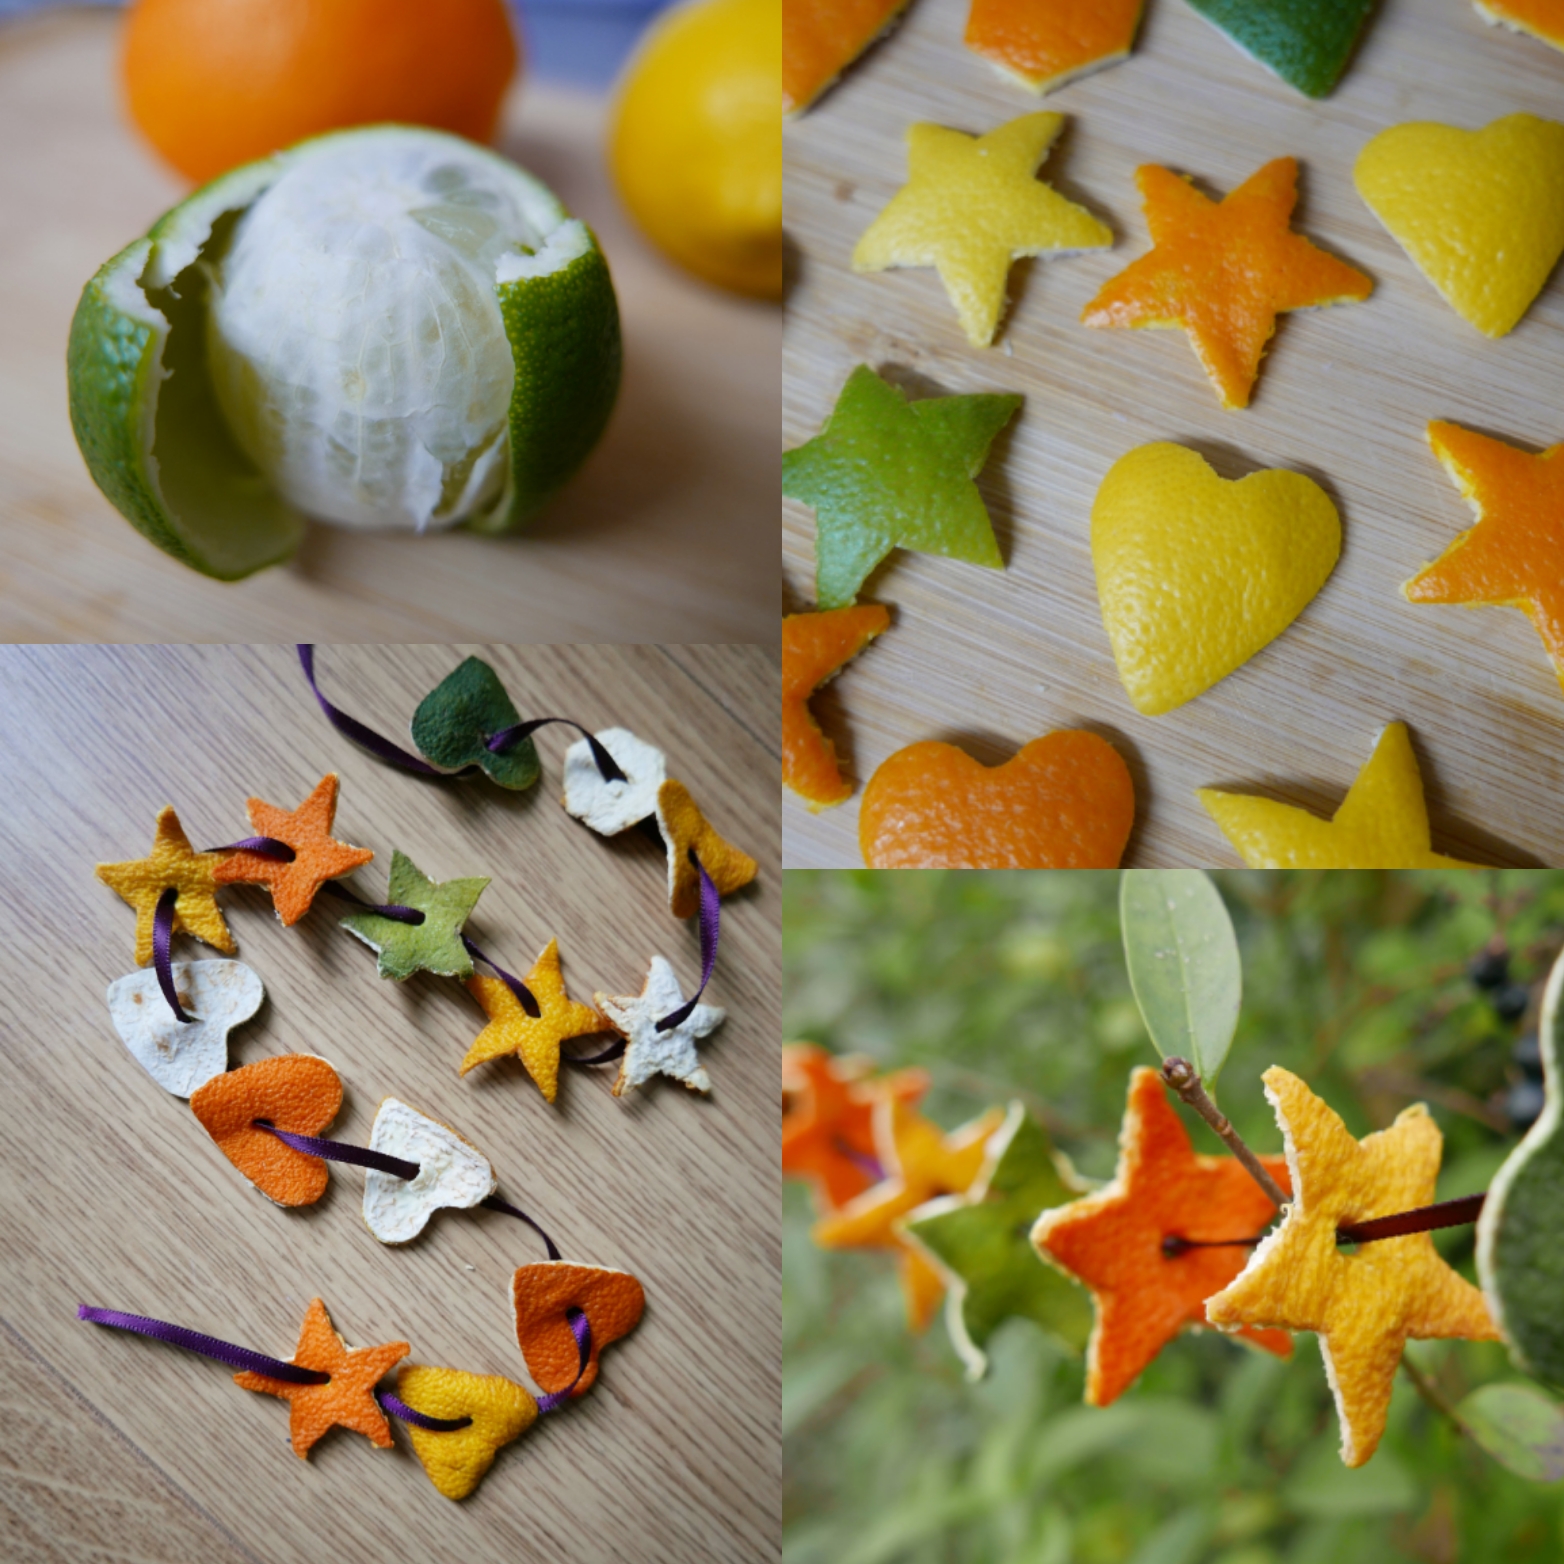
- Citrus fruit slices or citrus peel play shapes like oranges, lemons, limes or grapefruit.
- Other chopped fruits like strawberries, melon, raspberries, blackberries, apple, plum, peach or grape quarters.

Simply place a selection of the different sensory materials into the ice cube tray and then fill it with water. Place the tray in a freezer for a few hours or overnight to freeze. Then pop out the ice cubes and enjoy them in sensory play. You could also incorporate them into water play or use them in pretend play with mud kitchens. The children will enjoy exploring all the different scents, tastes and textures as the ice melts. *Please just be aware of the choking hazard of the ice cubes or any other materials you use with small children.
2. Multi shaped sensory ice blocks
Another way to incorporate ice into sensory play is to make different shaped blocks of ice. For this you simply pour water and any additional sensory materials into different shaped and sized recycled containers to freeze and play with as ice blocks. This is also a great way to recycle any water leftover from sensory water play.

It’s fascinating to see the objects trapped in the ice. You can hold the ice up to the light or experiment melting or breaking the ice in different ways using warm water, tools or even salt (please be aware salt is harmful to plants and wildlife so please don’t use it outdoors). Or the children can have fun stacking and playing with the ice to make towers.
You can make your ice block shapes even more interesting by creating holes and hollows in them by stacking different container inside each other when you freeze them. Fill your largest container or bowl of water and materials and then then place another bowl half full of water inside the first container to create a hollow or hole inside. You could then put an even smaller container inside and so on and so on. Then simply pop the containers into the freezer and leave them overnight to freeze.

You should be able to remove the ice blocks from the containers by leaving then to thaw for a minute or two, then turn over the containers and gently tapping the ice blocks out. The children can then have fun stacking, building and playing with the bowls and blocks or melting them with warm water to release the natural treasures inside.
3. Colourful building blocks
One of our absolute favorite play activities is to make rainbow ice and colourful ice cube building blocks 💙💚💛🧡They are so simple and quick to make and great fun to build, play and experiment with .All you need to make these are some old yogurt pots or an ice cube tray (silicone molds would also work), water, food colouring and a freezer.

Simply fill the yogurt pots, ice cube tray or silicone molds with water and then add different drops of food colouring to each pot or segment. Then pop them in the freezer for a couple of hours or overnight to freeze. Pop the colourful ice blocks out onto a tray or outdoors surface and have fun experimenting with stacking, building and sliding the blocks in any way you like.

*Please note if you use too much food colouring it can stain hands, clothes or surfaces.

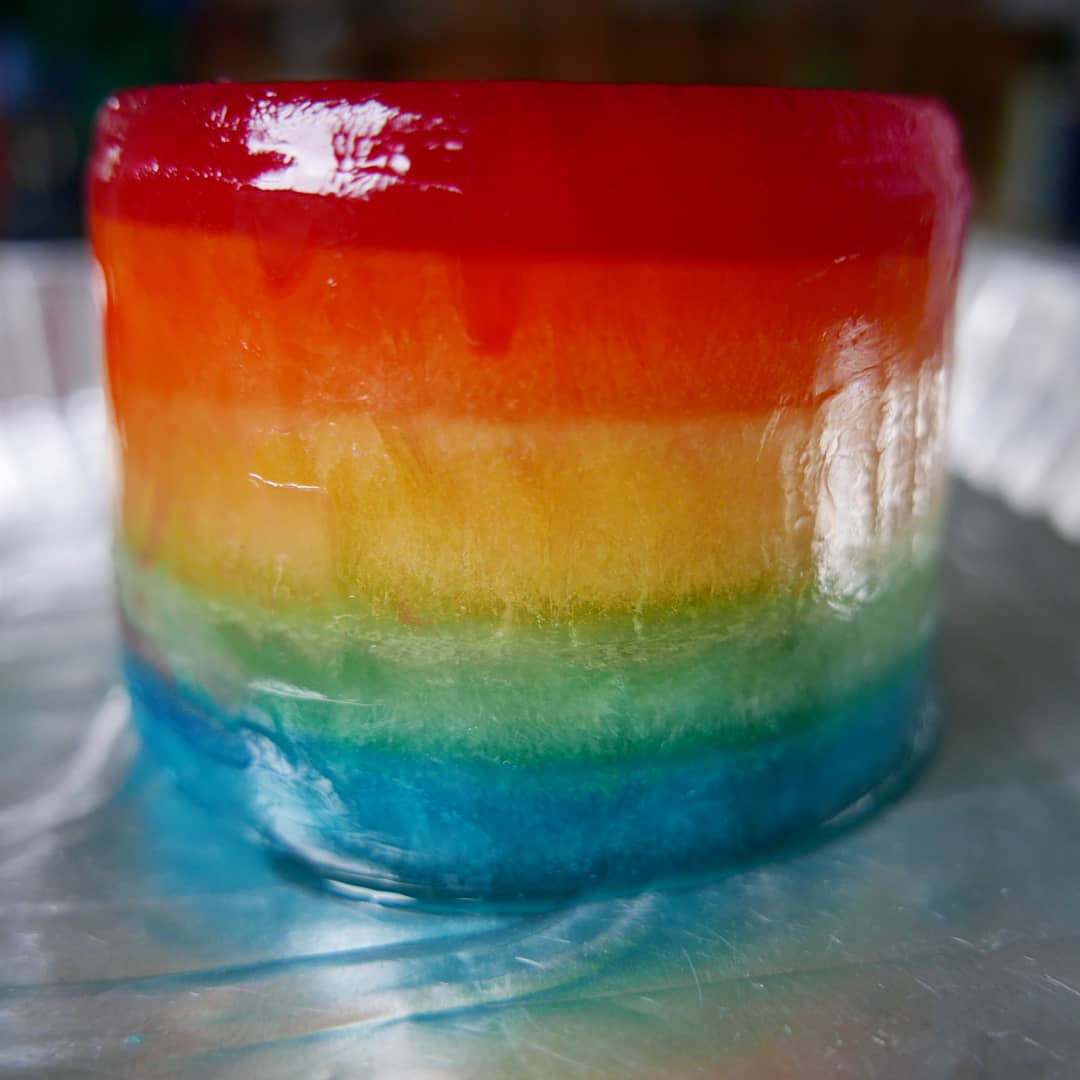
4. Rainbow ice block
Making a rainbow ice block takes a little patience as you have to freeze each layer of colour one after the other, but it’s well worth the time as you get a beautiful rainbow block of ice at the end. Simply mix up each colour of the rainbow using food colouring and water. Then pour the first colour into a freeze able pot or container. Then pop it into the freezer for an hour to freeze. Then pour the next colour and refreeze for an hour, and so on and so forth until you have a full rainbow. You can then have fun using the ice block in sensory play. *Please note if you use too much food colouring it can stain hands, clothes or surfaces.
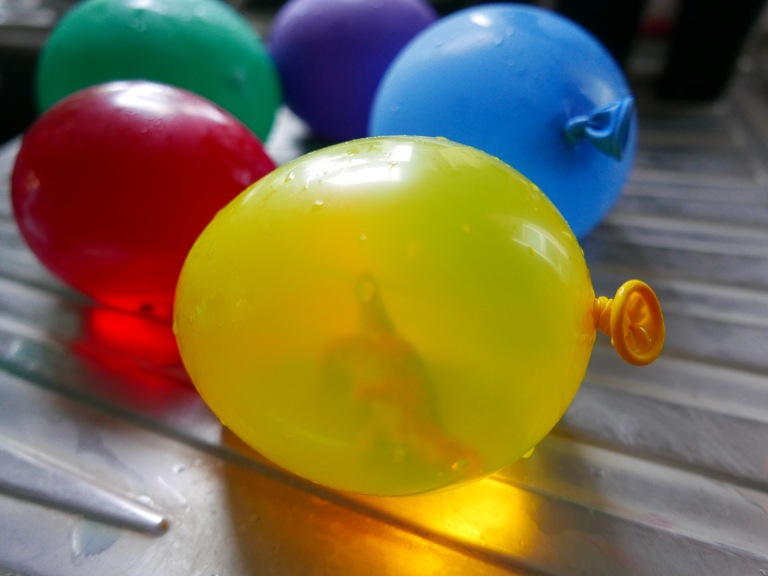
5. Ice globes
You can easily use a balloon to make some beautiful ice globes. To make a plain ice globe simply stretch the neck of a balloon over a tap and hold it firmly in place whilst you semi fill the balloon with water. Tie the end up securely and freeze the water filled balloon overnight. When your water is fully froze you can cut and peel the balloon off to reveal a perfect little ice globe.

You can also add extra sensory elements to your ice globes using scented herbs, food colouring and flavorings, flowers and other natural materials. *Please don’t pick any wild flowers, only collect flowers you have grown yourself or fallen ones you find on the floor. Simply place any of the sensory materials in the balloon before you fill it with water, then tie the neck securely and shake it well before you place it in the freezer.

6. Fake snow and snow cubes – (Taste safe and non toxic)
We have been experimenting with making fake snow and came up with this wonderful sensory snow experience that my children love. All you need is some ice cubes and cornflour or tapioca flour. The flour sticks to the ice cubes making them fluffy and soft to the touch. It also stops the chill from the ice so they are nicer for little hands. And they are easier to stack and build with as they aren’t slippery.

When the ice melts the flour then turns into Ooblock. Oobleck is named after a Dr Seuss story and its a non-Newtonian fluid. This means it acts like a liquid when its relaxed or being poured, but when you push, squeeze or exert any kind if force onto it, it becomes temporarily solid. This makes it a fantastic material for tactile and sensory play. It’s also taste safe and non toxic (although I wouldn’t let any children try to actually eat it.)
7. Ice cube igloo
Making an ice cube igloo is a simple activity that helps develop fine motor skills and patience. All you need is somewhere to freeze water, an ice cube tray and a round tin. To start you need to freeze a tray or two of ice cubes and make an ice base for your igloo using a round tray or tin lid.

When you start building you need to dip each ice cube briefly in a bowl cold water. Then when the blocks touch the water freezes between them helping them stick together. When your first layer is finished its best to put it back into the freezer for a short while to refreeze, this prevents the blocks melting and sliding apart. You can then complete each layer in the same way until your igloo is finished. Please note when you get to the doorway it’s best to balance two ice cubes touching to form a bridge and then add a supporting brick underneath.

When you finish your igloo you can have fun using it in roleplay and small play games with some toys, ice blocks and coloured water. Or how about adding some fake snow to your igloo when you have finished building? Cornflour or tapioca flour make great natural fake snow, the flour sticks to the ice cubes making them fluffy and soft to the touch. It also stops the chill from the ice so they are nicer for little hands.
You could also make your igloo into an ice lantern, using a candle to illuminate it in the dark and see how long the heat takes to melt the igloo. Safety note: Never leave open flames unattended and always fully supervise children round them.
8. Arctic and Antarctic small world play
How about making your own mini versions of the Arctic (North pole) and Antarctic (South Pole) to demonstrate the physical differences between the two, as well as learning about the different wildlife and animals that live in the Arctic and Antarctic. This is a great activity to incorporate books into as well.
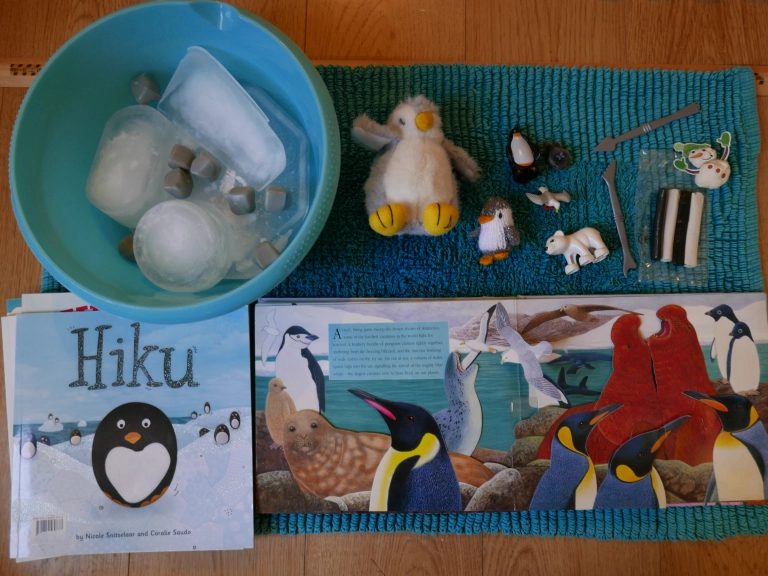
To make your modals you will need blocks of ice that you can male by freezing water in different recycled containers and some toy animals. For the Arctic you will need a bowl of water and for the Antarctic you will need a tray or frozen ice.
The Arctic otherwise known as the North Pole is mainly a sea of ice (the Arctic Ocean) surrounded by land that extends into 6 countries from Canada, and Alaska (USA) to Greenland (Denmark), Russia, Norway and Iceland. The Arctic is home to animals such as polar bears, arctic foxes, reindeer, snow owls and snow ox. There are also native human populations of Inuits, Sami and Yakuts.

Antarctica is different to the Arctic as it’s actually a continent (rather than a sea) covered in a large ice cap. Animals that inhabit Antarctica include penguins, leopard seals, sea lions, whales and a variety of birds. It is uninhabited by people although science expeditions/camps have been set up on the Antarctic.
9. Chemical reaction experiment using acid and alkalis
Creating a simple chemical reaction using acids and alkalis is a fun and easy activity children of all ages can enjoy. When you combine the acid with a carbonite alkali they react to create salt, water and carbon dioxide. As the carbon dioxide gas is released it bubbles up and out of the liquid.
You can easily freeze bicarbonate of soda (which is an alkali) mixed with food colouring and a very tiny amount of water. When you then drip an acid like vinegar or lemon juice onto the frozen bicarbonate of sodayou will get a chemical reaction that makes the ice bubble and fizz.

10. Ice fossils
A fossil is the preserved remains, imprints or impression of a once living thing like as animal or plant. Did you know the word fossil comes from the Latin word ‘fossilis’ which meant “obtained by digging”
Fossils can form in several ways, one of these is when the remains of animals and plants become trapped or encased in permafrost or ice. It is so easy to make your own ice fossils by freezing toy insects or dinosaurs in old recycled containers filled with water. You could also add in extra sensory elements using scented herbs, flavoured oils, colouring and textured natural materials.

If your feeling a bit more adventurous then you could let the children loose with hammers and tools to break the dinosaur or insect toys free. Safety note: Be careful to supervise children carefully with tools and taken precautions so they don’t break any of the toys or hurt themselves. I highly recommend doing this outdoors on soft ground.

11. Dinosaur ice eggs
You can also use a balloon to make dinosaurs ice eggs. Carefully push a dinosaur toy through the neck of a balloon. Then stretch the balloon neck over a tap and hold it firmly in place whilst you fill the balloons with water.
You could even place a small toy figure or animal in the balloon in the same way. Then the children can have fun releasing whatever is trapped within the globe. Either by pouring warm water over the surface till the ice melts enough to free it, or by putting the egg in a bowl of warm water.
Freeze the water filled balloons overnight. When the water inside the balloon is fully froze you can cut and peel the balloon away to reveal your dinosaur ice egg. Now you have an icy dinosaur egg you can have fun hatching or rescuing the dinosuar trapped within. Either by pouring warm water over the surface till the ice melts enough to free it, or by putting the egg in a bowl of warm water.

12. Evaporation. condensation and precipitation demonstration.
Water can exist in three different states as gas (water vapour), liquid (fluid) or solid (ice). Most of the water on earth is constantly moving and changing state as it passes through various stages of the water cycle. The water cycle is the process by which water travels between the surface of the earth and the atmosphere in continuous cycle. This is a simple science experiment that demonstrates the processes of evaporation. condensation and precipitation using just a glass jar, hot water, ice and either foil or clingfilm.

Simply pour hot water into the jam jar (caution this may make the glass too hot to touch) and then cover the top with foil or cling film. place a few ice cubes onto the top of the foil or clingfilm. We also decorated our jar before the experiment and added a few drops of blue food colouring to the water to make it stand out but you don’t need to do this.

Now you can watch and see what happens. As the hot water evaporates and turns into water vapour it rises and meets the cold air and surface caused by the ice cubes. As the air cools the water vapour turns back into water droplets which form on the side and top of the jar as condensation. As more condensation forms the water begins to clump together forming bigger and bigger droplets that eventually become too heavy. Gravity then pulls them down the sides of the jar as precipitation.
13. Ice decorations and water for wildlife
Ice decorations are something we make every summer as my children love the magical effect of a frozen flower sun catcher and they are so simple and easy to make. It is also a good way to provide water for wildlife on hot days, as your ice decorations melt birds and insects will stop by to drink and you can put a bowl or dish underneath to catch the water for other wildlife like hedgehogs.

All you need to make your own ice decorations some recycled plastic pots or tubs (of any shape or size it just needs to fit in your freezer), water, a piece of string and some natural materials collected from your garden or on a nature walk.
Please don’t pick wildflowers (they are an important source of food for wildlife), only pick flowers you have grown yourselves or ones that have already fallen to the ground.

Once you have collected some natural materials like flowers, petals and leaves simply put them in your recycled plastic container. Fill the the container with enough water to cover the natural materials. Then drape a loop of string into the container so the ends are submerged in the water but a loop handle dangles over the edge. When they freeze you can use the string to hang your decorations from. Now you simply pop all your containers into the freezer and leave them overnight to freeze. Then you can hang your decorations up as sun catchers and watch insects stop to take a drink from the melting ice.
14. Make ice shards
All you need to make ice shards are some shallow recycled containers filled with water and really cold weather or a freezer to use to freeze water over night with. You can then have fun removing the ice from the containers and breaking it into shards and chunks to stack, play, explore and experiment with.

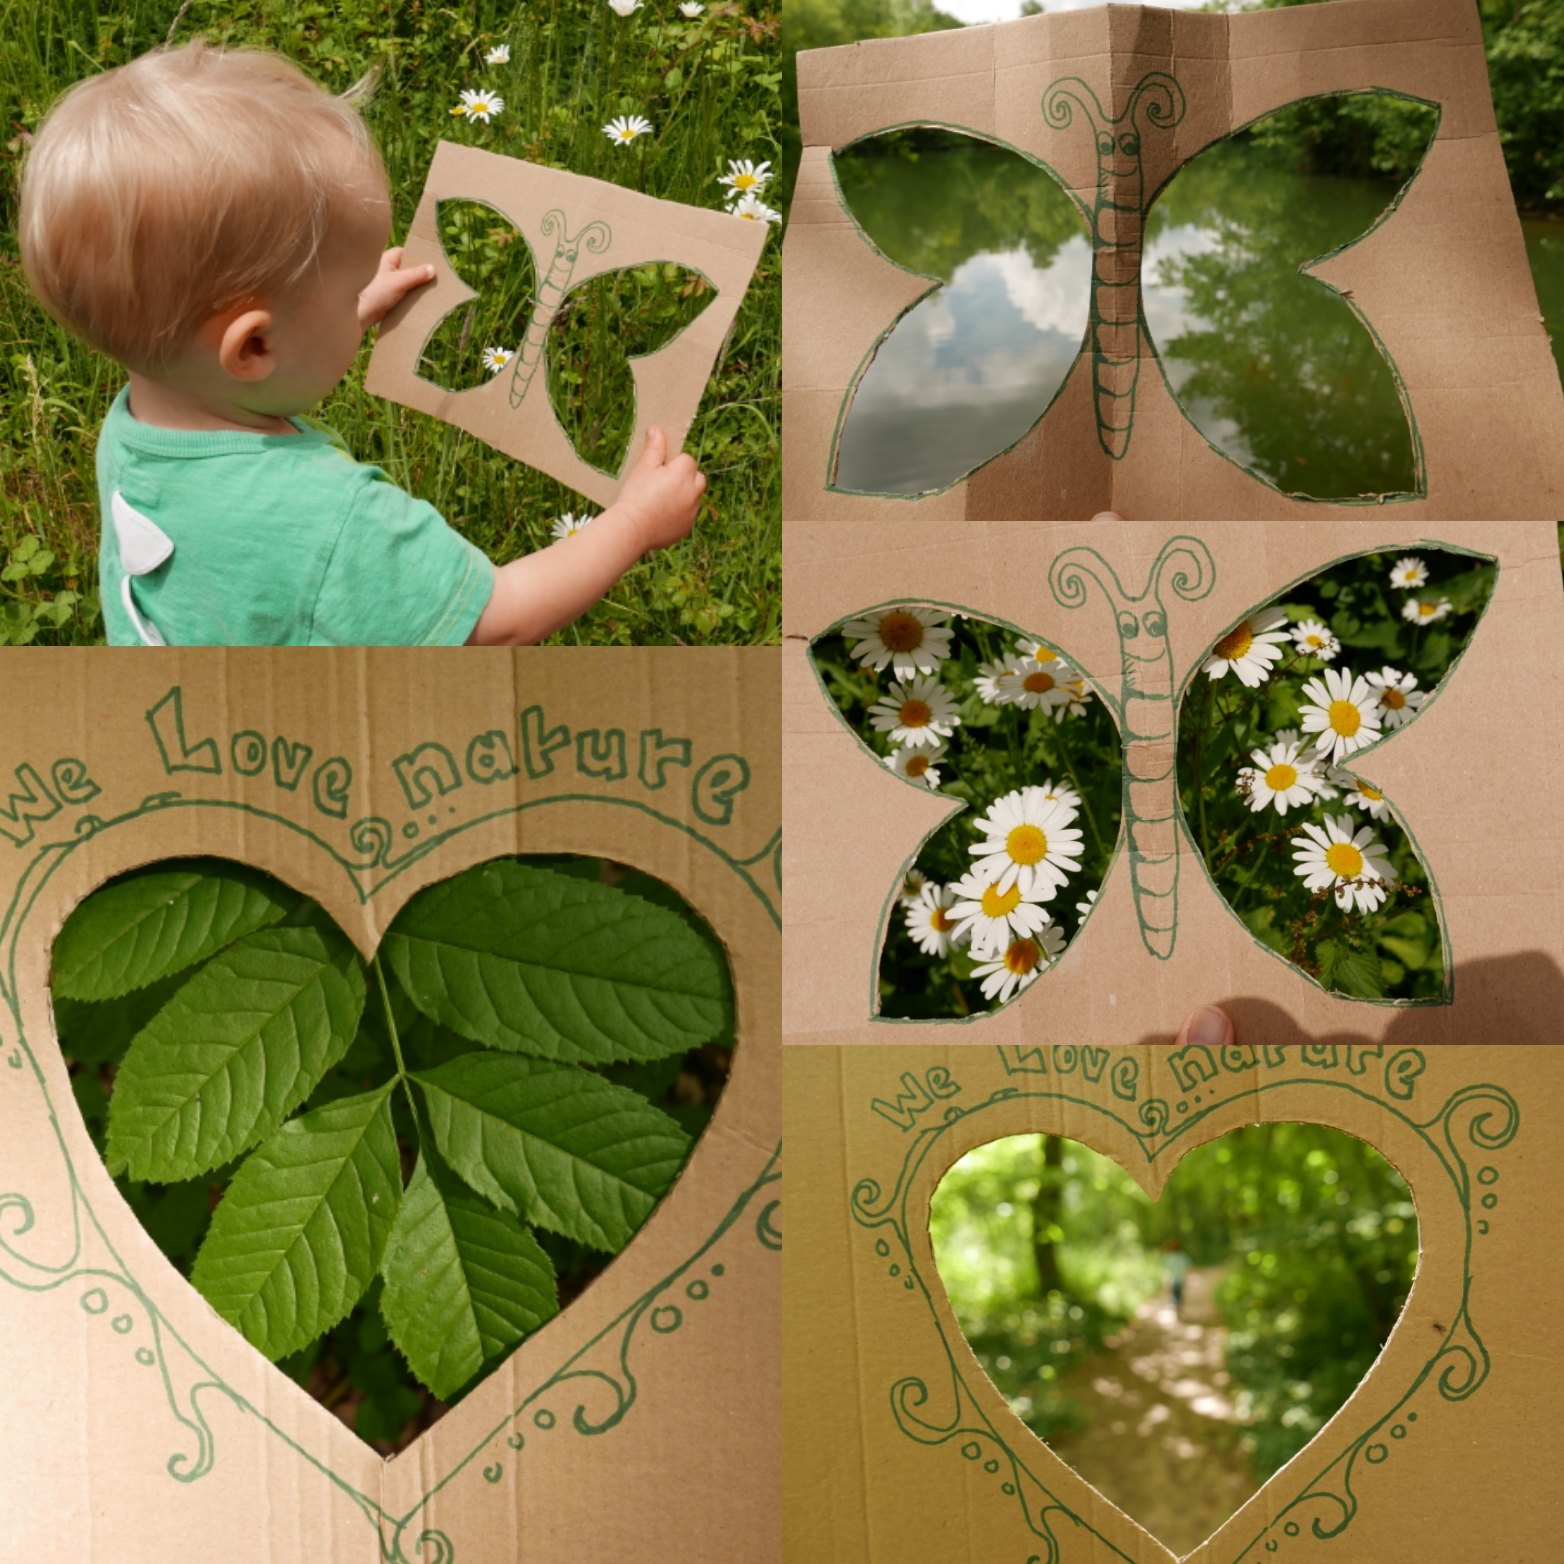
15. Make ice shard nature art
Nature art (also sometimes called land art) is a wonderful nature activity that encourages creativity and fine motor skills in children of all ages and abilities. All you need is some imagination and natural materials to make pictures, shapes and patterns or letters, numbers and words. How about using your ice shards to spell out simple words and messages.

Or make patterns and shapes like ice spirals, hearts, smiley faces or circles, squares and triangles. You could take photos of your ice shard nature art as you go so you can then print them out as artworks, learning resources or even turn them into cards to give to friends and family.

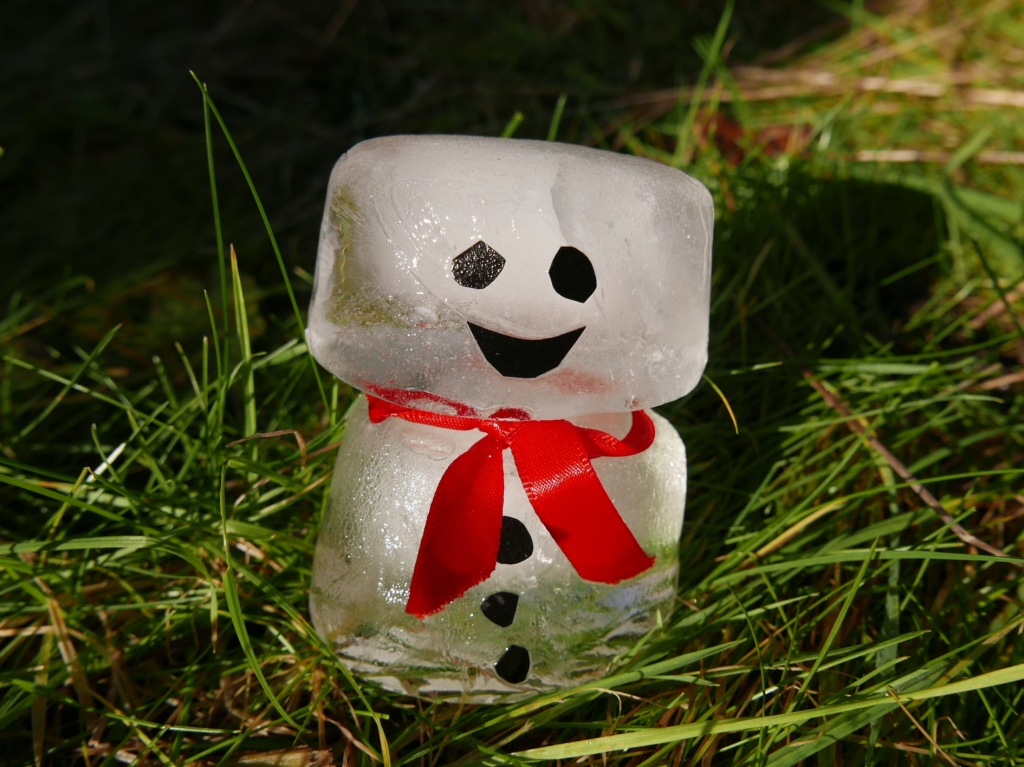
16. Ice cube snowmen
For this activity you stack two blocks of ice or two ice cubes on top of each other to make a snow mans body. Then add on paper eyes and buttons (they stick really well to the ice) and tie on a scrap bit of fabric or old ribbon as a scarf. Its a great activity for practising fine motor skills and developing imaginative play.
Afterwards you can have fun using your snowmen in role play games or experiment with melting them with salt and warm water. See if you can hear and see the ice cracking and popping when you first pour water or salt on it.
17. Reindeer ice blocks
Reindeer ice blocks are even simpler to make, just stick some small branched twigs into old yogurt pots filled with water and then freeze them overnight. Once you take the ice blocks out of the pots you can then add on eyes and a nose with paper and pens. Its a great activity for practising fine motor skills and developing imaginative play. Afterwards you can have fun using your reindeer in role play games or experiment with melting them with salt and warm water. See if you can hear and see the ice cracking and popping when you first pour water or salt on them.

18. Ice wreaths
Ice wreaths make great Christmas decorations outside in cold weather and they are also great fun for sensory and exploratory play. You can make them using any round recycled plastic pots or tubs with a smaller container placed in the middle. Just fill both containers water and any natural materials you can find. You could go on a nature hunt outdoors, exploring and looking for materials like leaves, plants, sticks, nuts and berries to put into your wreath.. (Please be aware that berries can be toxic. It’s important to ensure all children are carefully supervised and you pre warn them not to eat any.)

You can also use ringed cake tins filled with water to make your wreath, we found a little Bundt cake tin worked perfectly for this. How about adding in some scented oils (taste and skin safe) like peppermint to add an extra sensory element. You could also drape a loop of string into the water to hang your decorations from when they are frozen. Simply pop the containers into the freezer and leave them overnight to freeze.

This page features in Twinkl’s Learning in Nature with Childsplayabc.

If you like this you might like to try:
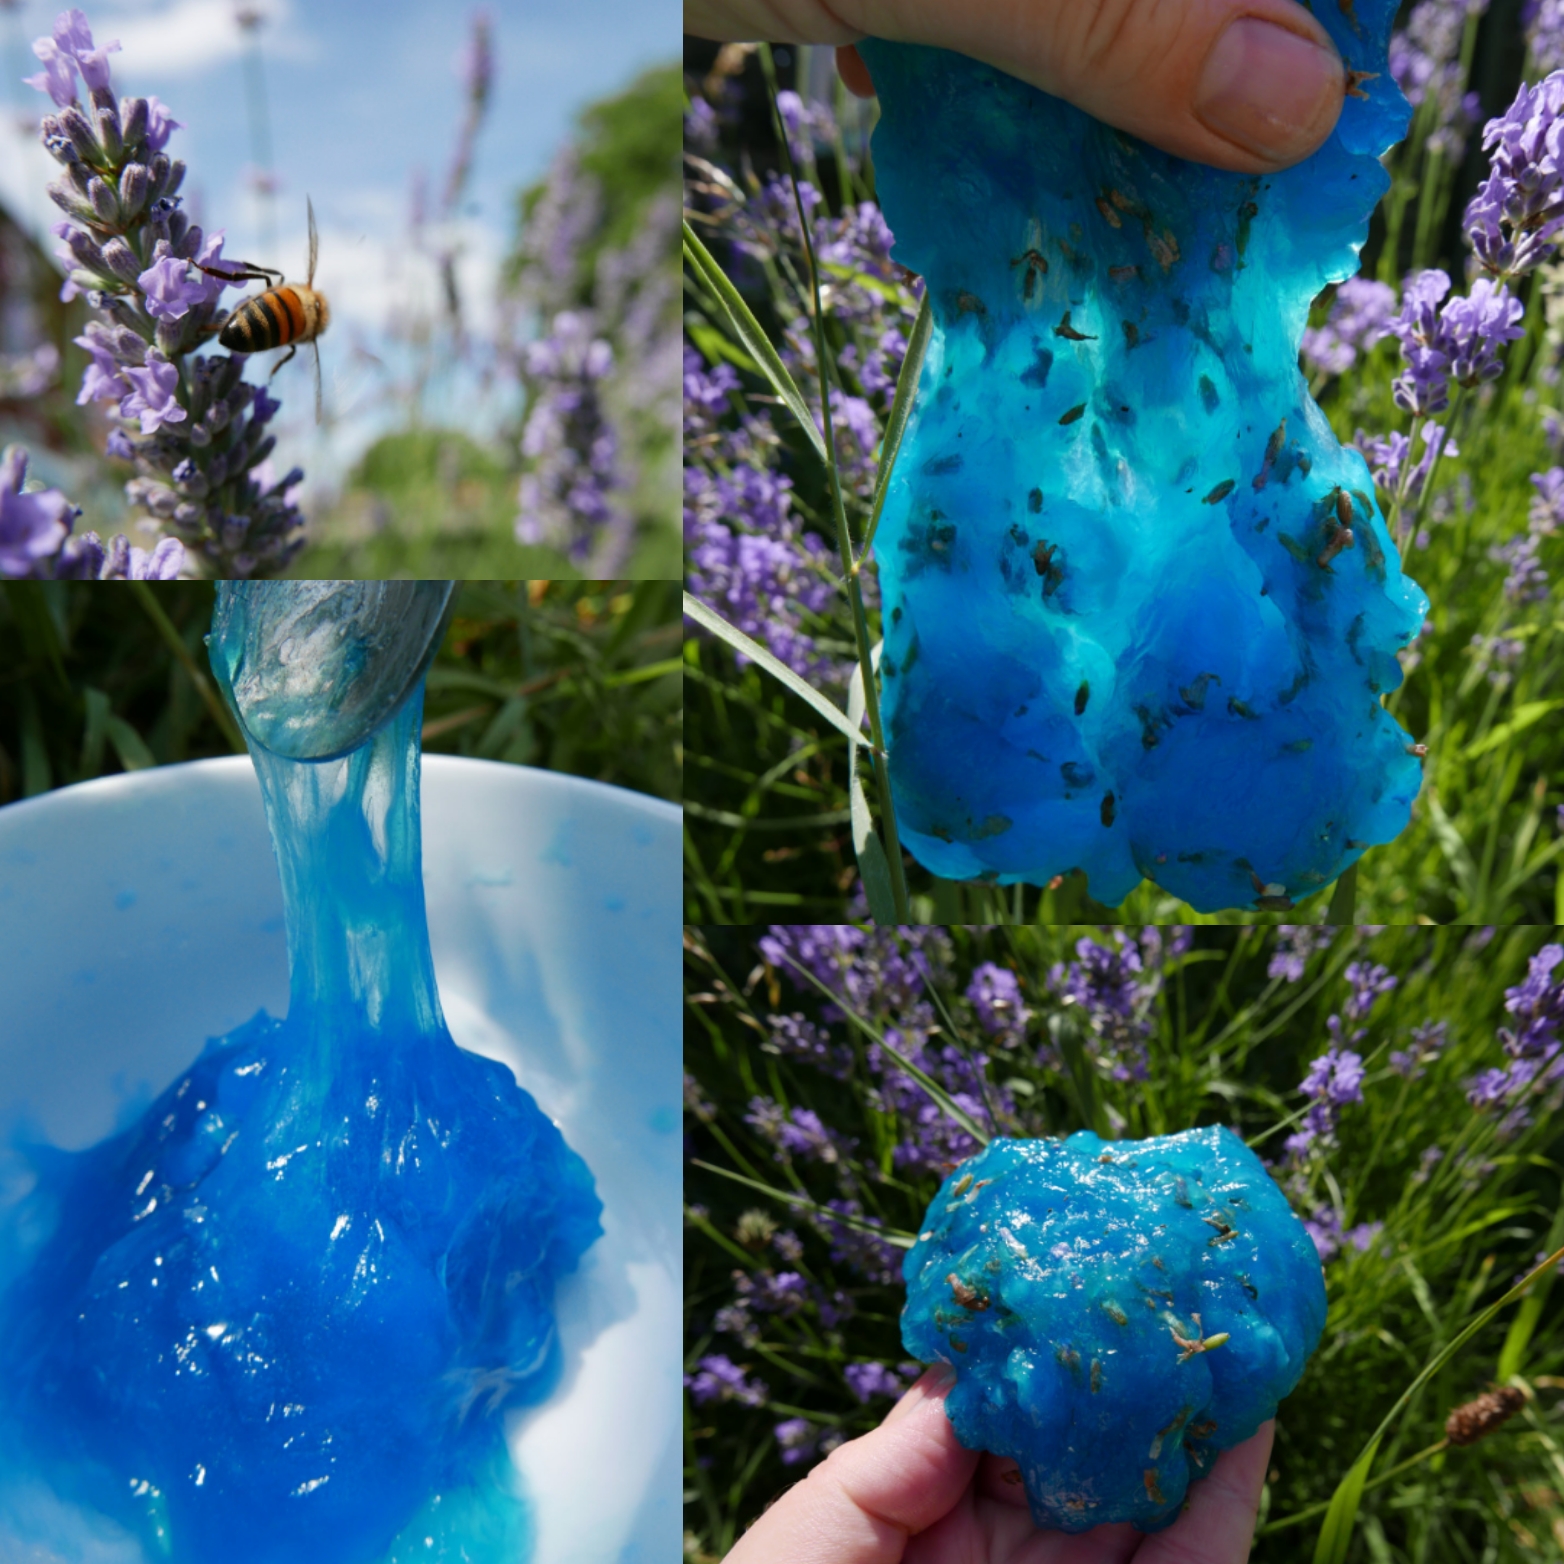
Nature slime (Non toxic and taste safe)

Super cute! ❤
LikeLike
😀❤
LikeLike