
Chives are a wonderfully fragrant and edible herb that belong to the Allium family. Did you know there are actually over 920 species of Allium plants which also include onions, leeks and wild garlic? Chives produce hollow tapering leaves and beautiful pom pom purple flowers that are nectar rich and provide a valuable source of food for pollinators like bees and beetles. Chives are actually rated as one of the top ten nectar producing plants in the UK .

The entire chive plant is also edible for humans, you can eat the leaves, flowers, and bulbs of chives. They are a good source of vitamins and dietary fibre as well as calcium, iron, magnesium, potassium, copper and zinc. Since early civilisation and throughout history humans have cultivated and used chives as food and for medicinal purposes. Dutch farmers in the 19th century even used to feed chives to their cattle to flavour the milk.

Chive plants can also act as an environmentally friendly form of pest control for gardeners and farmers as they can be used both as a ‘companion plant’ and a ‘trap crop’, the smell of chives masks the scent of other plants and the sulpher compounds they produce deter pest insects like aphids.
Did you know over a third of the food we eat comes from plants that rely on pollination, yet pollinator species across the world are in drastic decline due to widespread pesticide use and the loss of habitats. This is why its so important to help pollinators like by providing food and egg laying spaces for them.

You can easily grow chives in a garden, in window boxes or indoors in pots. You can then add the fresh or dried leaves and flowers to dishes like salads, soups, butter, pastas, cheese, eggs, vegetables meat or seafood. You can find lots more fun and interesting chive activity ideas and recipes below to enjoy.
1. Look for wildlife amongst Chive plants
You will often find pollinating insects like bees, beetles, butterflies and moths flying back and forth collecting nectar from chive flowers. It is fascinating to watch them stop to feed on the nectar from each flower. You may also often find a variety of minibeasts hiding along the stems of he chive plant as well. You could take a notepad or camera with you to record your finds. You can also help citizen science by recording any minibeasts you find on national databases like Nature’s Calendar or iRecord.

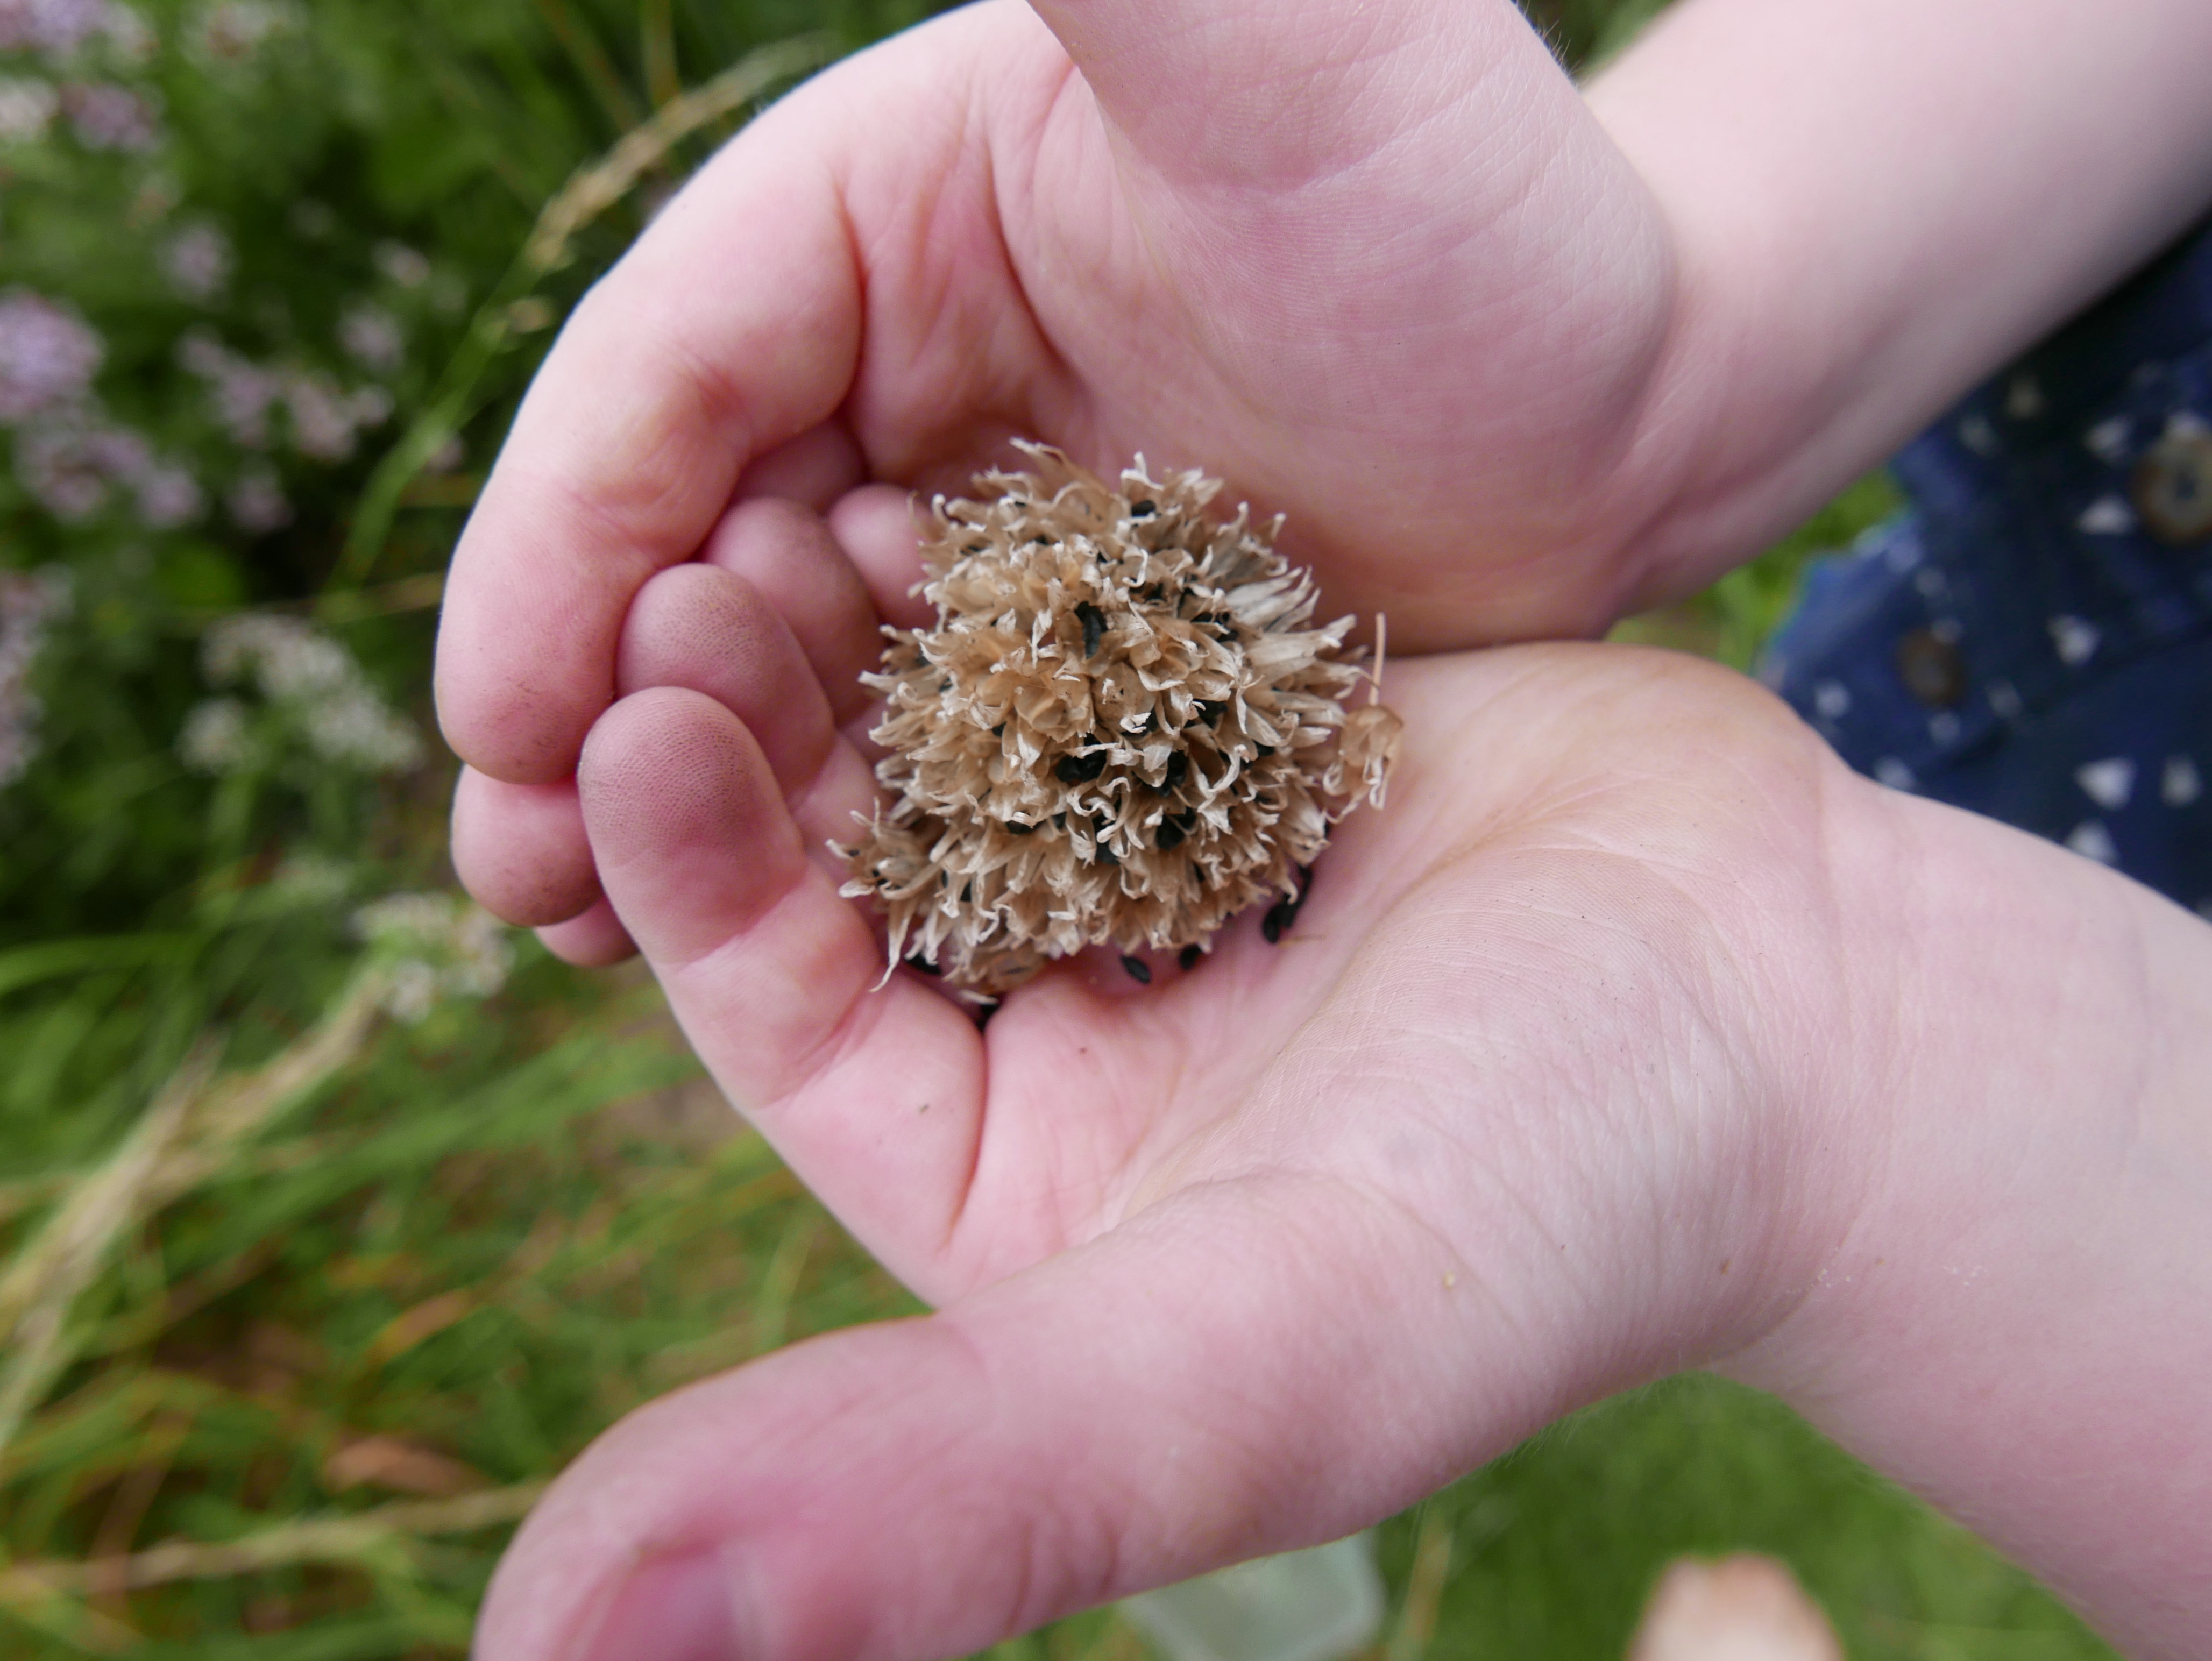
2. Collect chive flower seeds
Collecting chive flower seeds is so simple and fun to do. When the flower heads have started to fade and open up, you can easily shake the flower heads into your hands (or a pot or tray) to collect the tiny little black seeds they produce. The seeds can be stored for a year in a little envelope if you keep it in a cool dry place, We also like giving flower seeds we have collected as gifts to friends and family. We use wrapping paper to make little pocket envelopes and write simple growing instructions. To grow the seeds you have collected you just need to plant them in pots (or straight into the soil) with a little peat free compost and water to start them off.
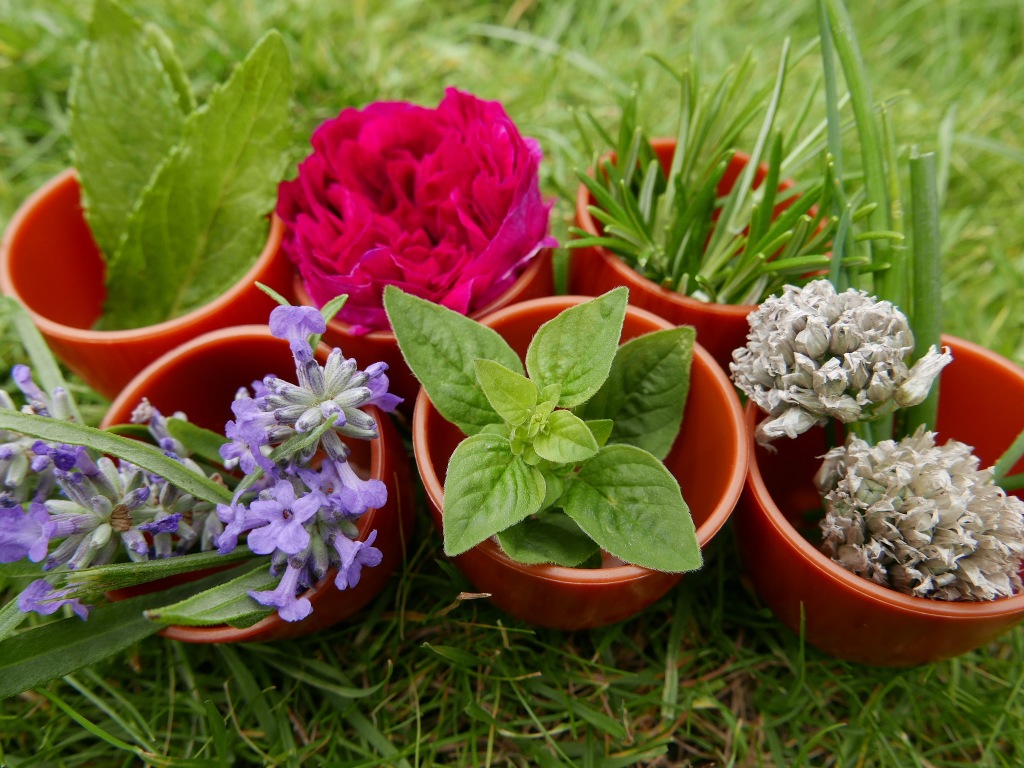
3. Sensory exploration pots
Scented herbs like chives along with edible flowers, spices and fruits are great for sensory exploration and play. You can easily fill some recycled pots or containers with a variety of differently scented materials. Then the children can have fun guessing what is in each pot by smelling and shaking them whilst the lids are on. Or by opening them to touch, taste and explore the what is inside. Here are some ideas of sensory materials you could use:
- Edible flowers: Roses, Dandelions, Elderflower, Marigolds, Nasturtiums, Borage, Pansy’s or Primroses.
- Scented herbs: Lavender, Basil, Rosemary, Marjoram, Sage, Thyme, Oregano, Parsley and Chives.
- Spices: Cumin, Cinnamon, Paprika, Vanilla, Turmeric, Ginger, Cardamom, Anise, Clove and Liquorice.
- Fruits: Orange, lemon, lime, apple, grapefruit, strawberries and banana.
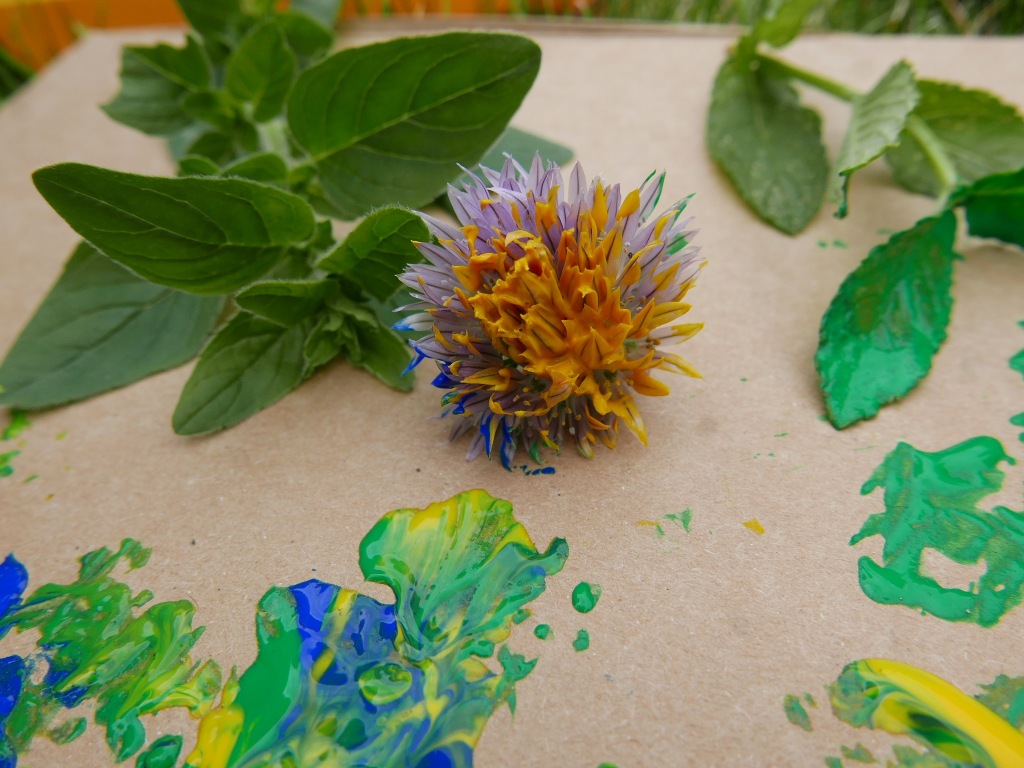
4. Nature painting
Nature painting is a simple activity for children of all ages, Just simply dip chive flowers and leaves into paint and use them as natural paintbrushes or paint, print and mark make with. How about experimenting with other different natural materials to see what variety of marks you can make by using different shapes and textures. Recycled cardboard is a great environmentally material to use instead of paper for your nature painting. Simply cut out panels from old cardboard boxes and packaging.
5. Chive flower prints
Potato printing is a simple activity for children of ages, all you need is a potato cut in half, a bit of inspiration and some paint to get started. Potatoes are a great environmentally friendly material to use as stamps for printing as you can compost them after use. To create a chive flower potato print (middle print) you just need to cut a potato in half and then cut some small triangular slithers all around the edge of the half. Then simply dip the potato into paint and print onto paper, card or fabric. You can then draw, paint or glue on some plant stems and or leaves.

Even simpler than potato printing, you could dip a fork into paint (left print) or some scrunched up tissue or paper (right print) and then use it to print chive flower shapes onto paper, card or fabric. Again you can then can then draw, paint or glue on the plant stems and or leaves.
6. Tataki zome
Tataki zome is the Japanese art of transferring botanical dyes from flowers and leaves onto fabric by simply hammering them onto the surface. It’s also know as flower pounding, leaf bashing and sometimes refereed to as Hapa Zome. (Funnily enough Hapa Zome came from an artist getting the name wrong, now its more widely used than Tataki zome which is the correct name for it.)

For this activity you will need scraps of cotton or linen fabric or some old clothing. something to hammer with like a rounded stone, hammer or rolling pin, a safe surface to hammer on and finally natural botanical materials like flowers, leaves and grass. *Pretty please however don’t pick any wild flowers, only collect flowers you have grown yourself, fallen ones you find on the floor or flowers from shop bought bouquets.

Lay the fabric or clothing flat onto a hammer safe surface and arrange your flowers and leaves on top. Then cover everything with a piece of paper or another piece of fabric. Carefully but firmly (supervision required at all times for this) hammer across the fabric with a stone or hammer. You should be able to see the dye seeping through the fabric so make sure you have hammered evenly across. Peel back the paper to see the images you have made.
7. Sensory water play
Water play is a great sensory activity for children of all ages. Chive flowers and leaves scattered in the water help to add extra scent, colour and texture for the children to enjoy and explore. Lavender and mint are also wonderfully calming herbs to use, but you could also use uplifting fresh citrus fruit slices as well.

8. Sensory ice play
After you finish you can recycle the water and materials by pouring them into different shaped containers or ice cube trays to freeze and replay with as ice blocks another day. It’s fascinating to see the objects trapped in the ice. You can hold the ice up to the light or experiment melting or breaking the ice in different ways using salt and warm water. Or the children can have fun stacking and playing with the ice to make towers.

You could also make decorative edible ice cubes for drinks by using freshly washed chive flowers and leaves frozen with drinking water in ice cube trays. You can then pop them into drinks as pretty floral decorations. *Please just be aware of the choking hazard of the ice cubes or any other materials you use with small children.
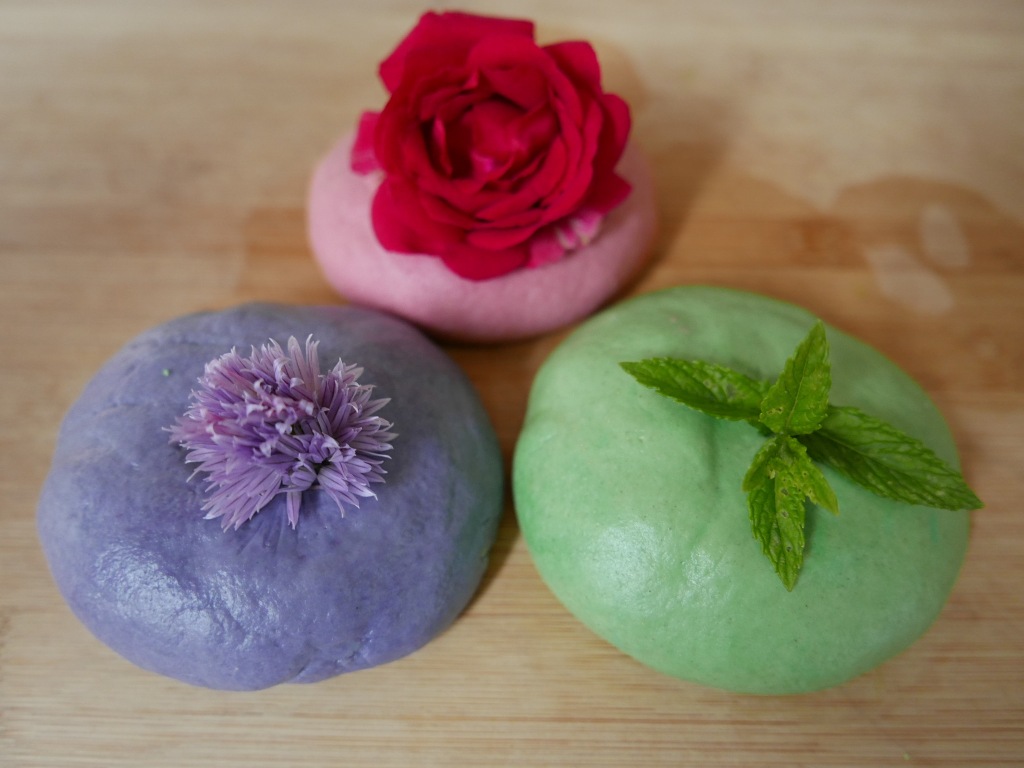
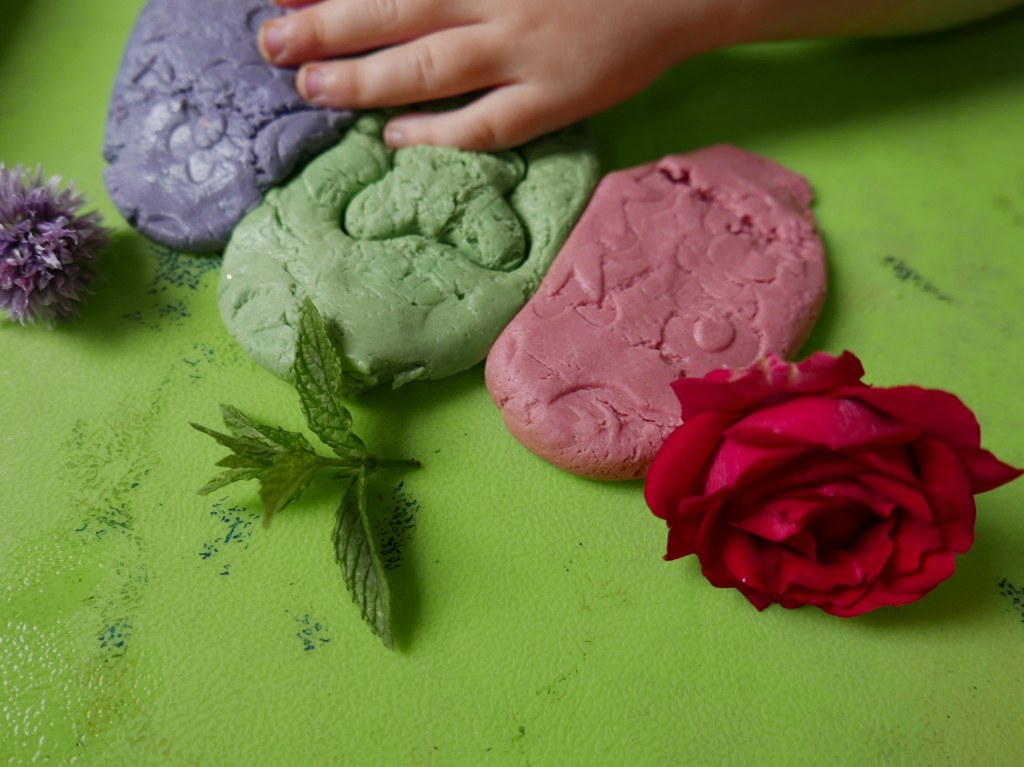
9. Nature playdough
It is surprisingly quick and simple to make your own homemade playdough using just kitchen cupboard ingredients. You can also easily add extra sensory elements with natural materials like scented herbs like chives or dried or fresh flower petals. You could also pop in a few drops of food colouring or flavourings to give it a bit more scent or colour.
To make your playdough base you will need the following ingredients.
- 300g of plain flour
- 80g salt
- 2 tablespoons of cream of tartar
- 2 tablespoons of vegetable oil
- 240ml of hot water
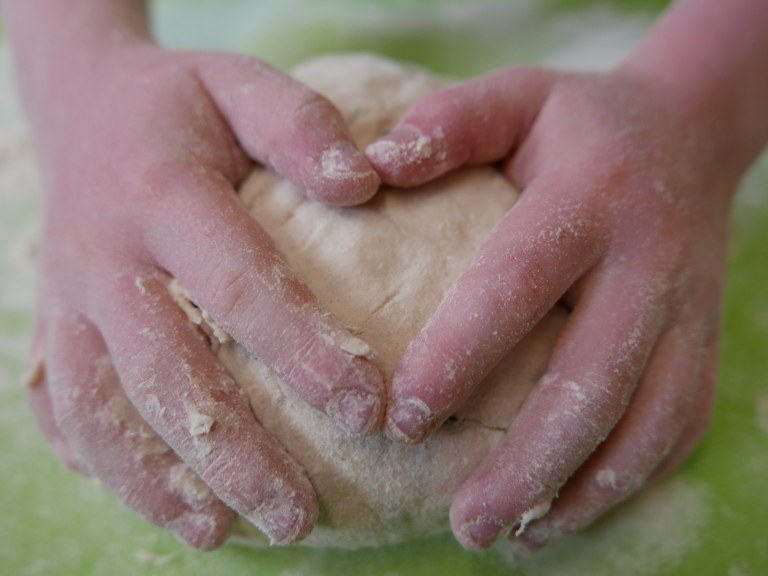
First mix the flour, salt and cream of tartar together than add in the oil and any natural materials (see below for a handy list of suggestions). Next start to pour the water in slowly (you might not need it all) and if you are using food colouring or flavouring you can add a few drops now.
If the playdough feels to wet then add in more flour it it feels to dry add in a few more drops of water. Finally knead your playdough until its a smooth consistent dough. Once it feels right then it’s ready to use. Children can add additional natural materials to the dough as they play and have fun exploring and experimenting with mark making as well. Just remember that salt is toxic to plants and wildlife so do not leave playdough outside unattended or let it come into contact with grass or plants outdoors. We always play with ours on a tray or board.
The playdough should keep for awhile in an airtight container in a cool dry place although the length will vary depending on the natural materials you use and if the playdough gets wet or damp during play. Always check it carefully before play and give it a sniff to make sure it doesn’t smell off.
10. Chive omelettes
Chives taste fantastic in omelettes and they are so simple to make. Simply whisk 3-4 eggs in a bowl or jug then add a handful of freshly washed and diced chives (leaves and or flowers) and salt or pepper to taste. Then pour the mix in a hot pan that has a little melted butter. Sprinkle cheese over the top and cook each side until golden brown.

11. Chive petal and honey cupcakes
To make chive petal and honey cupcakes you will need you will need
- 100g softened butter or an alternative butter spread
- 100g caster sugar
- 1 egg (lightly beaten)
- 100g self raising flour (or alternatively 100g of plain flour with 2 teaspoons of baking powder added)
- 1 teaspoon of baking powder
- 1 tablespoon of fresh chive flower petals
- 1 tablespoon of honey.
Before you start it helps to preheat the oven to 180 oC/340oF.0

First put the butter and sugar together in a mixing bowl and beat it together until it’s light and fluffy. Next gradually add in the beaten egg whilst continuing to stir the mix. Add in the flour, baking powder, chive flower petals and honey and then whip everything with a spoon or mix with an electric mixer for for a few minutes until the mix is light and fluffy.
Pour the mix into cupcake cases (don’t fill to the top as the mixture rises quite a lot) and place in the oven for 15 minutes or until the cakes are golden brown. Leave to cool and then enjoy as they are or decorate with icing and or freshly washed chive flowers.
12. Chive shortbread biscuits
Ingredients.
- 120 g of Butter
- 60g of caster sugar
- 180g of plain Flour
- A tablespoon of fresh chive leaves and or flower petals
Firstly heat the oven to 180c

Cream the butter and sugar together before carefully add in the flour, chive leaves and petals and mix until you have a smooth mix you can roll into a ball. Chill the dough in the fridge for 30 minutes.
Roll the dough out to biscuit thickness and then use cookie cutters to cut out the biscuits. Place the biscuits on a tray covered in greaseproof paper, then pop them into the oven for 15 minutes (or until golden brown). The biscuits should keep an air tight container for 5 days or you can freeze them and save them to enjoy at a later date.

13. Cheese and chive scones
Cheese and chive scones can be made using a simple and easy recipe that children of all ages can help you to bake.
- 225g plain flour
- 1 tablespoons of baking powder
- 50g butter
- 1 tablespoon of caster sugar
- 1 tablespoons of chive flowers
- 100g of grated or chopped cheese
- 150ml milk
Pre heat the oven to 220oc.

Place the flour and baking powder into a mixing bowl. Add the butter and then rub it into the flour with your hands until it resembles fine breadcrumbs. Next add in the caster sugar, chive flowers and cheese. Mix everything together with a wooden spoon and then slowly pour in some of the milk (you may not need to use it all). Keep pouring and mixing in milk until you have a slightly sticky but firm dough.

If you find your dough becomes has become two wet or sticky you can always add in some more flour. Roll your dough out onto a floured surface until it is roughly a centimetre thick. Carefully cut out your scone shapes from the dough and then place them onto a baking tray. Brush the tops of the scones with a little of the leftover milk (to give them colour when they cook) and then place in the oven for 12 minutes. Leave them to cool for a short while then enjoy them fresh with butter.
14. Chive bread
To make chive bread you will need
- 1-2 handfuls of freshly washed chive leaves
- 500g plain or bread flour
- A sachet of fast action yeast (about 7g)
- 2 teaspoons of salt
- 1 teaspoon of sugar
- 1 teaspoon of cooking oil (Vegetable, olive or sunflower)
- 300ml of warm water
Pre heat an oven to 210oC

First crush, shred or cut up the chive leaves then put them in a mixing bowl with the flour, yeast, sugar and oil. Next slowly add in the water and mix well until everything comes together to form a dough. Cover the bowl with a tea towel and leave the dough to rest for 10 minutes.
Place a layer of flour on a clean kitchen surface and then work and knead the dough for another 10 minutes. Leave to rest for 2 minutes. Then form the dough into roll shaped balls on a baking tray covered in grease proof paper. Lightly dust the tops with flour, cover with a damp tea towel and then leave to rest for another 40-60 minutes. Bake in the oven for 25-30mins or until the rolls are a light golden brown and sound hollow when you tap the base.
15. Chive flower lip balm
It is surprisingly simple and easy to make your own natural chive flower lip balm using just 3 ingredients. First you need a handful of chive flowers, Bees wax or the vegan alternative of candelilla wax and a carrier oil like olive oil, sunflower oil, coconut oil sweet almond oil or castor oil.
First place the chive flowers in a jam jar and cover them with your choice of carrier oil. Then place the jar on a window sill or warm place to infuse for 2 weeks. Make sure you stir the oil every few days and make sure the flowers are completely covered with oil.

After 2 weeks strain the oil through a muslin a cup or jug and measure the weight. If you are using bees wax you will need 1 part beeswax to 3 parts oil (For example 300g of oil only needs 100g of beeswax), If you are using candellia oil you want to use 1 part to 4 parts oil (for example 200g of oil needs 50g of beeswax). Pour the oil into an old saucepan and gently heat, add in the bees wax of candillia wax and stir until its fully melted and mixed together. Pour it into a sterilised container or pot like an old mini jam jar and leave to cool and set. If your lip balm turns out too soft or hard you can always re-melt it and add in more oil or wax.
- For Day 4 of 30 Days wild 2023 we had an unexpected visit to A&E (littlest fell down the stairs head first, thankfully they were fine just an egg shaped bump and bruise). So we had a quiet afternoon at home picking chive flowers and leaves in the garden to bake, paint and play with.
If you like this you might like to try:
11 Daisy activity ideas and recipes
12 Nasturtium recipes and activity ideas

14 Lavender recipes and activity ideas

