
Pumpkin is the name we use to describe round, orange varieties of winter squashes, but there are actually hundreds of species of winter squashes and they can come in a variety of different colours shapes and sizes. Pumpkins (and squashes in general) have been farmed for food in central America for over 7,500 years. They were grown as food for humans as well as feed for animals.
Pumpkins are a great source of fibre, vitamins and minerals. Almost all the parts of pumpkin plants are edible, including the flowers, seeds, skin, flesh, vines and leaves. You might be surprised to find that although we think of them as vegetables pumpkins are actually scientifically classed as fruits, they are a type of berry know as a pepo. Pepos are berries that develop from one flower, they have a firm outer skin and fleshy innards with several seeds. Other varieties of pepos include cucumbers and melons.

Pumpkin plants produce both female and male flowers. The male flowers grow first on the vine to entice bees and other pollinating insects, they are then followed by the female flowers that grow a little bit later further down the vine. The female flowers only open for one day to be pollinated and then shrivel and fall off the vine. If they are successfully pollinated the ovules within the flowers (the structures that contain the female reproductive cells) start to develop into pumpkins. Pumpkins are a great example to use when talking about the importance of pollinating insects in relation to the food we eat as without pollination the flowers on the vine would not turn into pumpkins.
You can find lots of fun and easy activity ideas below to help you celebrate and learn more about pumpkins.
1. Go pumpkin picking
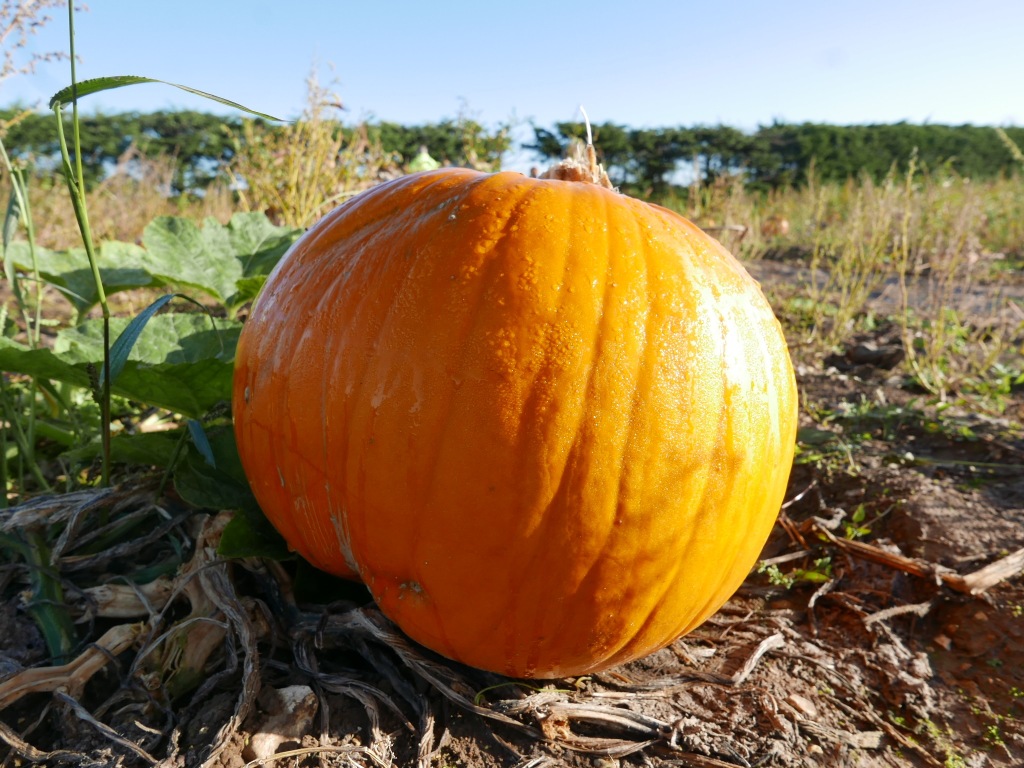
Picking your own vegetables and fruit is a great way to show children where their food comes from and how it is grown. You just need a farm or garden centre near you that does pick your own pumpkins. On sunny days you have fun make shadow puppet pictures on the sides of the pumpkins and on wet days you can bring welly boots and splash in puddles. If you can’t find a local pick your own patch you could still enjoy visiting a market stall or supermarket to pick out pumpkins together.

2. Look for wildlife on pumpkin plants
Take a closer look to see how much wildlife you can find on or around an pumpkin plants. When they are flowering you should be able to spot lots of pollinating insects buzzing between the yellow blooms. Turn over the leaves and look on the underside to find eggs, larvae and invertebrates like slugs and snails. You may even be lucky enough to spot birds and small mammals. You could take a notepad or camera with you to record your finds and also help citizen science by recording any thing you find on either the iSpot or the iRecord databases.

3. Grow your own pumpkin
A great way to learn how pumpkins grow is by planting a pumpkin seed. Watching plants grow and observing what happens is a great STEM activity for children of all ages. All you need for this activity is a pumpkin seed, some peat free soil and a clear jar or CD case so you can observe every part of the plant growing. Simply fill about a half of the jar or CD case with soil, making sure you leave room for the plants to grow above the soil. then pop your seeds just on top or a tiny bit under the soil. You want them to be sat against the side of the case or jar so you can watch them grow.

Hopefully you should be able to see the roots and shoots emerging from the seed cases as they would do if they were planted underground. Its fascinating to watch the roots spread out and downwards as the shoots grow upwards and turn into leaves. This is a great opportunity to talk what seeds need to grow (nutrition like soil, water and sunlight). You can measure your plant each day using a ruler to see how much it’s has grown. Keep a diary and make observations or drawings of the plant/seed at different stages. When your plant starts to out grow the jar or CD case then it’s time to replant it into a pot or out in the garden where you can continue to monitor the plants progress.
4. Experiment with pumpkin seeds
You can easily set up a series of simple science experiments to test the conditions pumpkin seeds need to grow successfully in. For this you will need multiple small pots (old yogurt pots are perfect). First mark each pot with a number and then write down the same numbers on a sheet of paper so you can track the results. Next fill your pots with peat free soil and then plant one pumpkin seed into each pot.

Finally chose some of the different conditions from the list below to experiment with. Don’t forget to write down notes as you go and keep track of which condition is assigned to which pot using the numbered paper.
- See if seeds grow without water. (Don’t water one pot at all).
- See if the seeds grow with too much water. (Flood one pot with water.)
- See if seeds grow without light. (Put one pot in a dark place without any light)
- See how seeds grow with a lot of light. (Put one pot in a sunny window.)
- See how seeds grow without much air. (Put one pot in a small zip lock bag or air tight jar and seal it.)
- See if seeds grow in the cold. (Put one pot in the fridge.)
- See if seeds grow in contaminated soil (Sprinkle half a tablespoon of salt in one pot.)
When you have finished talk about the results of each experiment and what you think pumpkin plants and seeds might need to grow and thrive.

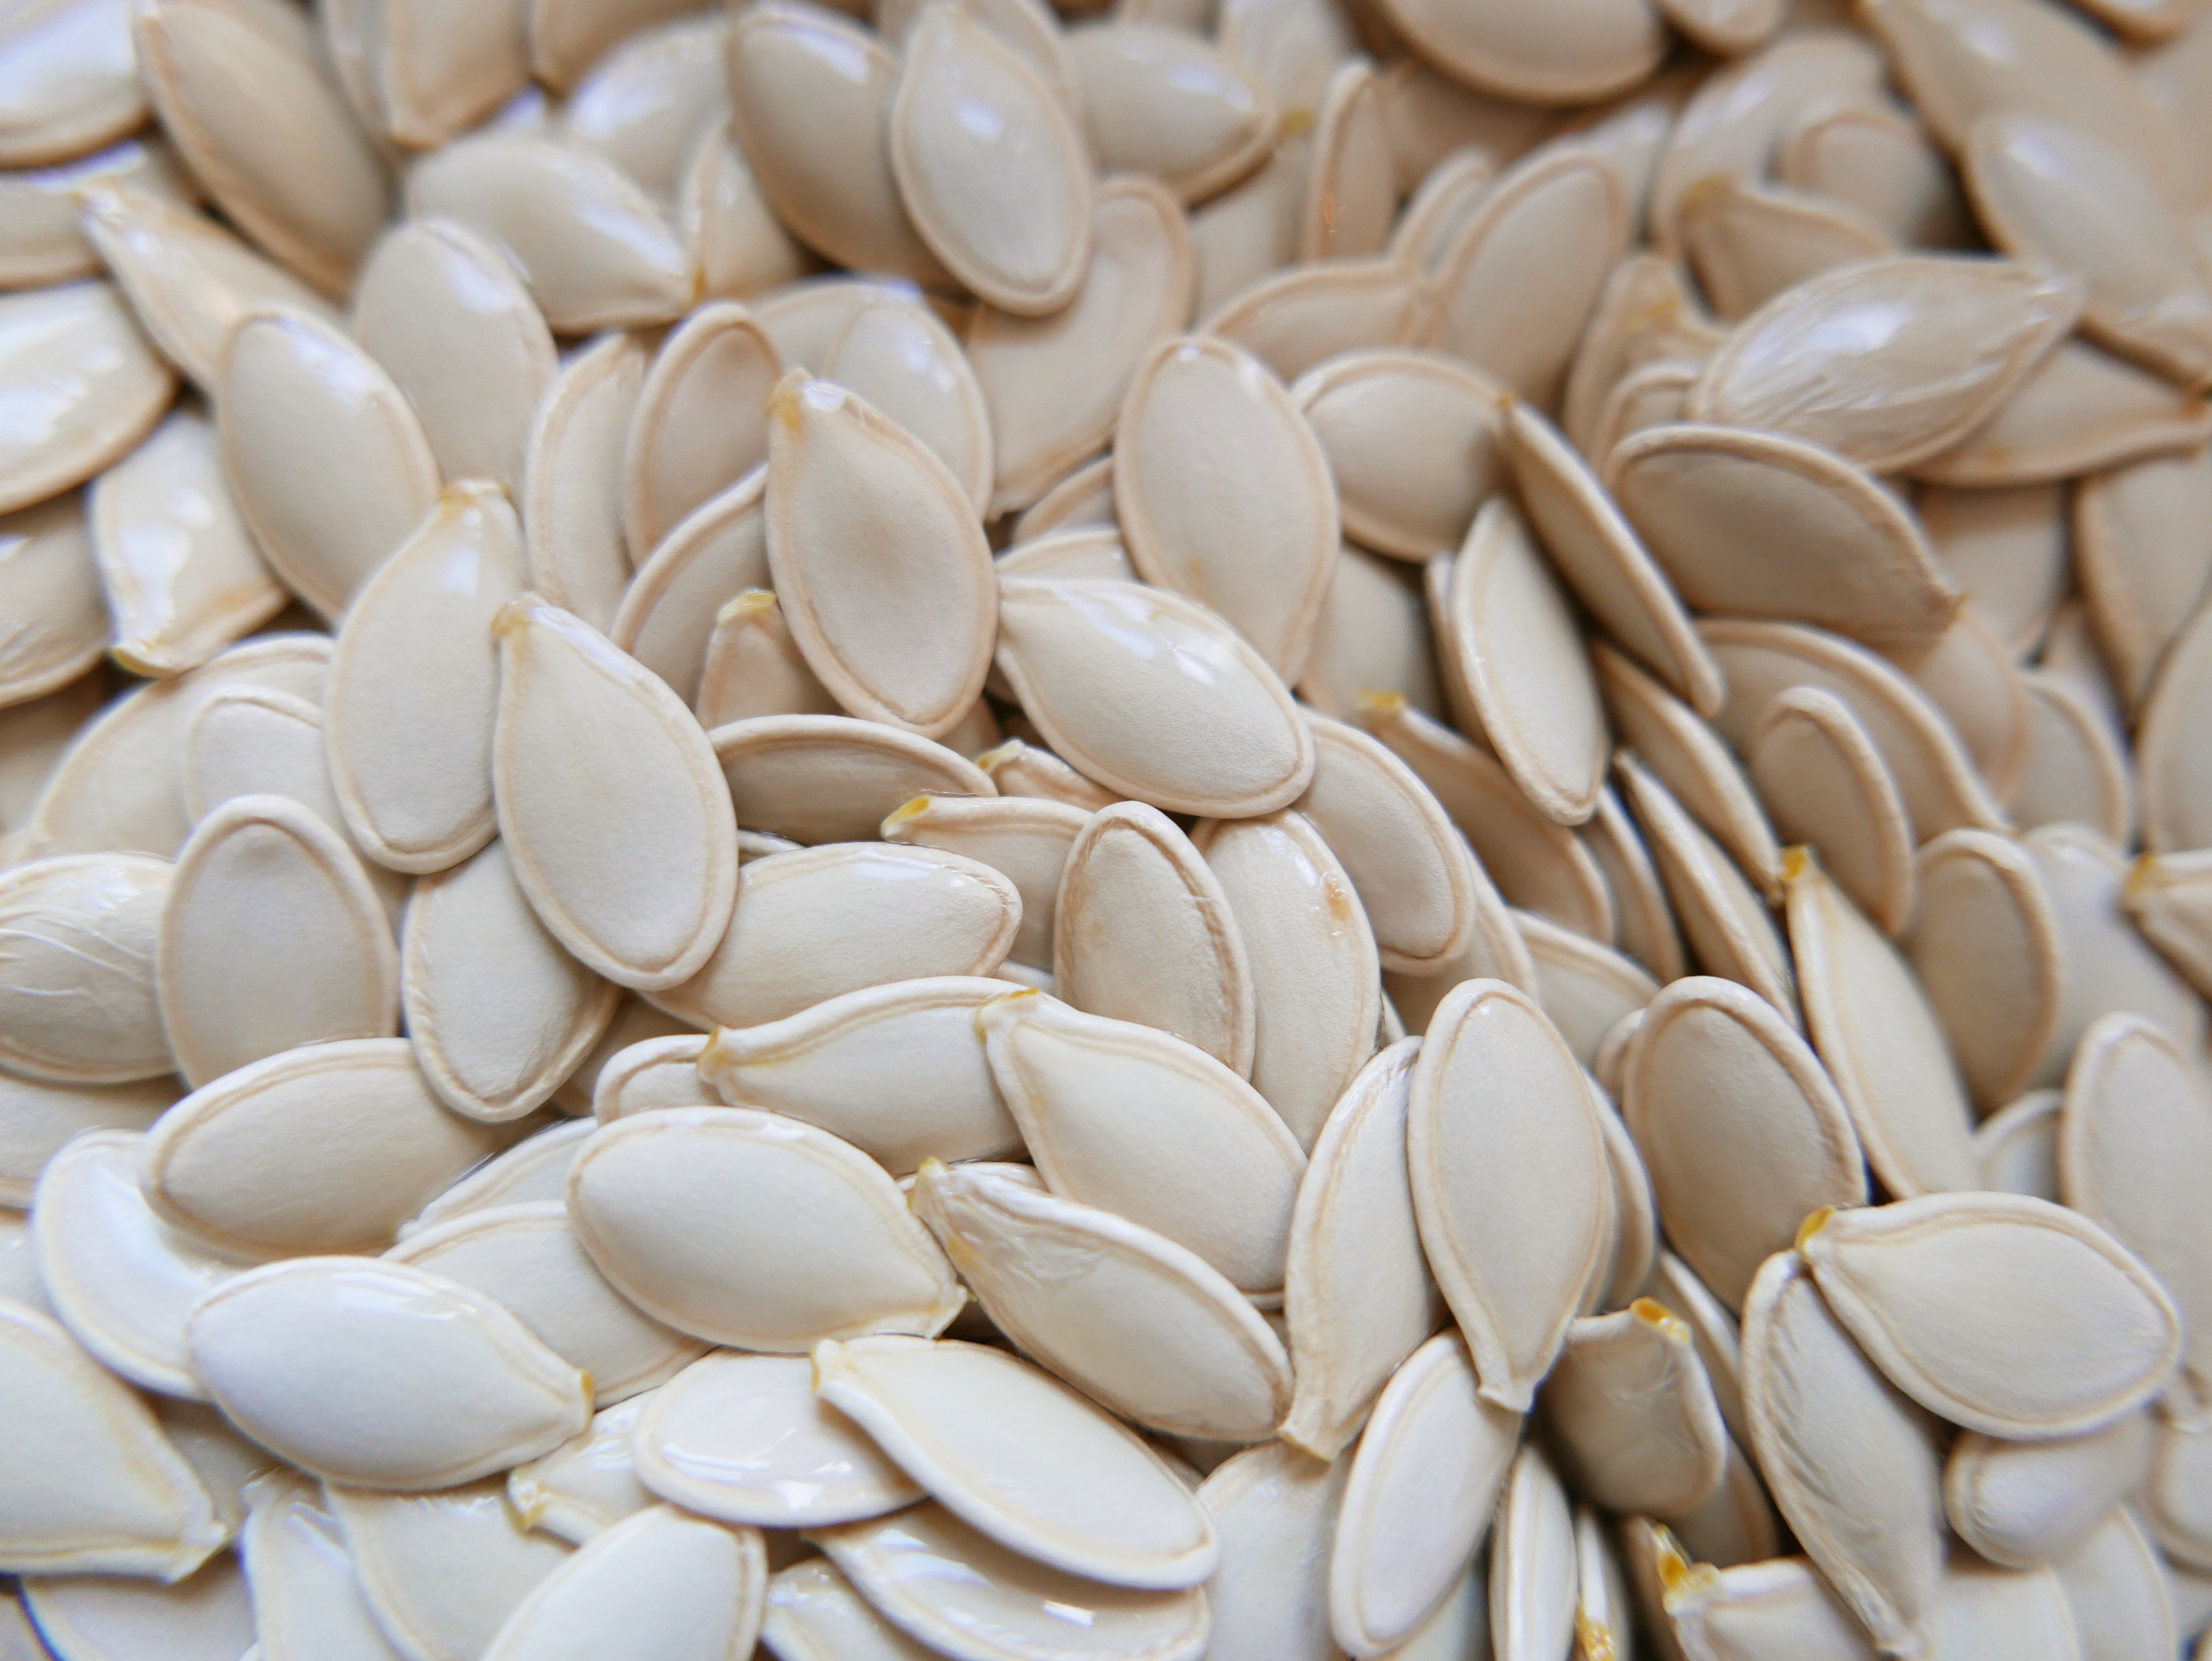
5. Enjoy eating pumpkin seeds
Pumpkin seeds also make a tasty and very healthy snack. They are packed with vitamins and important nutrients like magnesium, and zinc. You can easily oven roast pumpkin seeds by spreading them on a baking tray with olive oil and salt to taste. Then simply bake them in the oven at 180c for 10-15 mins or until golden in colour. Leave the seeds to cool for 15 minutes or so before eating them.
6. Make pumpkin soup
Many people don’t realise how versatile pumpkins are as a source of food, you can use them to make pies, pastries, cakes, cookies, curries, roast dinners and stir fry’s as well as a ton of other dishes. One of our favourite and easiest things to make with pumpkins is pumpkin soup.
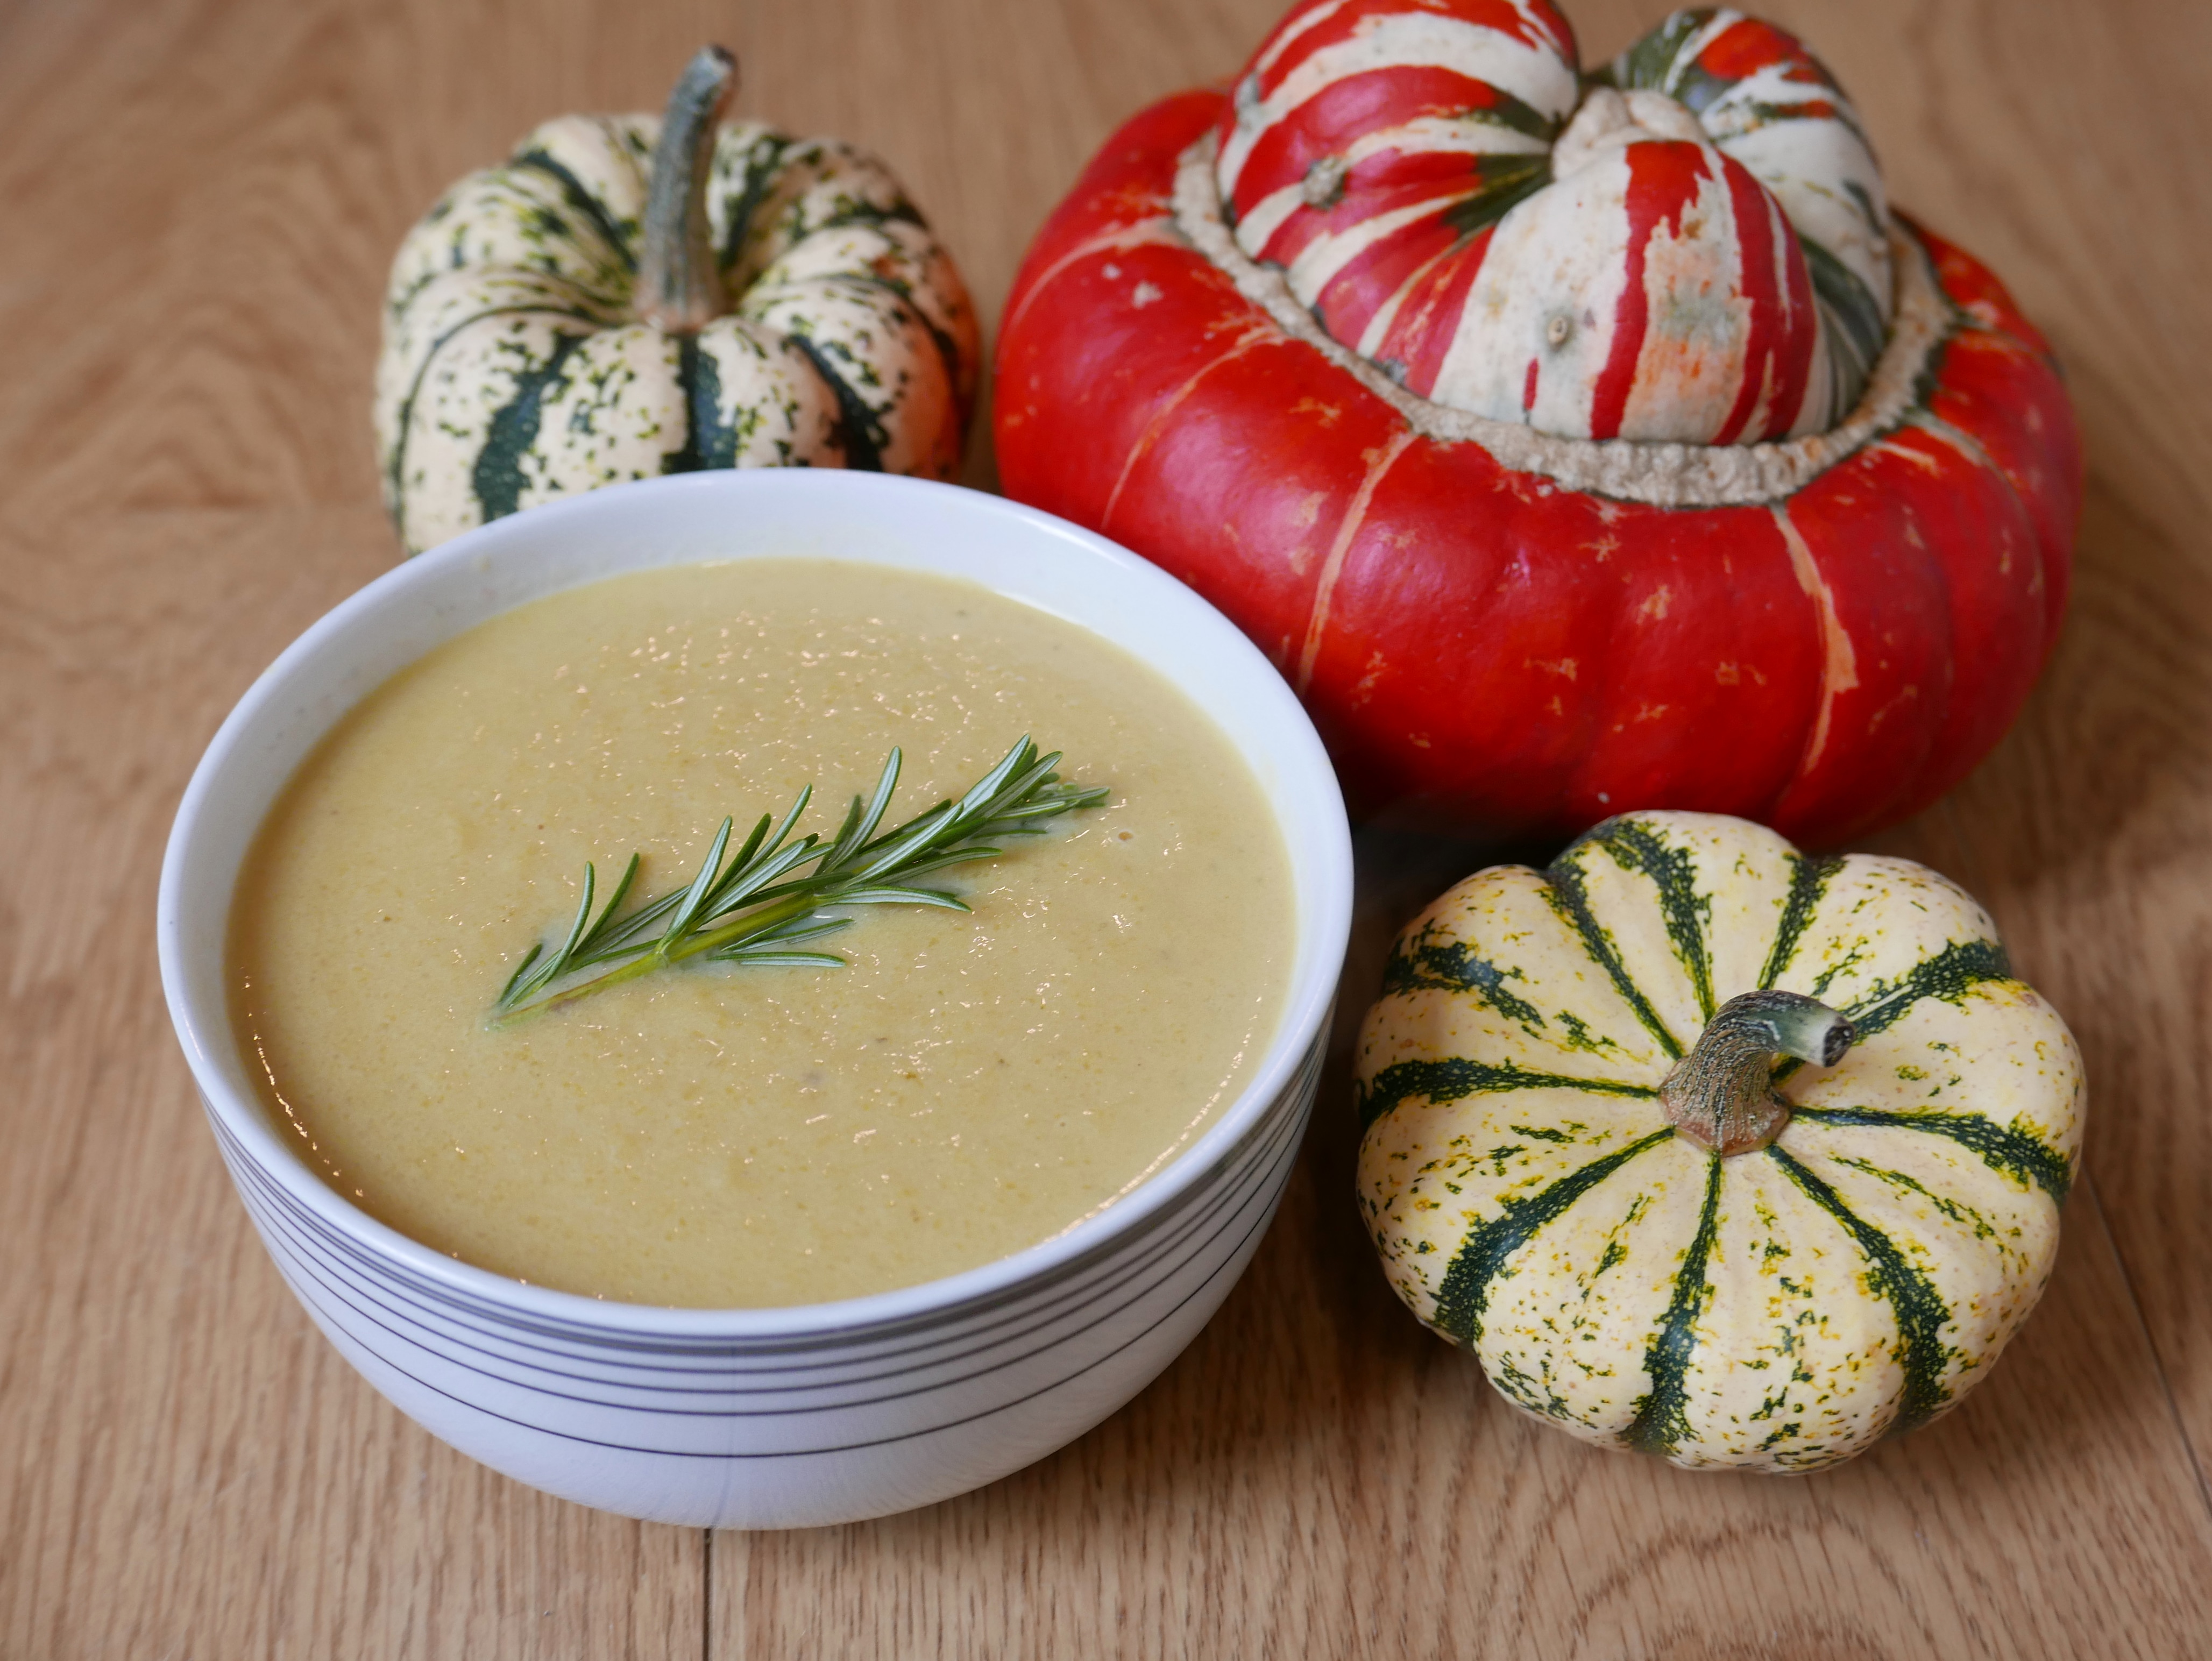
All you need to make pumpkin soup is:
- 750g-1kg of pumpkin
- 2 onions
- 1 clove of garlic (optional)
- 700ml of vegetable or chicken stock
- 150ml of double cream
First dice the onions finely and crush the garlic clove if you are using one. Cook them both on a gentle heat in a saucepan for 5 minutes until they have softened but not browned. Then add in the pumpkin (cut into small chunks) and cook for a further 10 minutes until the pumpkin has softened and changed colour.
Next pour in the stock and stir and simmer everything for 15 minutes. Finally pour in the cream and bring everything to the boil, you can then use a blender or hand blender to puree the soup to make it smooth or you can leave it chunky if you like. Enjoy it fresh or you can keep it in the fridge in an airtight container for two days or in the freezer for two months.

7. Learn about the anatomy of a pumpkin flower
Dissecting flowers* is a great way to learn about flower anatomy. You could either draw or print out a simple image of a pumpkin flower onto cardboard or paper and then label all the different parts of anatomy. There is a great free download printable sheet you can use here. Or you could cut a flower in half and see if you can find and label all of the parts in the flower using a photo guide. This is a great opportunity to stimulate conversation about pollination and how flowers attract insects using bright colours and sweet smelling nectar. Talk about how the insects brush against the pollinating parts of the flower picking up pollen that then gets distributed to all the other flowers and plants the insects visit afterwards.
*Pretty please don’t use wild flowers, only use flowers you have bought or grown yourself.
8. Play a pollination game
You can learn how insects pollinate pumpkin plants by playing a simple pollination game. All you need for this is a large sheet of paper or cardboard, recycled milk bottle tops, a stick, string, glue and paint. First you need to paint the pumpkin flowers across the surface of your picture. A few of them need to be big enough to place the milk bottle tops in the centre.
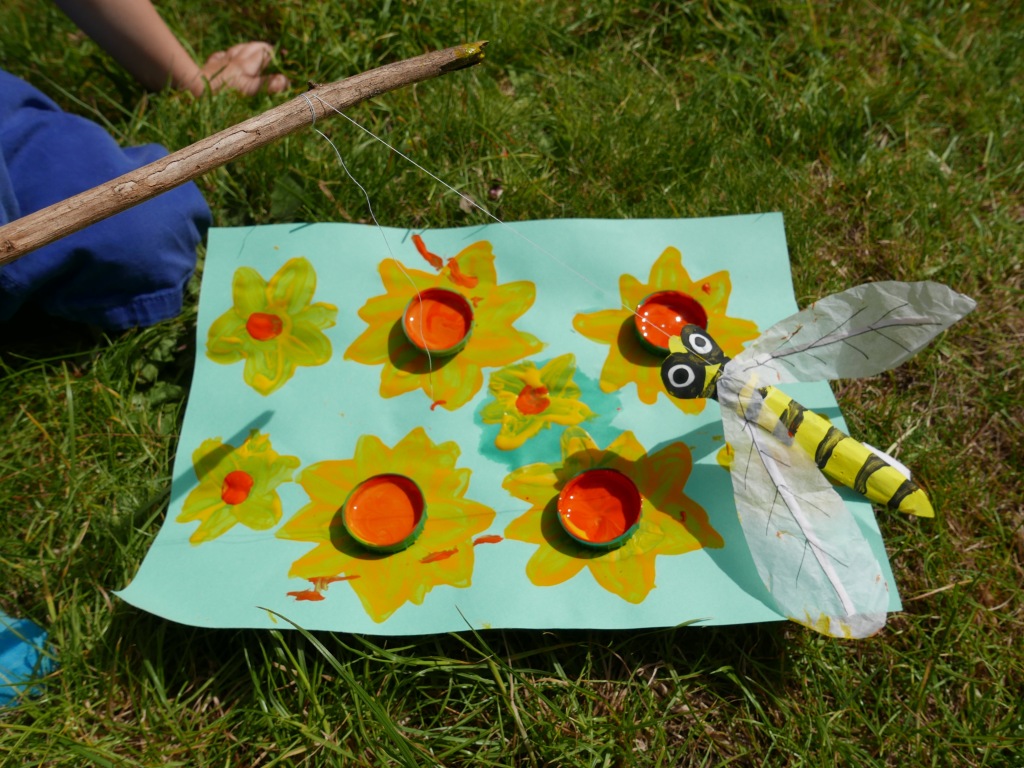
Paint the smaller flowers with yellow centres and then glue a few milk bottle tops onto the larger flowers. Next paint or draw a pollinating insect like a bee or butterfly onto a piece of card and cut it out. Then glue a small scrunched up piece of tissue onto the bottom of your flying insect so it can pick up the ‘pollen’ and transfer to the other flowers. Once the paint and glue has dried on the picture and insect you can then fill the milk bottles tops with yellow or orange paint to make your pollen.

Now you can have fun dipping the bottom of your insect into the ‘pollen’ paint and landing it on the other flowers to pollinate them. This is a great opportunity to talk to children about the important role pollinating insects play in the life cycle of plants and seeds.
9. Pumpkin finger painting
Pumpkin finger painting is great sensory fun for all ages. All you need to make a cute little patch of pumpkin finger or thumb prints is some orange paint for the pumpkins and a green pen pr pencil to add on some green stalks when your prints have finished drying.

10. Bob for pumpkins
Pumpkin bobbing is a fun activity that encourages coordination and fine motor skills. All you need is a bowl or bucket full of clean water and some small pumpkins or squashes with stalks. You could also make it more challenging by blind folding the pumpkin bobber or use a net to make it more hygienic or easier for younger children. *Please make sure younger children are always supervised around water.

Older children can also learn the science that explains why pumpkins float and other vegetables or fruits don’t. Pumpkins float and bob on water because they are partially hollow inside and less dense than liquid water. Density is determined by the mass (quantity or weight) of an object and volume (the amount of space an object occupies). For example an inflated balloon has a low density because it has a low mass per volume (its big but light) where as a lead weight has a high density (its small but heavy). Pears are more dense than liquid water so they sink. You could also experiment with different vegetables and fruits measuring the volume or size and weight of each and making predictions on whether they will float or sink.
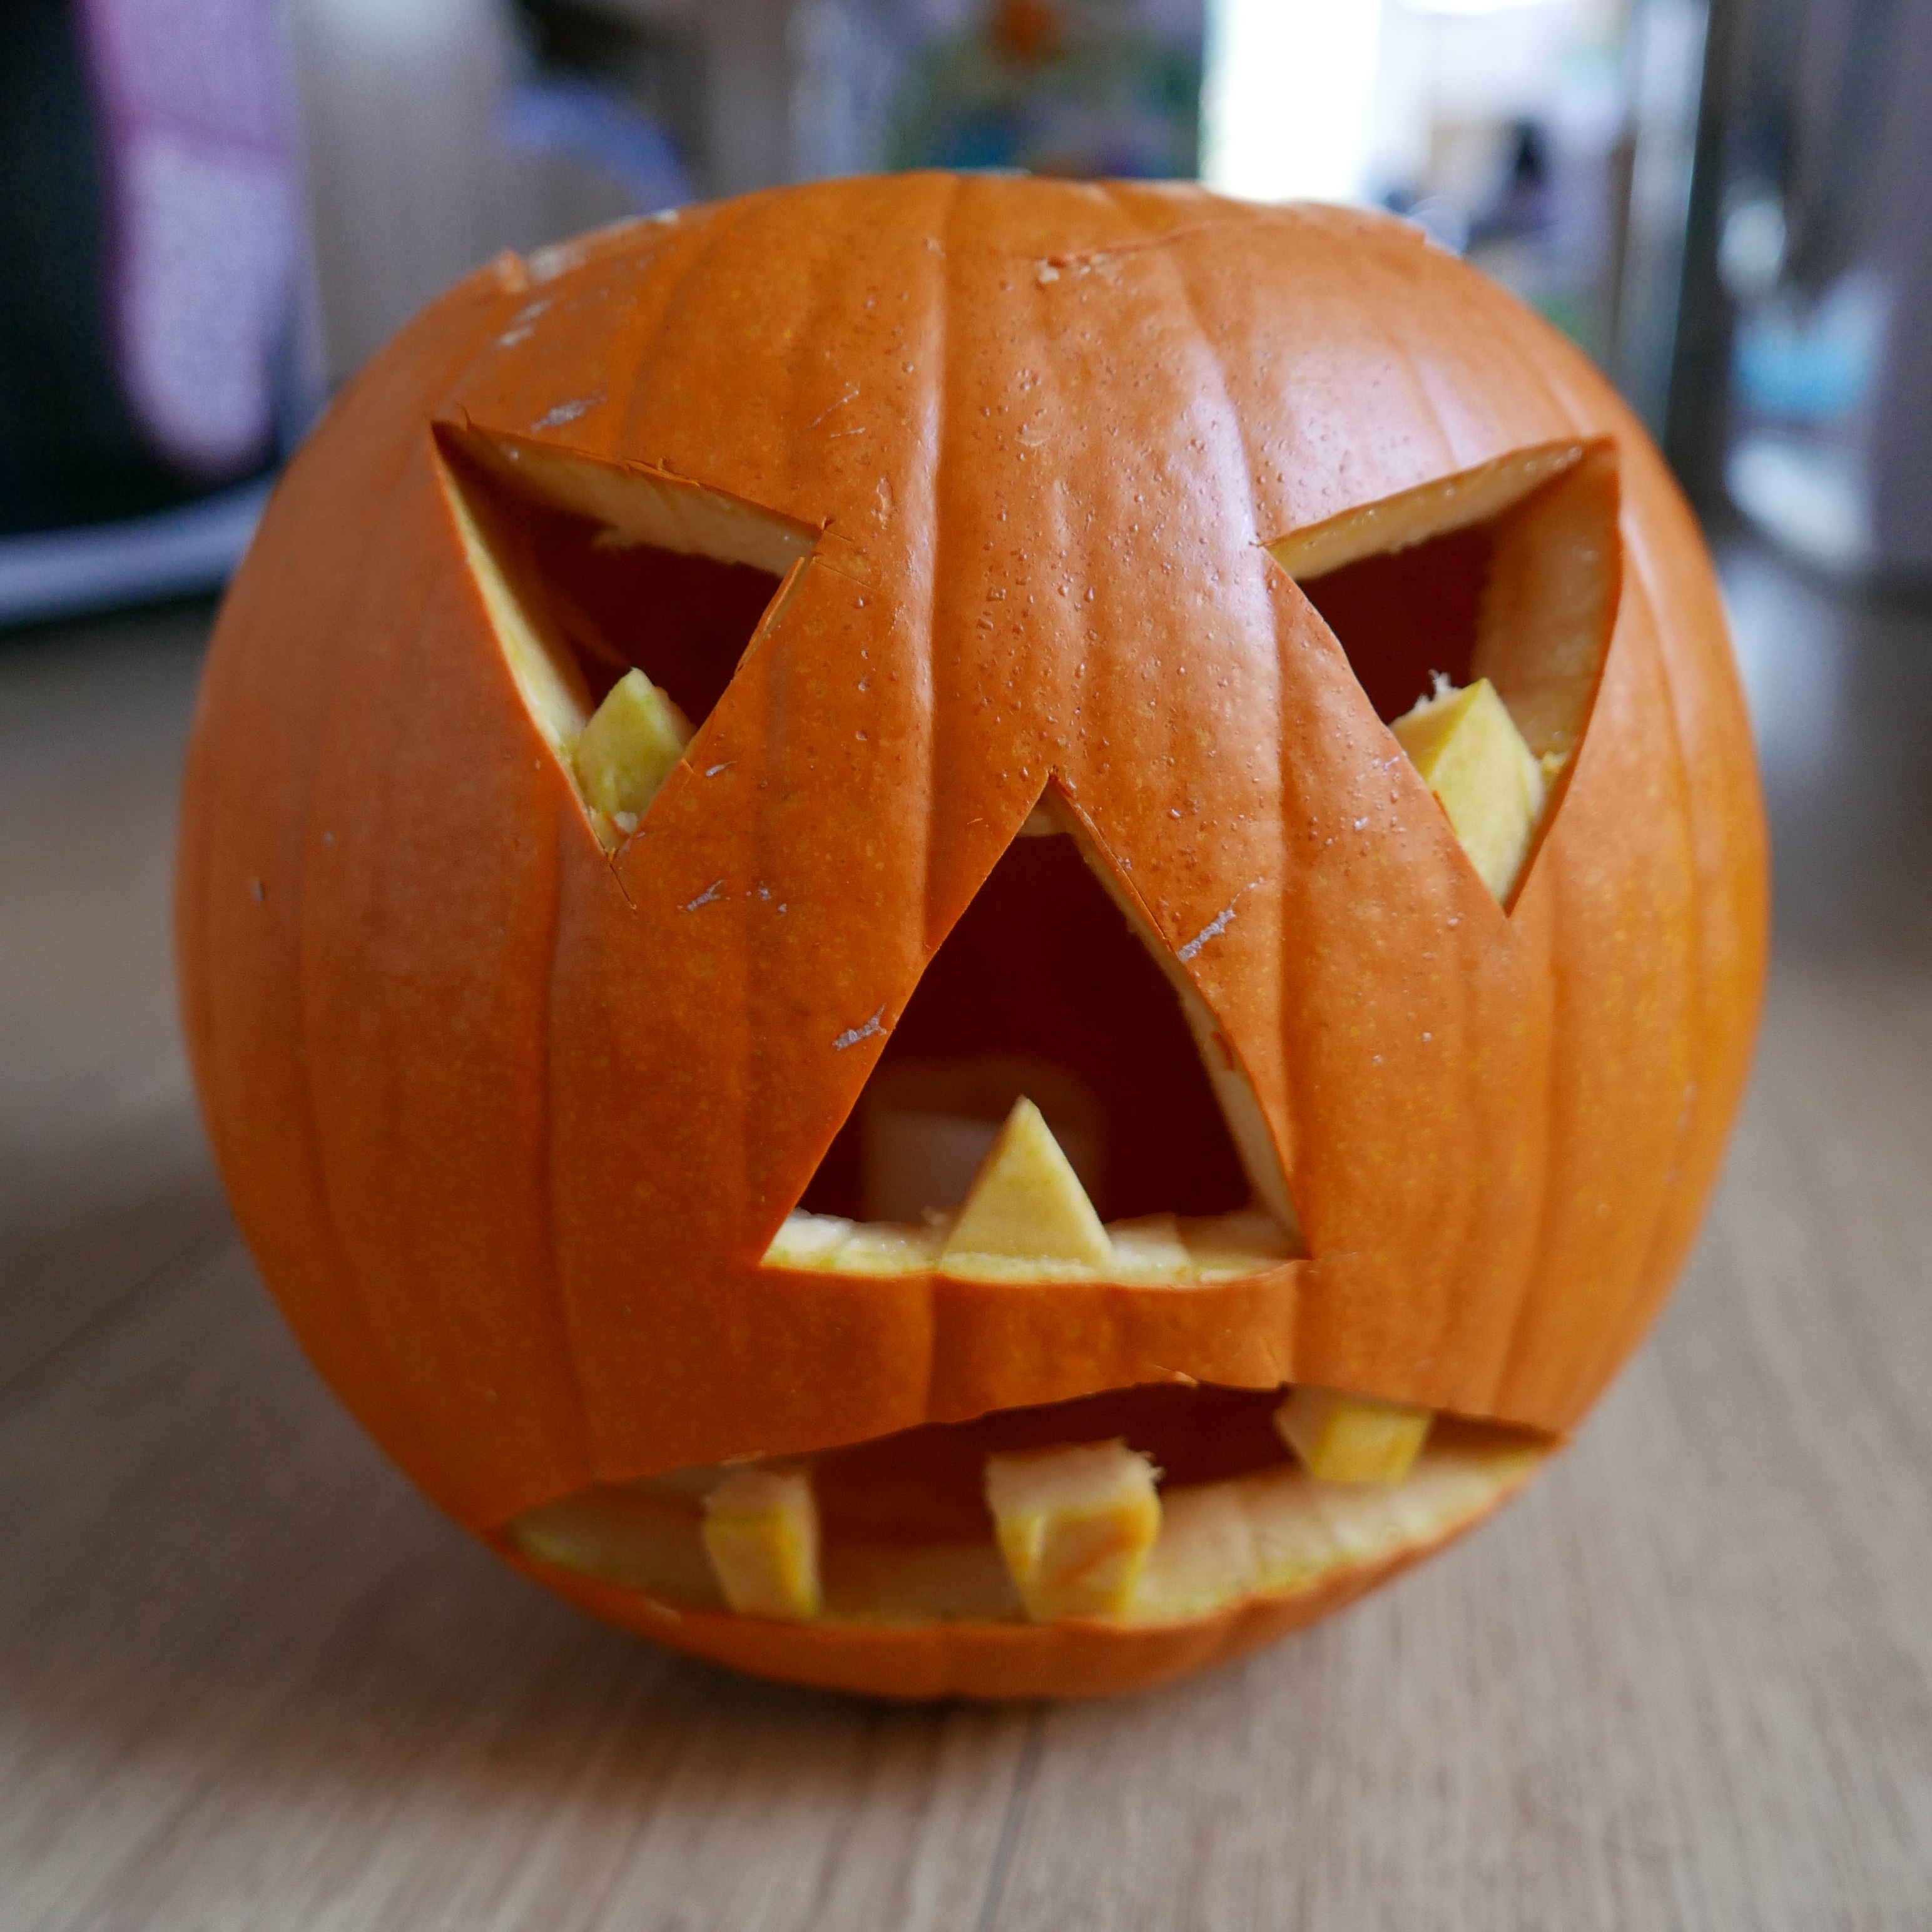
11. Carve Jack-o’-lanterns
We always enjoying carving pumpkins into Jack-o’-lanterns. You just need to cut the top of the pumpkin off, scoop out the insides of the pumpkin (which you can then use for cooking or baking) and then carefully carve a spooky face or design on the side of the pumpkin. Did you know that Jack-o’-lanterns after thought to be named after an Irish legend about a man called Stingy Jack? Apparently he lost a bet with the devil and was doomed to roam the world using a lantern carved out of a turnip to light his way. You can also make Jack-o’-lanterns out of root vegetables like turnips or even peppers.
12. Paint and decorate pumpkins
Painting and decorating pumpkins is a great, easy alternative for children or adults who are unable to carve pumpkins. All you need is some paint, pumpkins and your imagination. You could also use pens to draw onto the pumpkins, or collage and stick on additional materials. If you are feeling more adventurous you could also use mud and found natural materials to decorate your pumpkins.
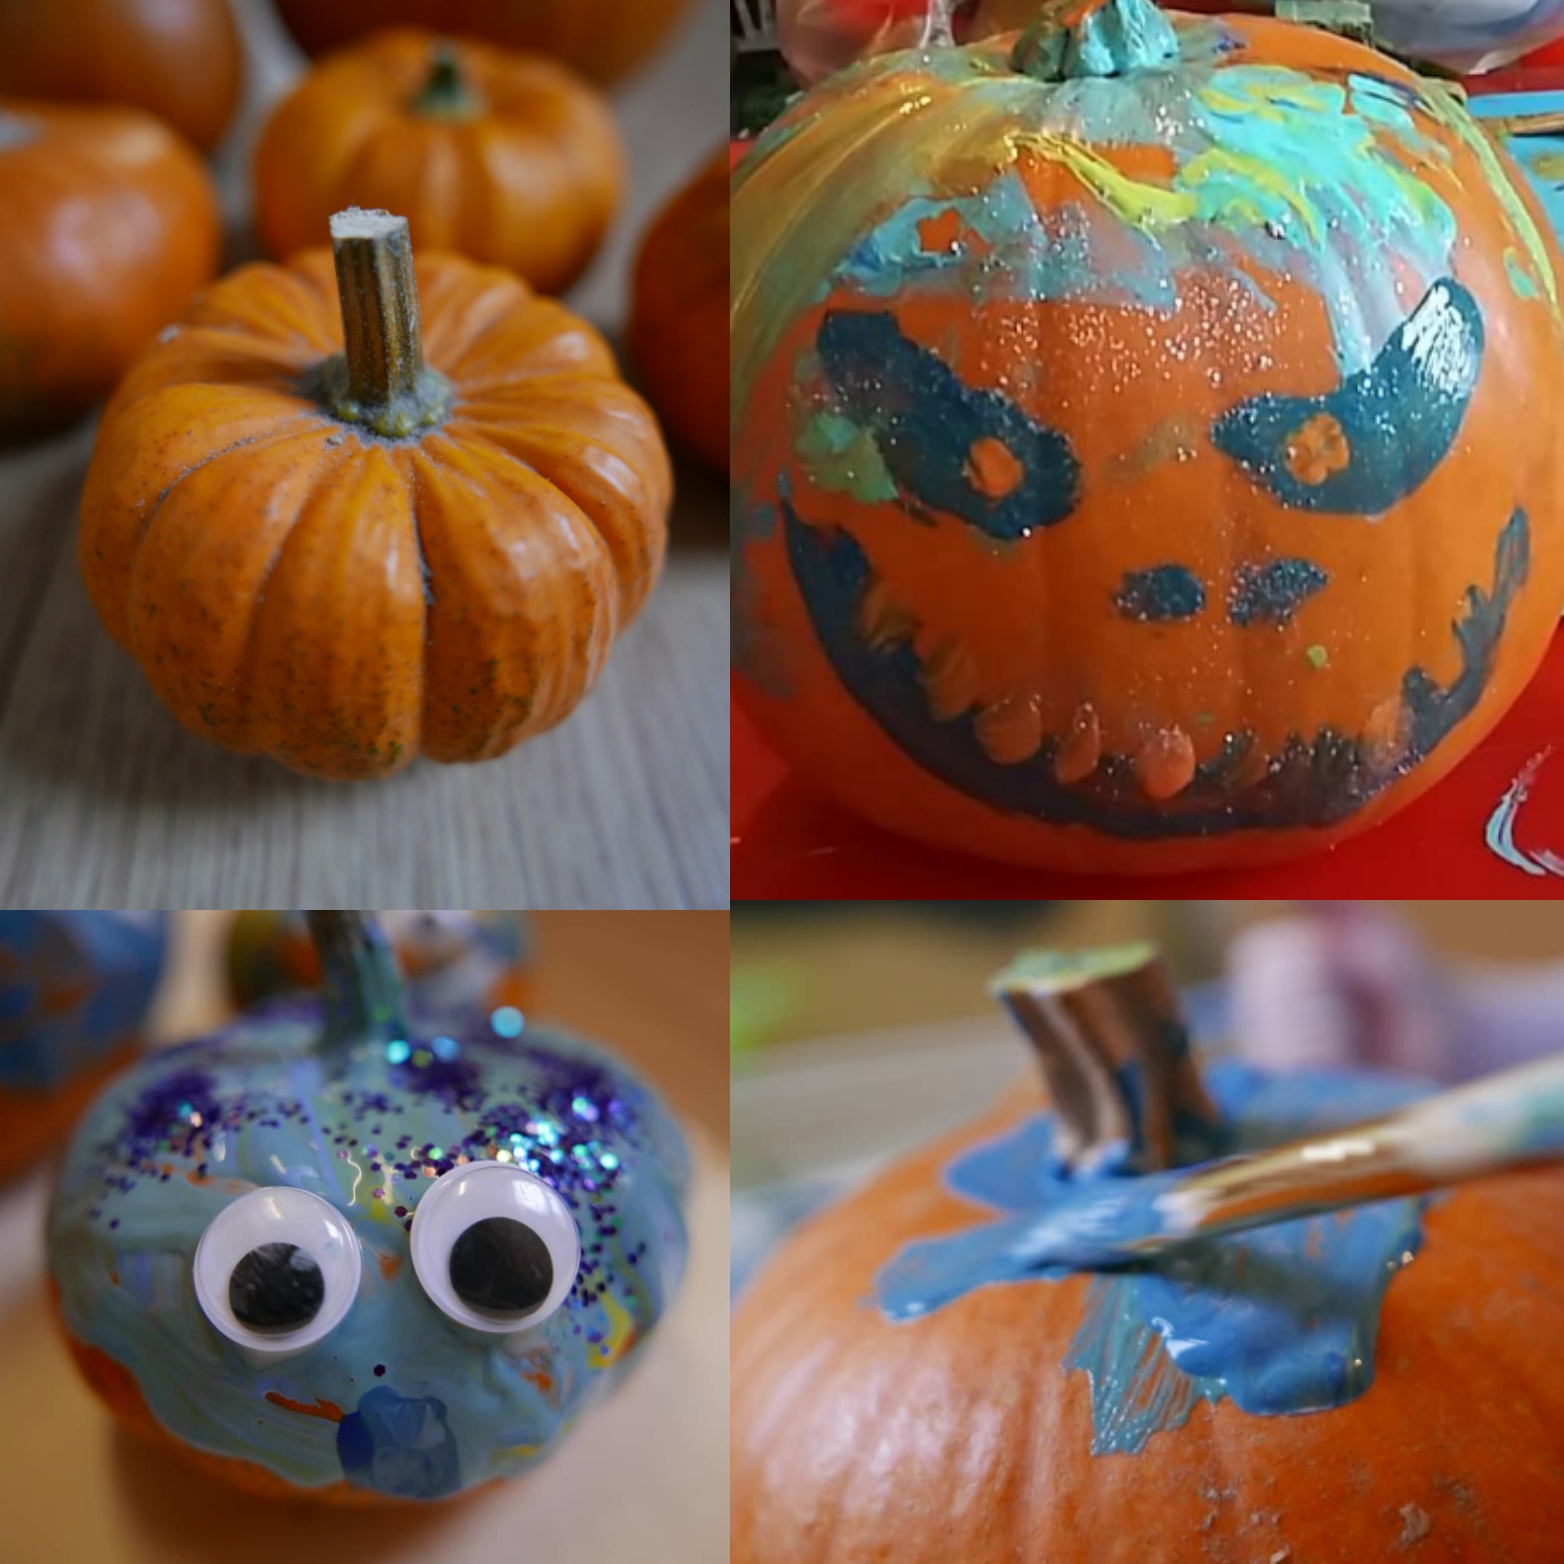
If you use water based paints or mud then you can wash your designs off and repaint and decorate your pumpkins all over again. The possibilities are as endless as your imagination and you can easily decorate any size, shape or variety of pumpkin. You can also use your decorated pumpkins as decorations, story props, Halloween trail markers or in games and activities.

How about creating a range of different characters with different expressions. Its a a great opportunity to talk about emotions with children of all ages and ask them what makes them feel happy, angry, sad, scared, excited or surprised. You can use your pumpkin characters in role play games, as story props or simply leave them out for the children to play with in any way they like.
13. Make magic Potions
Making magic potions in hollowed out pumpkins using a simple chemical reaction between acid and alkalis is a fun and easy activity all ages can enjoy. All you need is some bicarbonate of soda as an alkali, food colouring washing up liquid and either lemon juice or vinegar as the acid. First cut the tops off the mini pumpkins and scoop out the insides. Pop them onto a tray and pour in either lemon juice or vinegar and then add a few drops of food colouring, a squirt of washing up liquid and mix them together. Finally place some bowls of bicarbonate onto the tray as an invitation to play and explore. If you want an extra sensory element you could also place the scooped out flesh and seeds from the pumpkins onto the tray to add to the potions.

Now all you need to do is spoon bicarbonate of soda into the liquid to create lots of fizzing, frothing beautiful bubbles. This chemical reaction happens when you combine an acid with a carbonite alkali and the two substances react to create salt, water and carbon dioxide. As the carbon dioxide gas is released it quickly bubbles up and out of the liquid. *Please note it can get very messy when the mixture bubbles over the sides or gets splashed. so I highly recommend placing a tray underneath your potion making station.
14. Sensory pumpkin water play
Water play in general is great sensory fun for children of all ages. You can easily add extra sensory elements to your pumpkin water play with scented herbs, flavoured oils, citrus fruit slices, leaves, pine cones, sticks and other natural materials. I find that slightly warm water (make sure it’s mild and not too hot) brings out the smell and scent of materials more than cold water does. Its also more enjoyable to play with.

15. Make ice pumpkins
Pumpkin ice globes look great and are fun to play with. They are also so easy to make you just need to add some orange food dye or paint into a balloon, then stretch the neck of a balloon over a tap (hold it firmly in place) and semi fill the balloon with water. Tie the end up securely, give it a shake to mix the colouring in and freeze the water filled balloon overnight. When your water is fully froze you can cut and peel the balloon off to reveal a perfect pumpkin shaped ice globe. You can then also cut out simple black paper shapes to decorate your ice globes to turn them into Jack-o’-lanterns.

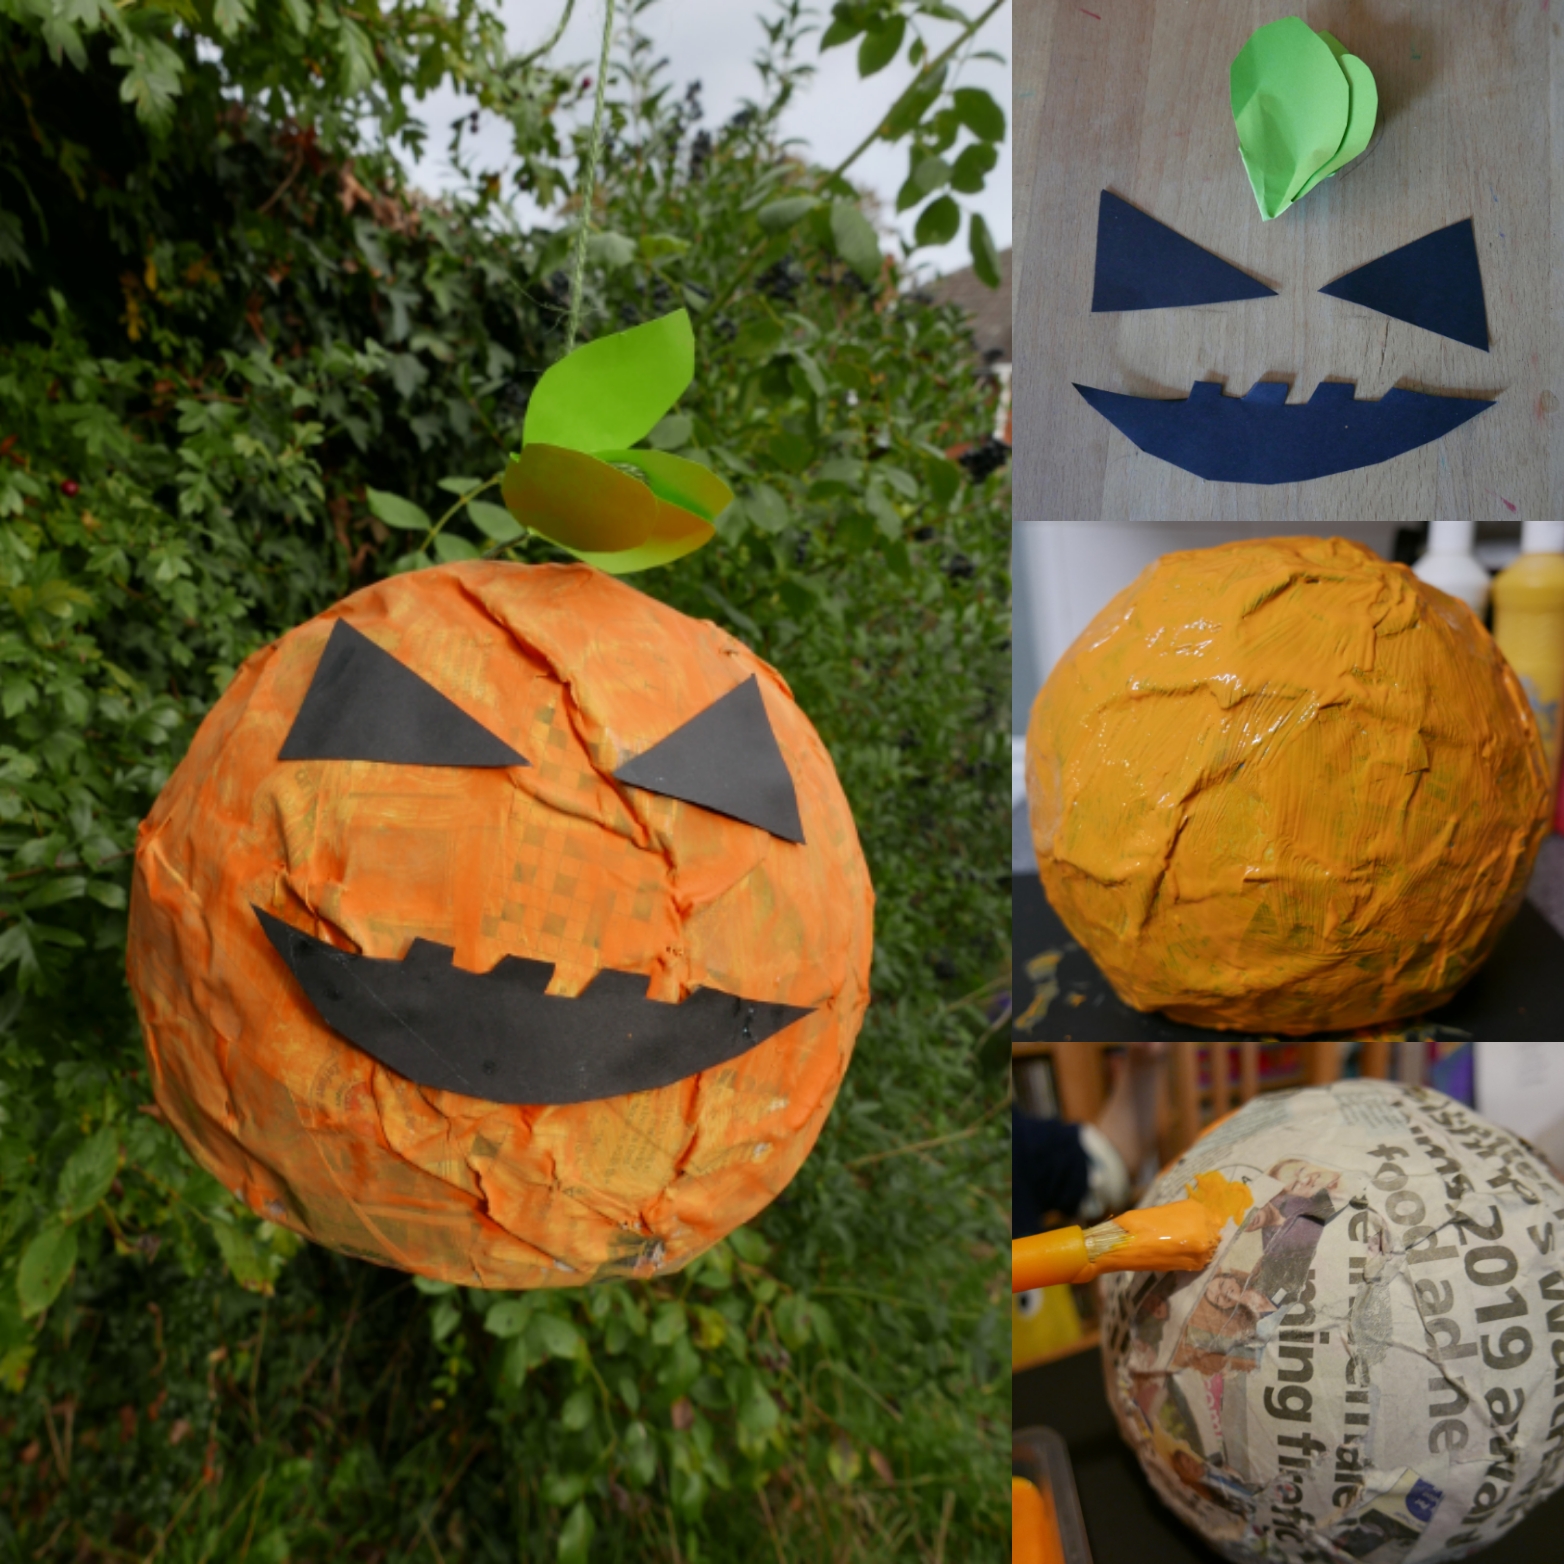
16. Paper Mache Pumpkin Pinantas
Paper Mache pumpkins pinatas are fun, cheap and easy to make, you can use them as story props, Halloween decorations or even fill with sweets to turn them into piñatas for party games. Click here for a full photo guide to making a Paper Mache Pumpkin.
17. Pumpkin rock painting
We love finding painted pebbles and rocks when we are out and about, it’s wonderful to see the creativity and love that people put into them. You can easily find pebbles to decorate yourself by looking in your garden, on a nature walk or along the shore. All you need then is some paint or permanent markers to paint or draw colourful designs onto the pebbles.

18. Pumpkin nature art
Nature art (also sometimes called land art) is a wonderful nature activity that encourages creativity and fine motor skills in children of all ages and abilities. All you need is some imagination and natural materials like leaves, sticks, stones, pine cones bark and grass ect. You could have a nature treasure hunt in the garden or go on on a nature walk to find natural materials to play with.

Autumn is obviously a fantastic time to find fallen leaves. Separating any leaves you find into the different colours gives you a good opportunity to talk about how and why leaves change colours with the seasons. For example leaves are green because of the chlorophyll in the cells which is busy turning sunlight into food. In autumn the leaves stop producing chlorophyll so the colour changes from green to brown as the chlorophyll disappears. Once you have collected your natural materials spread them out on the ground and have fun creating pumpkin shapes and pictures with them.
19. Pumpkin chalk drawings
We love playing with chalk. It’s cheap cheerful, easy to wash off and children can spend hours drawing, colouring and scribbling away. Chalk drawings can also makes a great invitations to play. How about drawing some simply pumpkin outlines for the children to colour in fill or decorate with chalk or other natural found natural materials like sticks, stones leaves, nuts, berries, bark, shells or grass. * Just be aware of the choking or toxicity hazards of any materials you use with younger children.

20. Pumpkin log slices log slices
Log slices are simply slices of tree logs or branches. They can be any shape or size and they are a brilliant, tactile and fun resource to use in play. You can easily cut your own log slices from fallen trees or branches, just make sure the wood is clean and rot free before use. Please don’t cut off branches or chop down living trees (unless its part of a coppicing plan) to make your slices. Trees are such an important and vital part of our ecosystem, they create oxygen, soak up carbon dioxide, prevent soil erosion, retain nutrients in the soil and provide food and shelter for wildlife.

21. Make a pumpkin bird feeder
You can also use old Jack-o’-lanterns and the bases of pumpkins to make bird feeders. Simply fill the base of the scooped out pumpkin with a layer of bird seed and hang them from a tree for the birds to enjoy. But please don’t leave them on the ground as they aren’t good for other wildlife like hedgehogs.

22. Feed the pumpkin
Feeding pumpkins or ghosts is a great activity for developing fine motor skills and stimulating imaginative play. All you need is a cardboard box, cardboard to cut into the shape of a pumpkin or a ghost and some oats or cereal and a spoon. First you need to draw and cut out some simple Halloween themed shape out of cardboard like a pumpkins or ghost.

Decorate the pumpkin of ghost with paint or pens and then cut a hole where the mouth is going to be. Then mark out the mouth hole on the the card board box and cut another hole in the same place. Stick your ghost or pumpkin shape onto the cardboard box. The children can then have fun spoon feeding the the pumpkin or ghost food in the form of oats or cereal.
23. Paper plate pumpkins and Jack-o’-lanterns
Paper plate Jack-o’-lanterns and ghosts are so quick and simple to make for children of all ages and they make great Halloween decorations. To make a paper plate Jack-o’-lantern simply paint a paper plate orange and then draw, paint or stick on a stalk, eyes and a mouth to turn your plate into a Jack-o’-lantern.

To make paper plate ghosts just cut straight lines down both sides of the plates and then cut jagged zig zag lines across the bottom. Finally draw, paint or stick on eyes and a mouth to give your ghosts an expression. It is a great opportunity to talk about emotions with children of all ages and ask them what makes them feel happy, angry, sad, scared, excited or surprised.
24. Clay pumpkin faces
It you have some natural clay you can have fun making clay pumpkins faces using the clay and any natural materials you can collect and find. (Please don’t use salt dough or play dough for this activity as they both contain high volumes of salt which is toxic to trees, plants and wildlife). You start by pressing some natural clay onto a tree trunk or log. You can then shape the clay into a pumpkin shape adding details and decorations using conkers, acorns, pine cones, leaves, sticks and any other natural materials you can find. But pretty please don’t pick any wild flowers, only collect ones you have grown yourself or fallen ones you find on the floor. When you have finished simply leave the clay pumpkins on the trunks of the trees or logs. They should last as long as the weather is dry and will then naturally biodegrade.

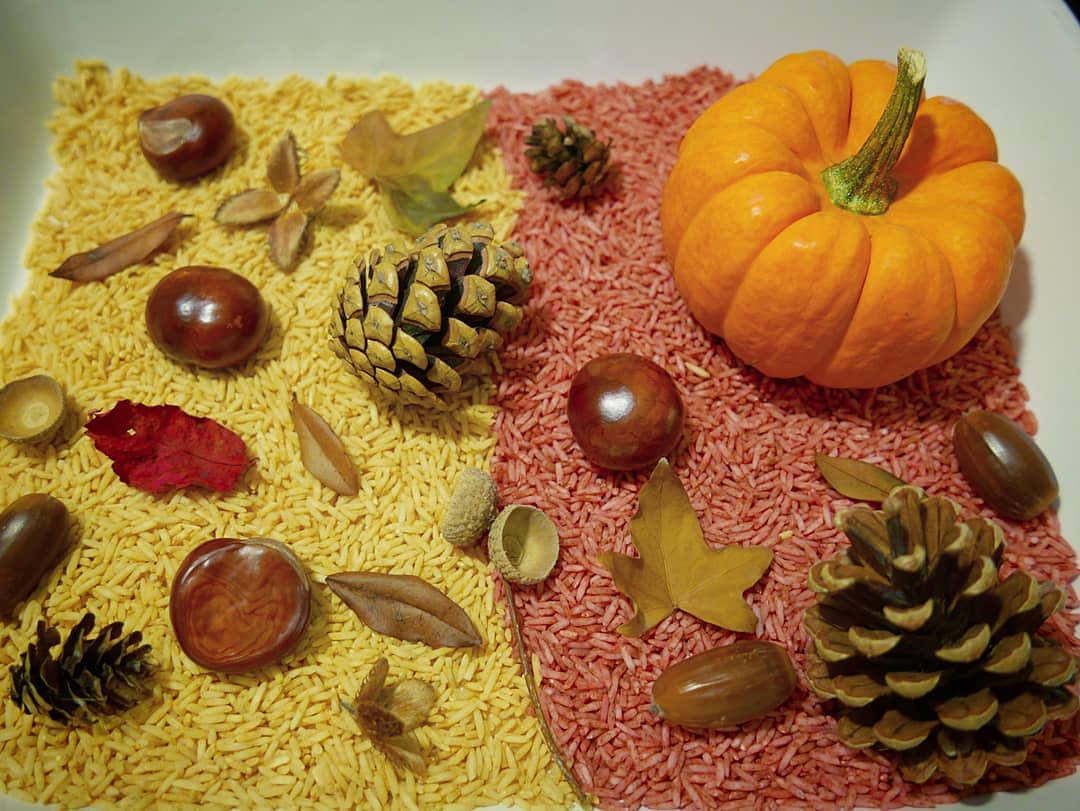
25. Pumpkin sensory trays
Autumn themed sensory trays are easy to make and fun to explore. You can use natural materials you find on nature walks like pine corns, leaves, conkers or seasonal vegetables like mini pumpkins and sweetcorn. (Please always be aware of the choking hazard of any materials and items you use).
26. Cardboard tube ghosts and pumpkins
We hate to waste anything and recycling and reusing materials is one of many small things we can all do to help the environment. So instead of chucking used cardboard tubes we like to find ways to use them in crafts and activities. To make mini pumpkins you will need a cardboard tube cut into 3 pieces as well as some paint. First cut rounded the edges into the cardboard tube rings to make them more pumpkin shaped. Then simply paint the the cardboard rings orange and then leave them to dry. You can then either paint, draw or stick on the pumpkins stalks, eyes and mouths.

27. Egg carton pumpkins and jack o lanterns
Egg carton pumpkins are so quick and easy to make, especially for little learners. Simply cut out the bottom cups from an egg carton. Then paint them orange and draw, paint or stick on spooky expressions and green stalk.. You can then then use them in role play as a decorations, story props or even fill them with sweets or presents to give as gifts.

28. Potato print pumpkins
Potato printing stamps make great invitations to play for children of all ages. They can use the potato prints to play and explore or make patterns, pictures, cards or even recyclable wrapping paper. All you need is a potato cut in half, a bit of imagination and some paint to get started. Pumpkin prints are potato prints are so simple to do. You just need to cut a potato in half, dip it into some orange paint and then print it onto a surface like paper or recycled cardboard. Then add a green stalk (using paint or pen) to complete the pumpkins.

You can easily turn your pumpkin prints into jack o lanterns by giving them spooky expressions using, pen, paint or even cut up pieces of black paper or card. The Pumpkin potato prints themselves look great printed onto black or dark coloured paper.

Or you can make Jack o lantern prints by cutting a potato in half and then carefully carving two triangles for eyes and a mouth and nose into the potato stamp. Then the children can just dip them into orange paint and print. Again you can also add a little green stalk (using paint or pen) to complete the pumpkins.

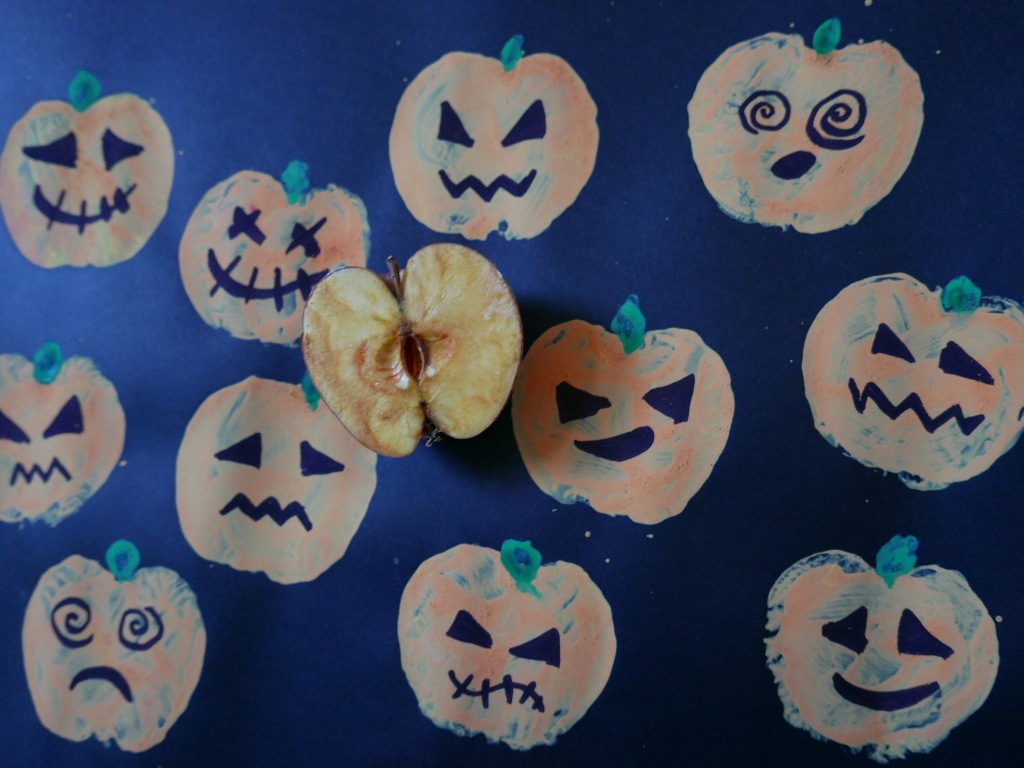
A lot of these print ideas will also work well with apple’s too. Like the apple pumpkin/jack o lantern prints below. Or you could have some fun experimenting with other different vegetables.
29. Pumpkin muffins and cake
To make pumpkin cakes and muffins you will need:
- 200 grams of self raising flour (or plain flour with 2 teaspoons baking powder)
- 100g caster sugar
- 1/2 teaspoon ground mixed spice
- 1/2 teaspoon ground cinnamon
- 100 grams sultanas or raisins.
- 2 eggs
- 2 tablespoons vegetable oil
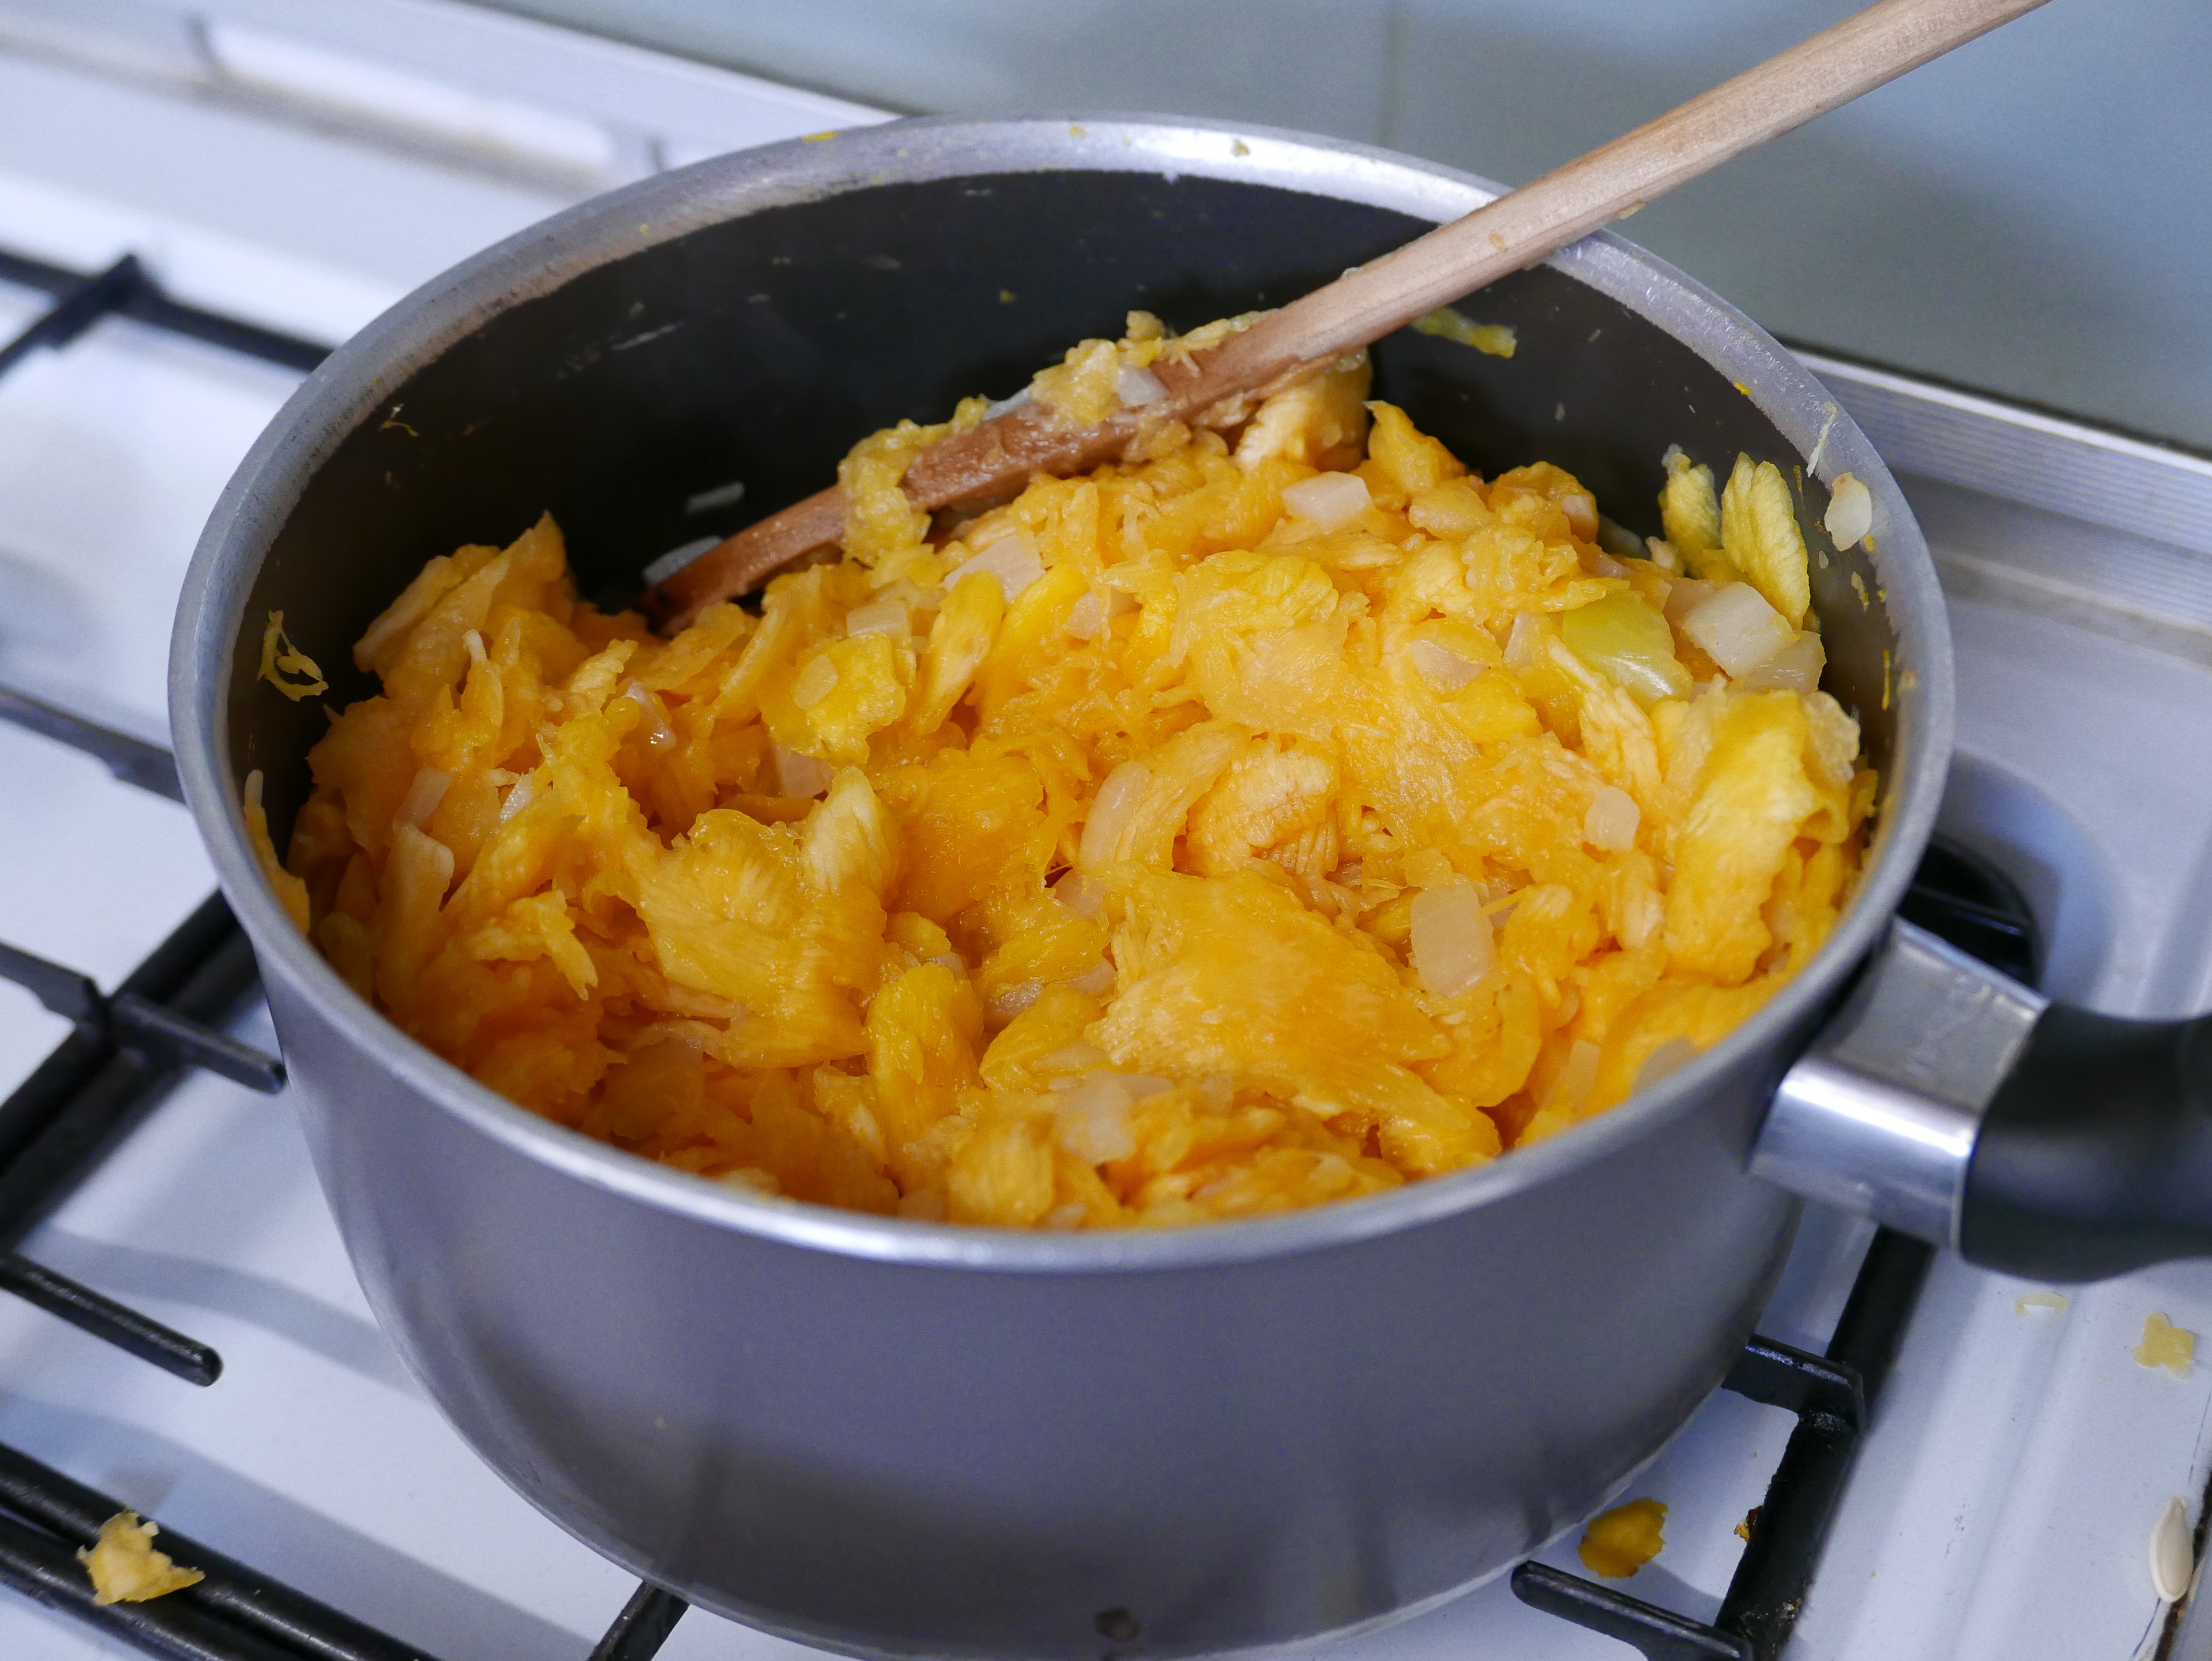
- 150 grams cooked pumpkin puree (you can cook the pumpkin with a little water in lidded saucepan for 10minutes or roast in an oven and then puree)
Preheat the oven to 180 oC.
Line a cupcake tin with 12 cupcake cases.
Put the flour and sugar into a bowl with the mixed spice, cinnamon and sultanas or raisins.
In another bowl whisk the eggs and add the syrup and oil.
Pour the mixture into the flour and stir before adding in the pumpkin puree.
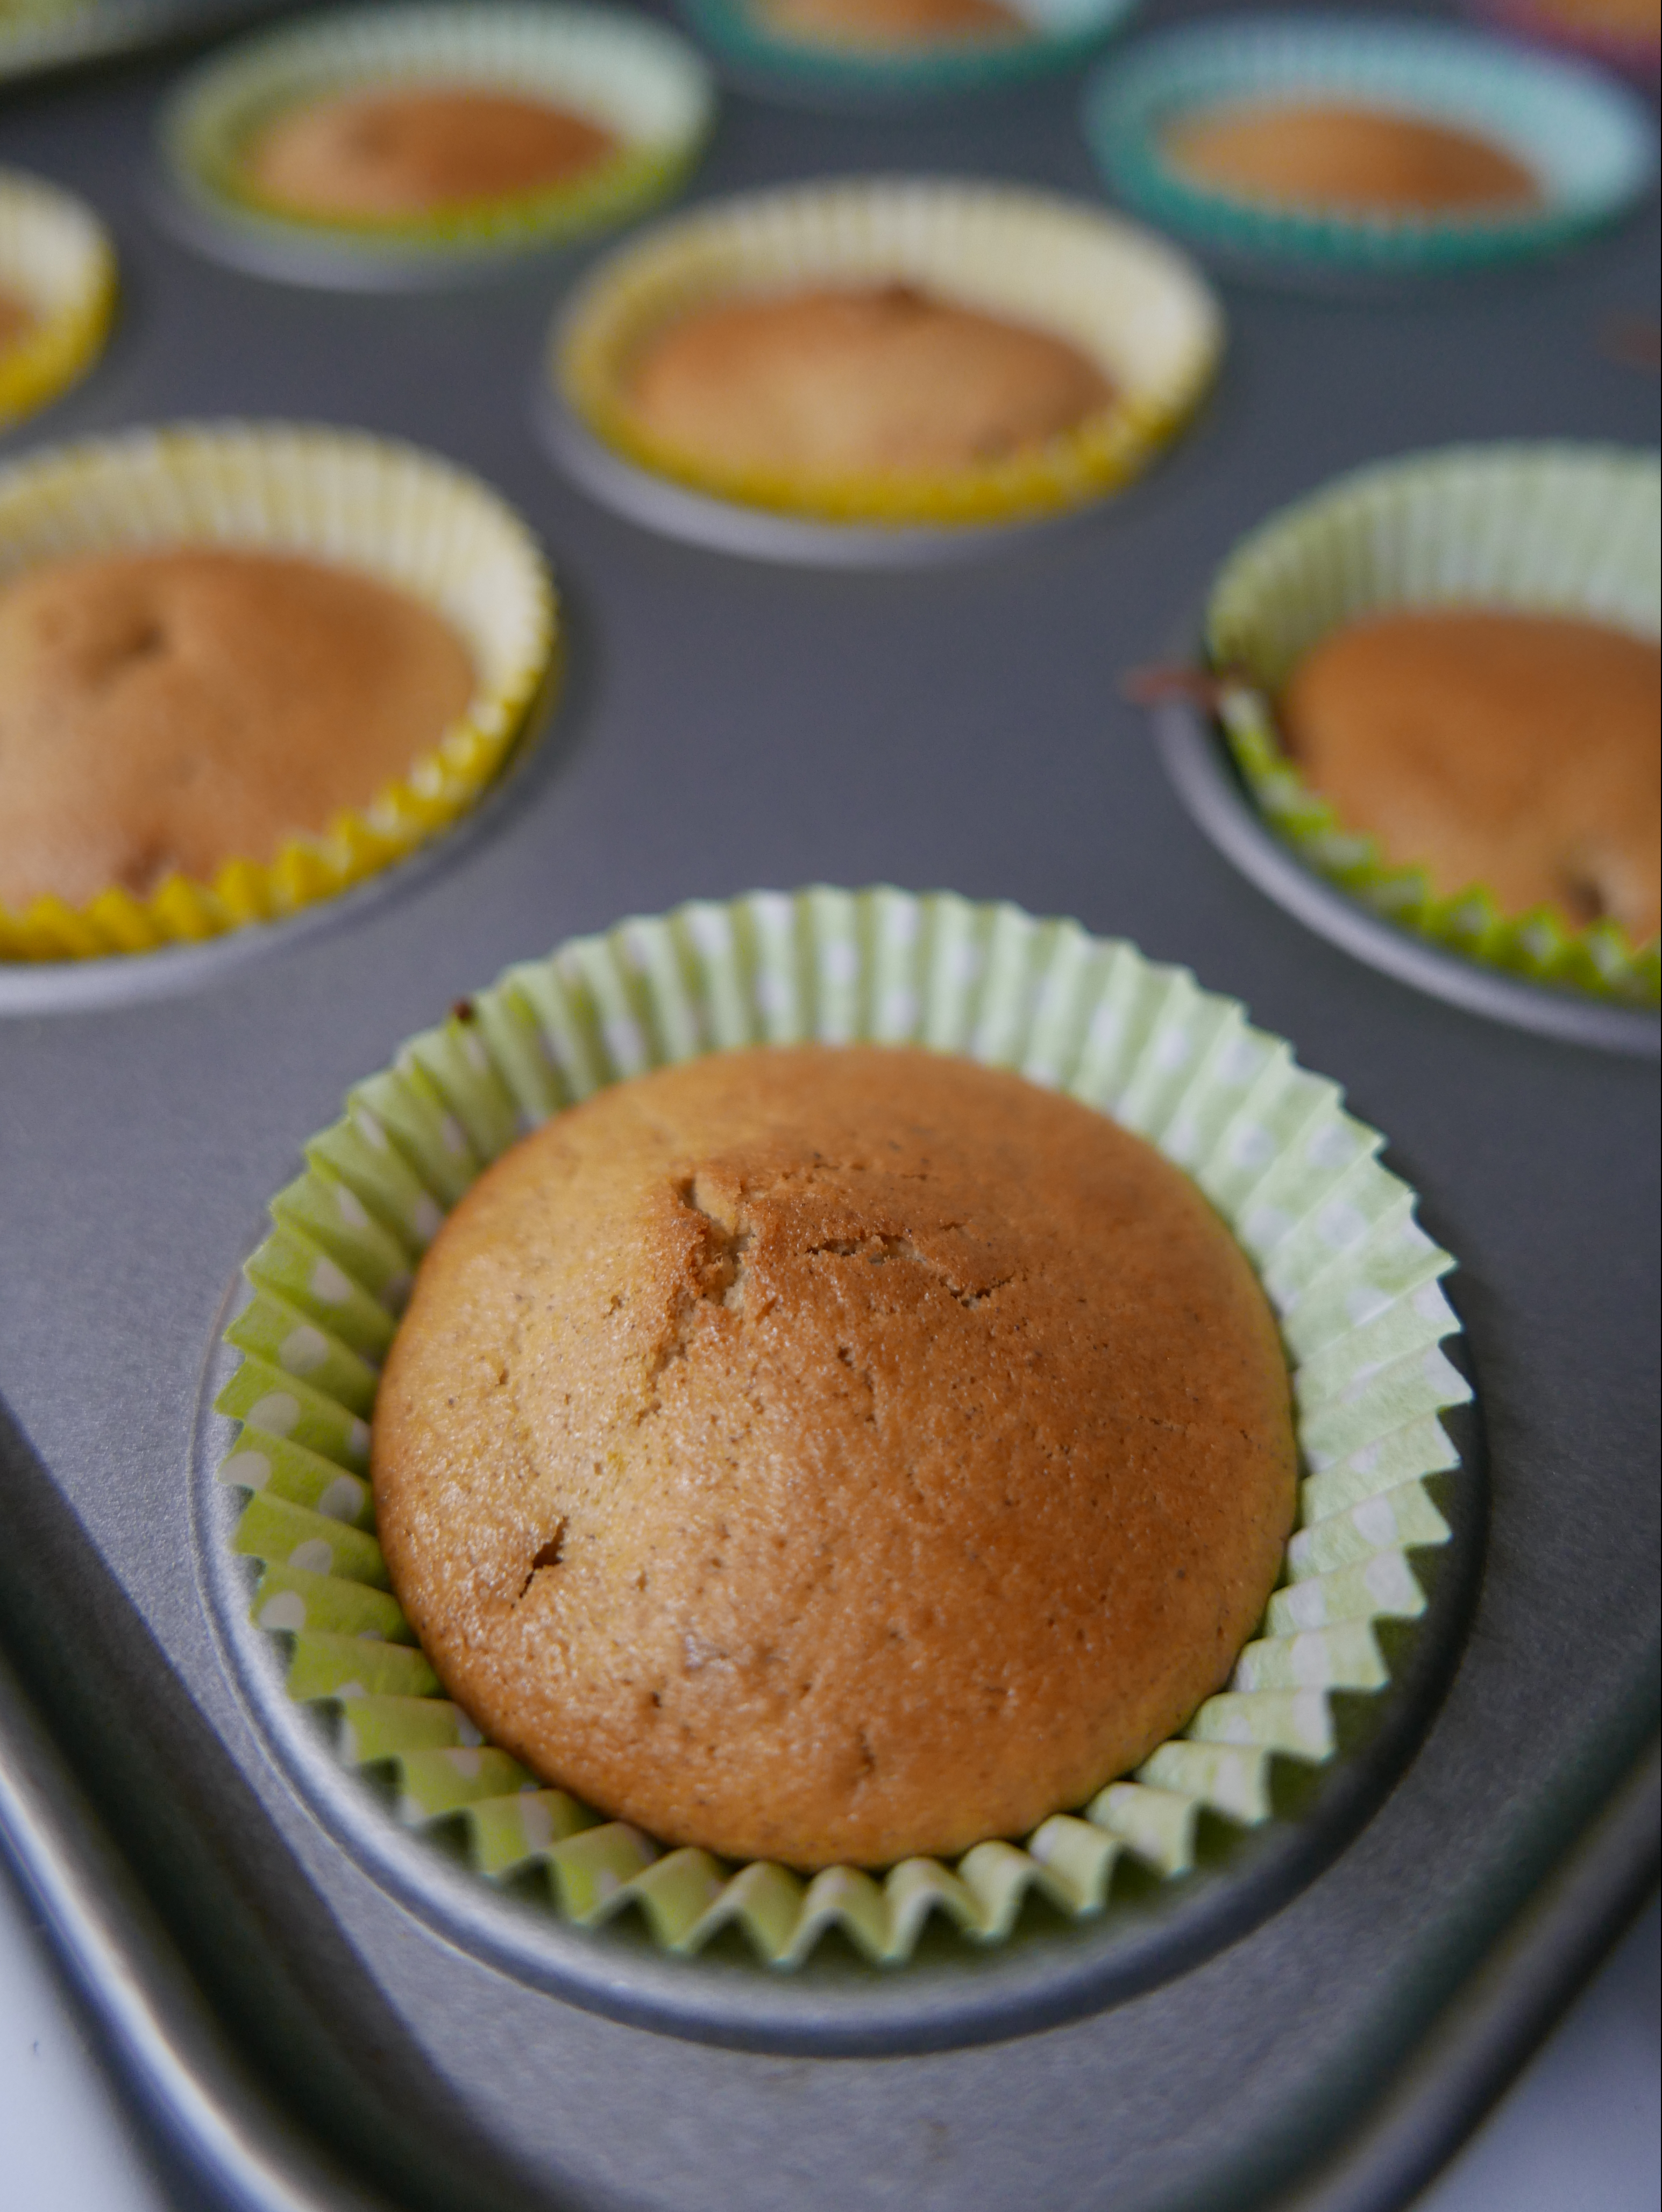
Spoon The mixture into the cupcake cases and bake in the oven for 15-20 minutes.
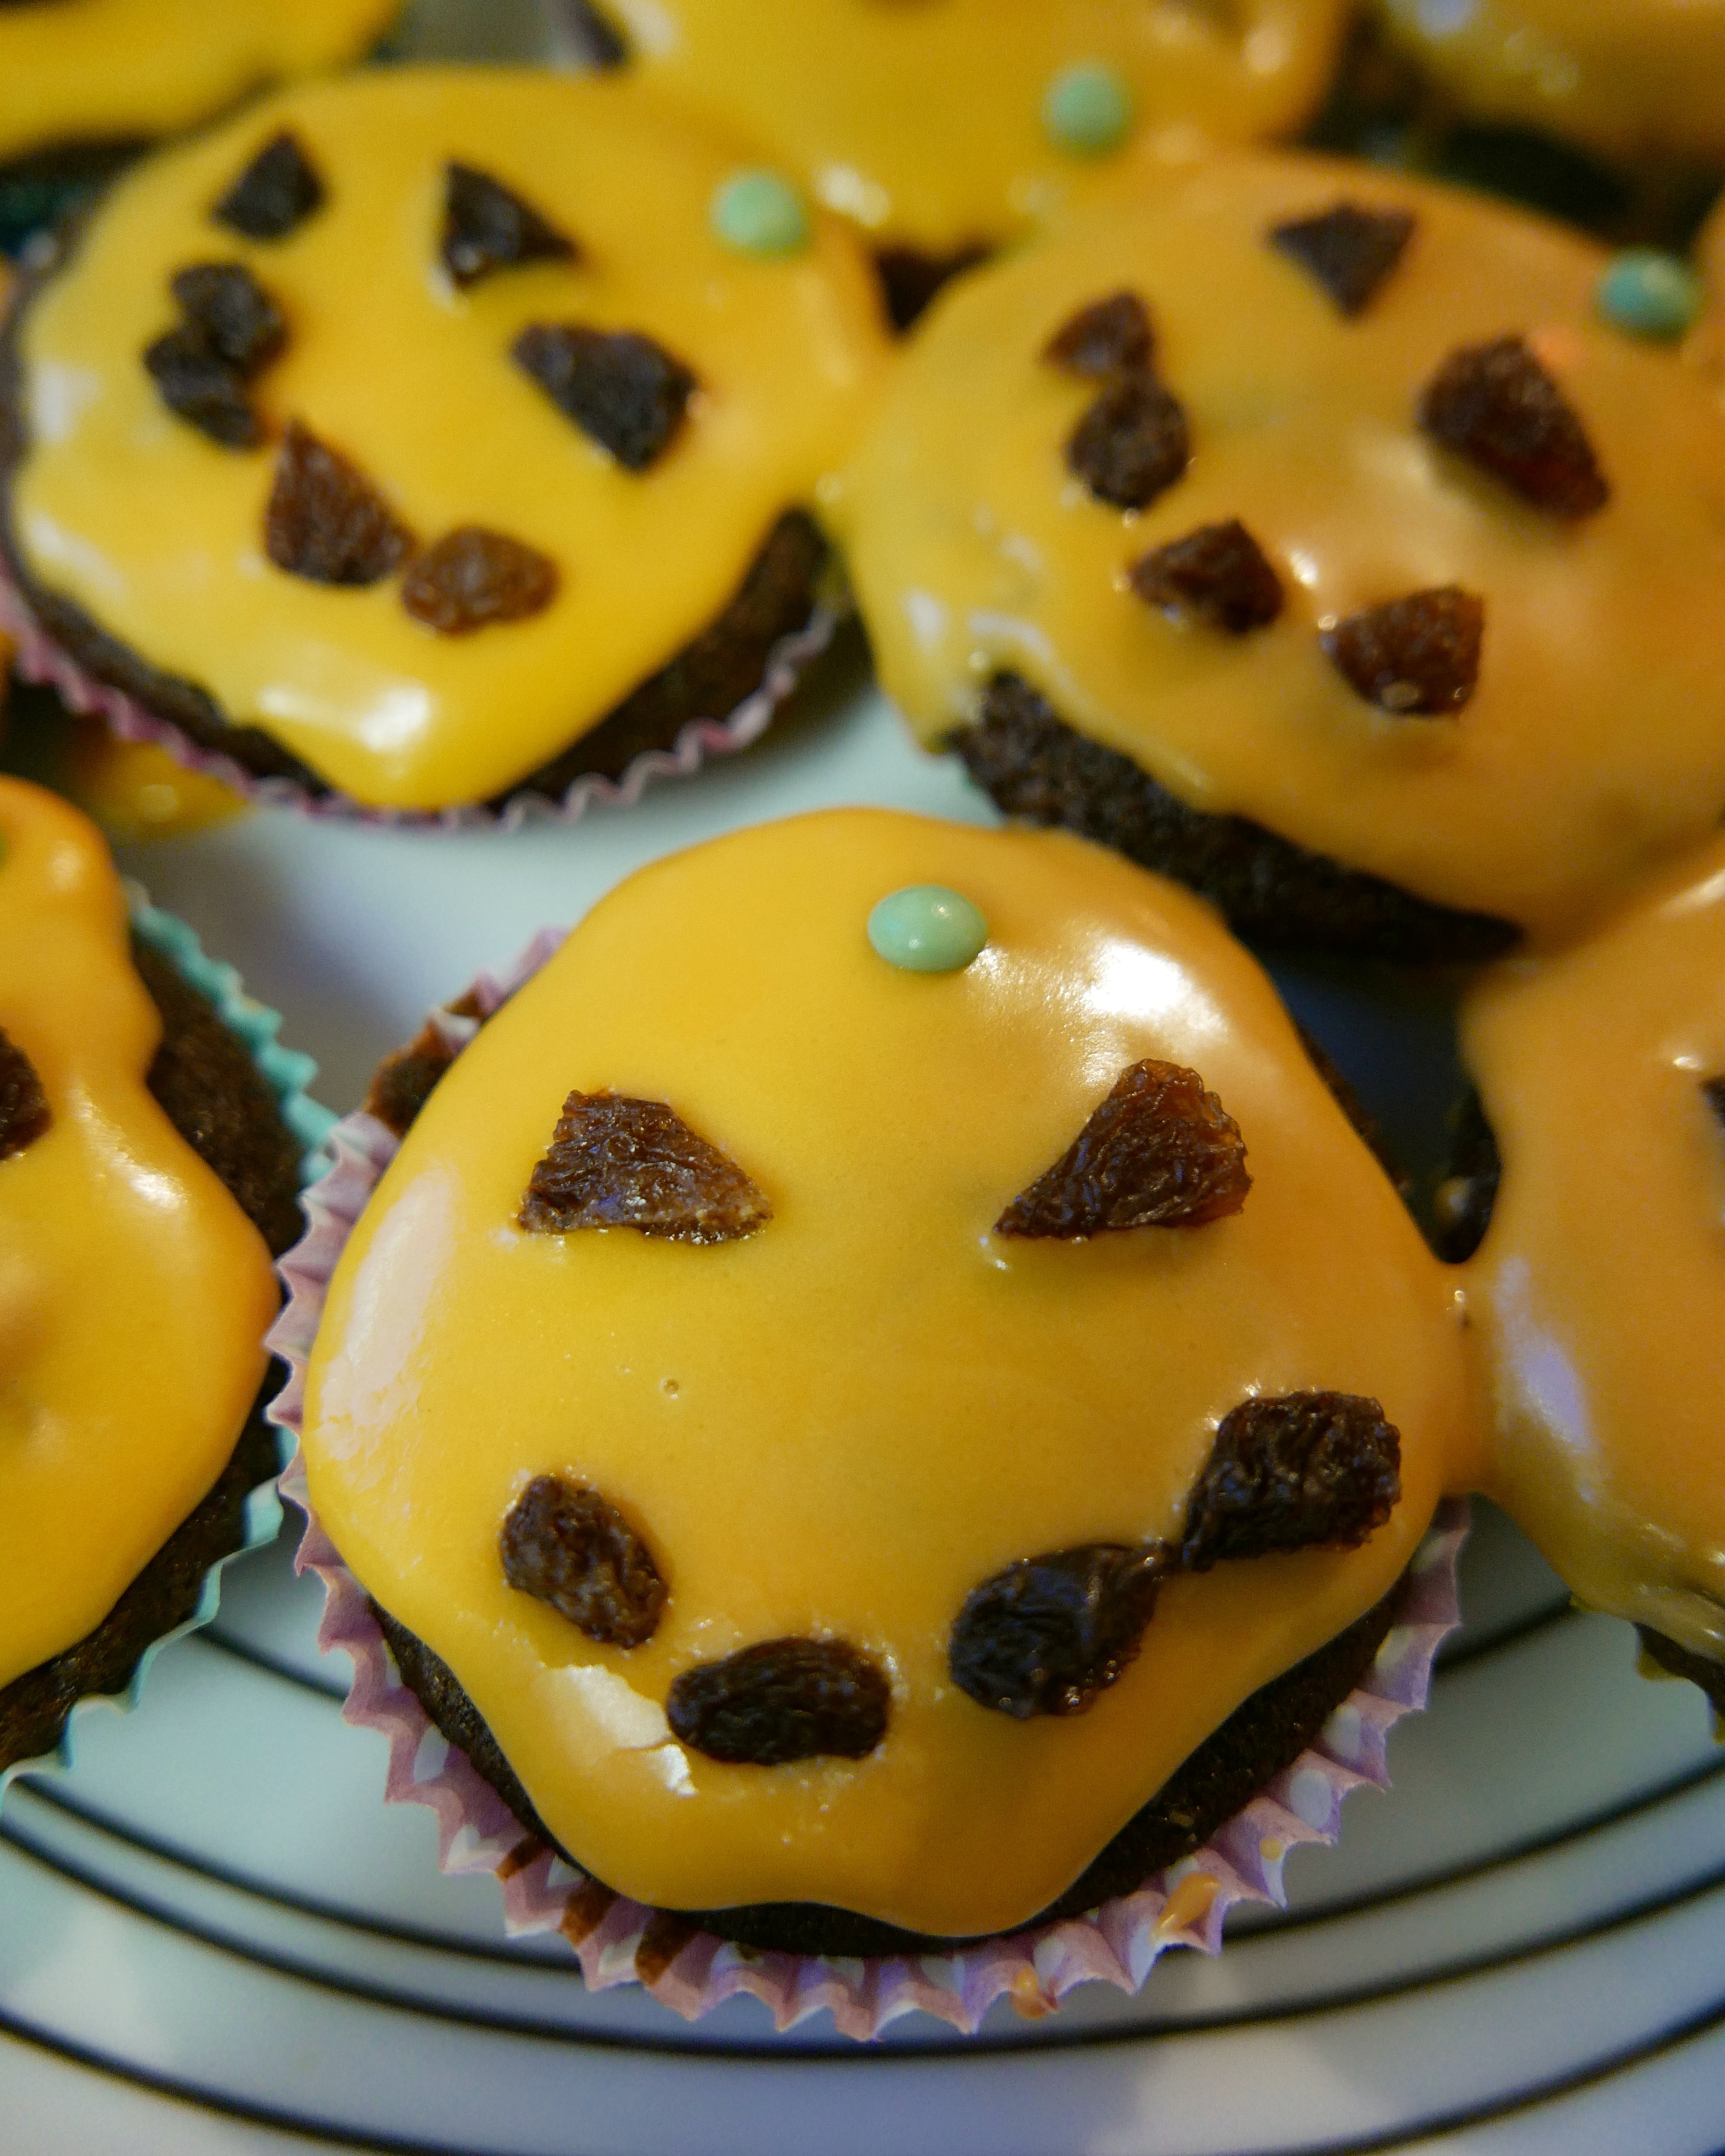
Leave to cool on a wire tray and then decorate. We made ours into pumpkins by covering the tops with orange icing and adding raisins and green sweets to make the pumpkin faces. You can also bake the mix in one cake tin to make a cake rather than mini muffins.
30. Cheese and pumpkin scones
To make cheese and pumpkin scones you will need:
- 150 g pumpkin
- 200 g self-rising flour
- 100g grated cheese
- 50ml milk
- 50g of butter
- 1 teaspoon baking powder
- Pinch of salt
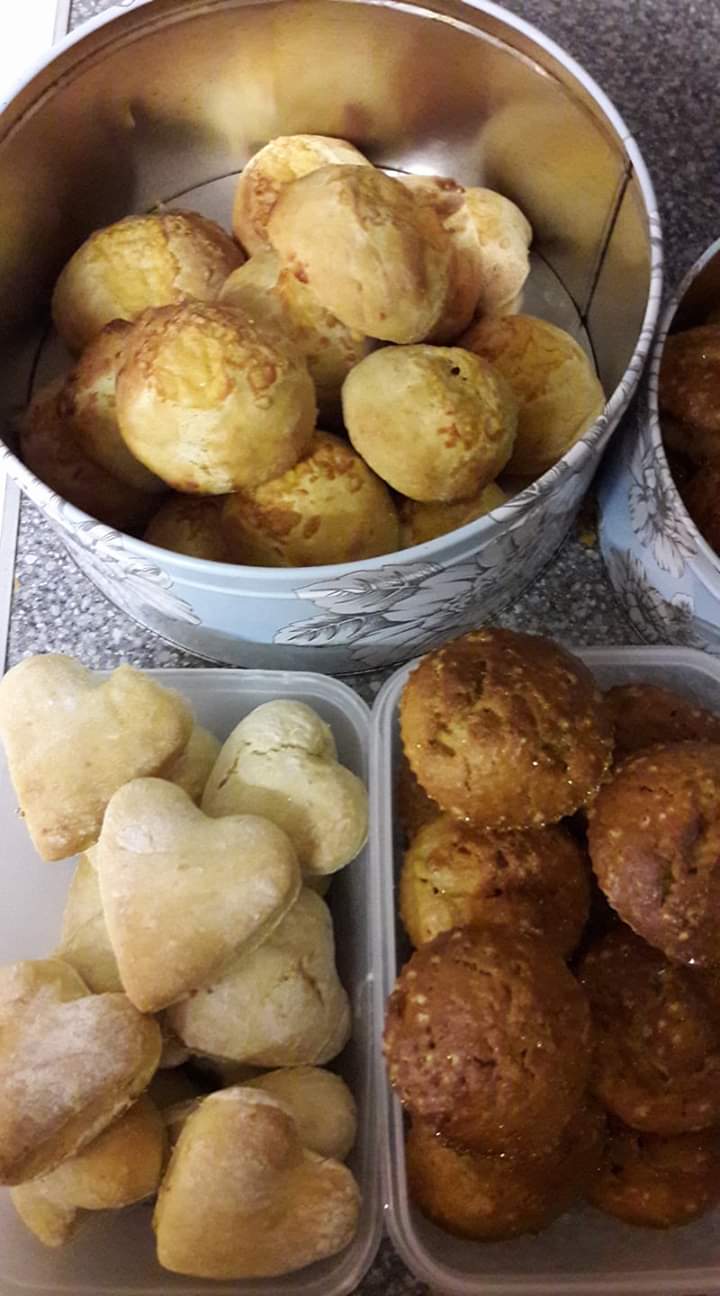
Preheat the oven to 200oc Pre cook the pumpkin by placing it in a saucepan of boiling water and simmering it for 10 minutes. Drain and roughly mash the cooked pumpkin then leave it to cool. Sift the flour into a bowl with the baking powder and salt. Rub in the butter until the mix resembles breadcrumbs. Add in the two thirds of the grated cheese, as well as the milk and pumpkin. Mix well and then knead the mixture into a ball. Chill for 5-10 minutes in the fridge. Roll out onto a floured surface until it’s roughly 2cm thick. Cut out the scone shapes with cutters (We like to use heart shapes) Place on a baking tray, brush with milk and sprinkle some of the remaining cheese on top. Bake for 15 mins or until golden brown. Enjoy fresh with or without butter.
31. Pumpkin pork and apple stew
To make pumpkin pork and apple stew you will need:
- 2 apples
- 1 onion
- 1 sweet potato
- 200g pumpkin
- Diced pork
- 2 garlic gloves
- 500g of vegetable stock
- Pinch of pepper and salt
- Pinch of chilli

Brown the pork in a sauce pan and then add the diced onion and the crushed garlic cloves. Cook for 2 minutes then add the pumpkin, diced sweet potato and apples. Cook for a further 15 minutes and then add the vegetable stock. Cover the saucepan and simmer for 30 mins stirring every now and then to stop it sticking to the pan. Add pepper, salt and chilli to taste and cook for a further 5 minutes.
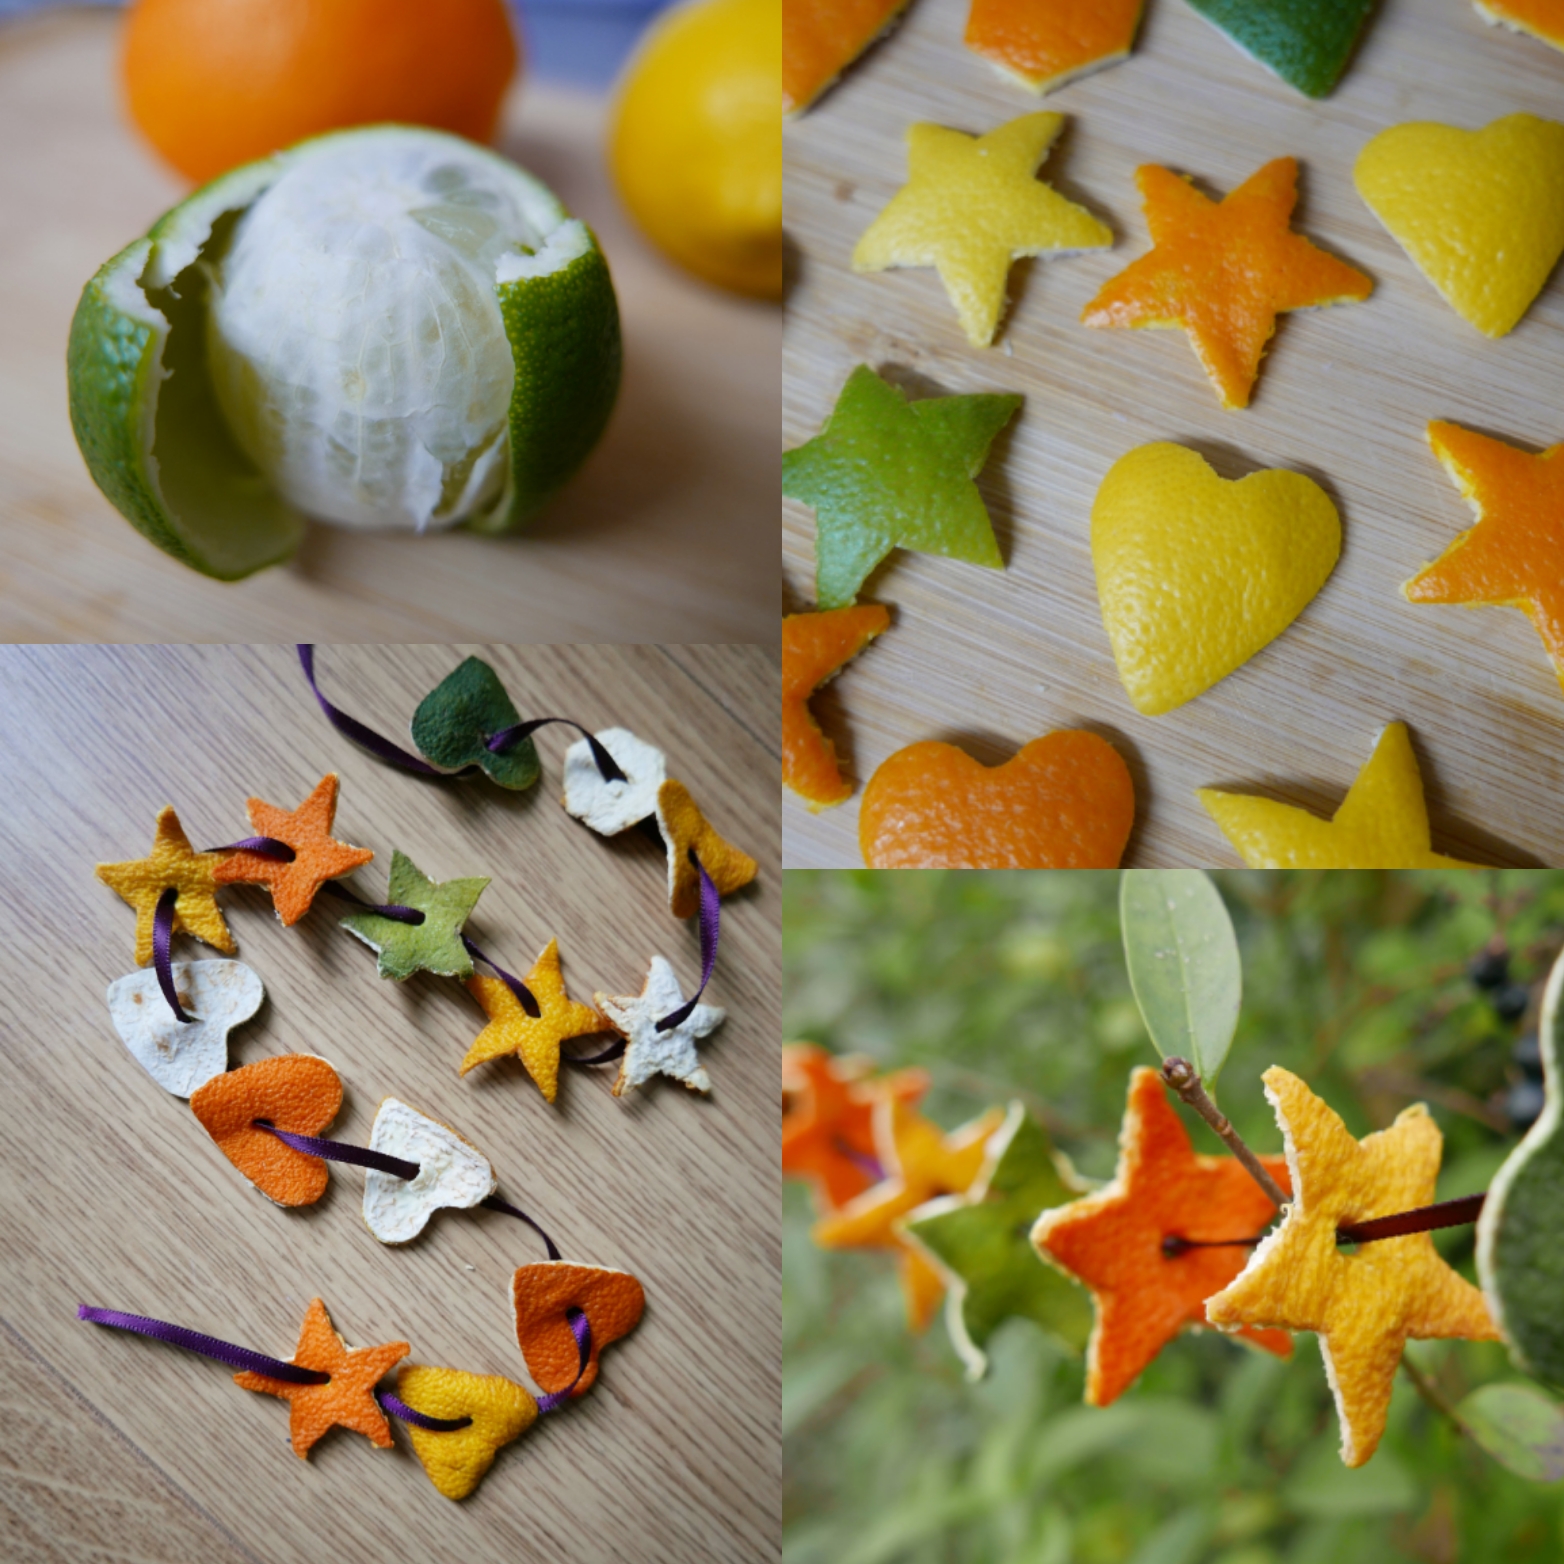
If you like this you might like to try:


Orange and citrus peel play shapes

One thought on “31 Pumpkin activity ideas”